
TABLE OF CONTENTS
- Step 1: Navigate to Memberships
- Step 2: Edit Membership Settings
- Step 3: Configure Class Sessions
- Step 4: Add Classes and Set Benefits
- Step 5: Save the Membership
Overview
This guide explains how to add classes to an existing membership in Core. It covers every step, from accessing membership settings and configuring class session limits to selecting branches and defining member benefit allocations. By following this guide, merchants can successfully incorporate specific classes into their existing membership plans.
Step 1: Navigate to Memberships
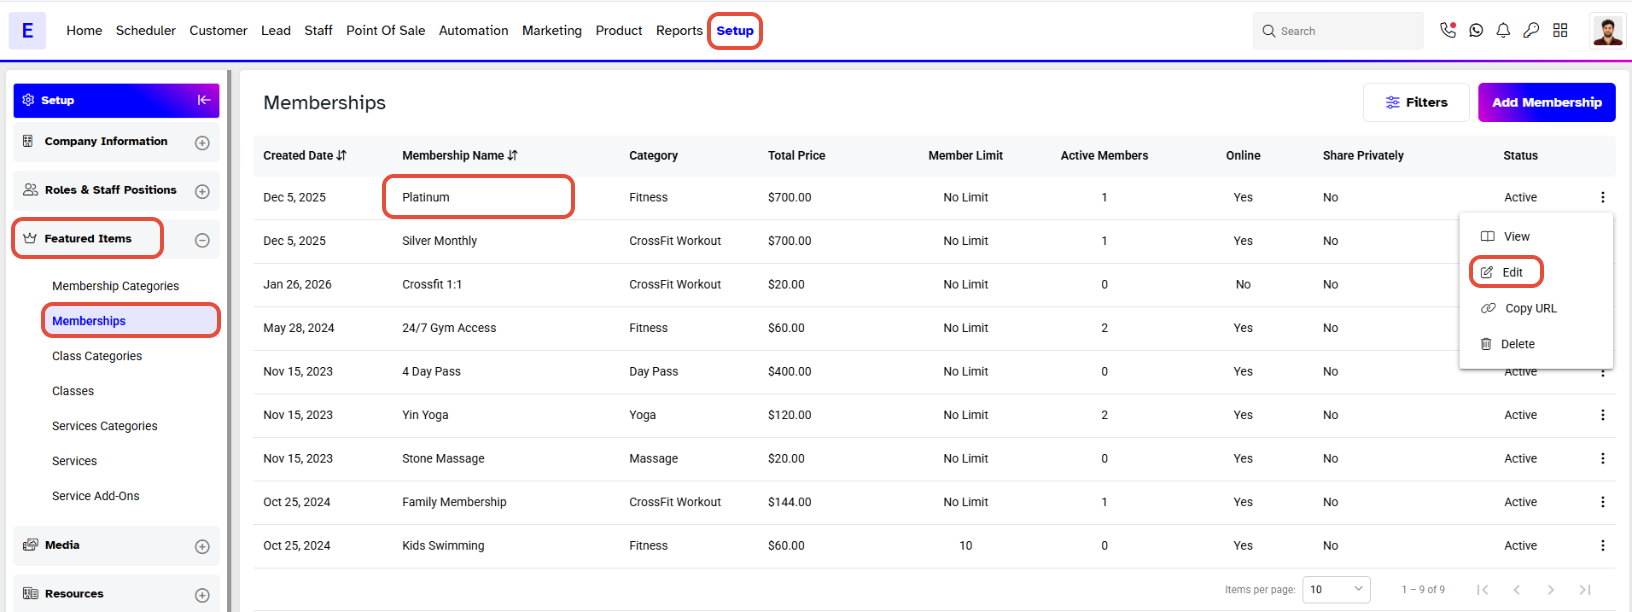
- Go to the Setup module in Core.
- Click on the Membership tab.
- The list of all existing memberships will appear.
- Click on Edit.
Step 2: Edit Membership Settings
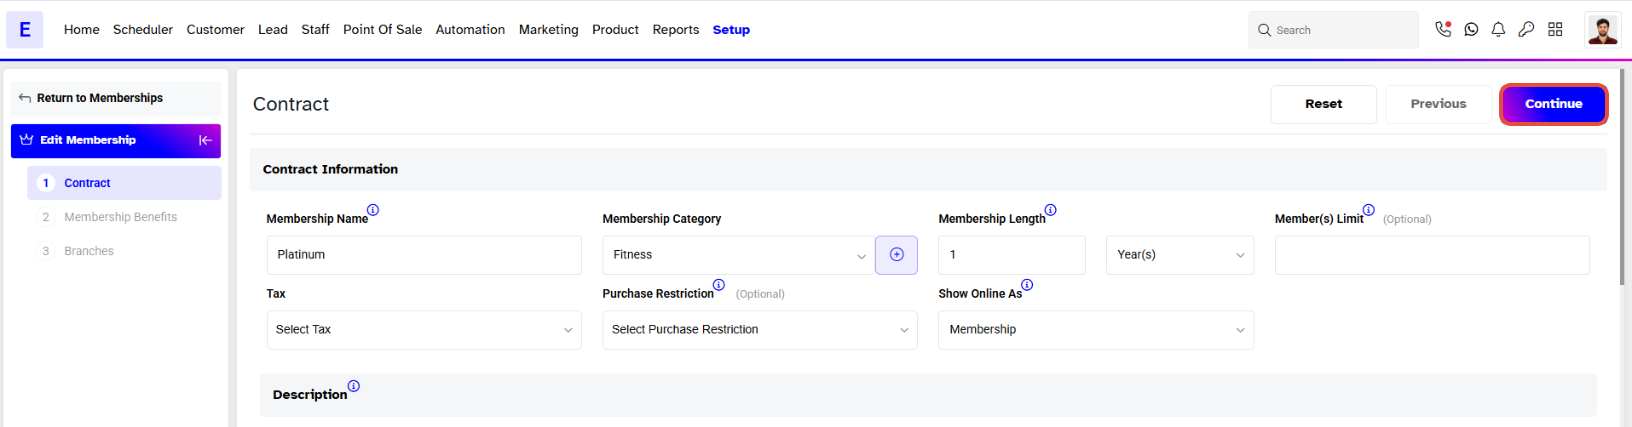
- Locate the membership you wish to modify under the Action column.
- Click on the Continue button to proceed.
Step 3: Configure Class Sessions
Toggle the Class Sessions option ON.
You can set class session limits by unchecking the No Limit box and entering your requirements.
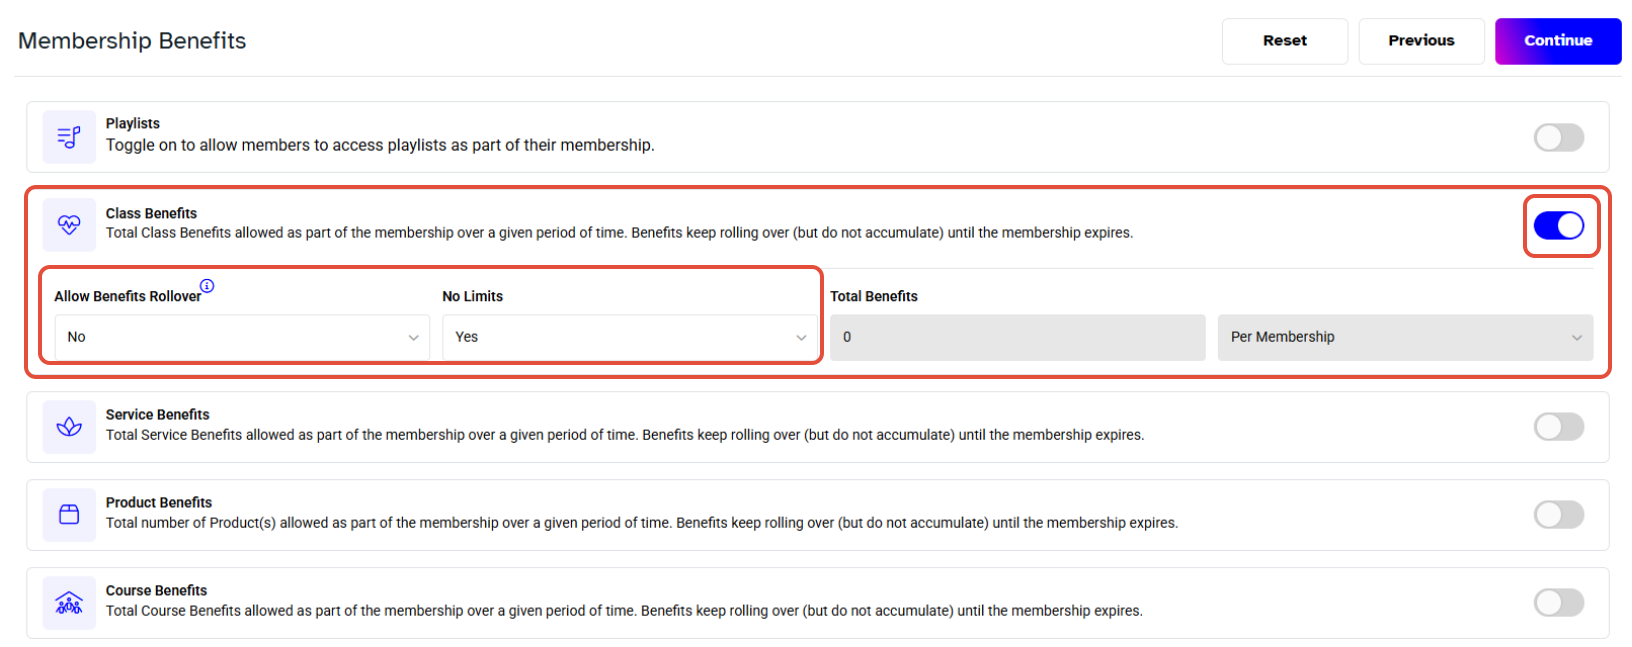
Select the allocated branches for this membership. By default, your main branch is selected; you may add additional branches as needed.
Step 4: Add Classes and Set Benefits
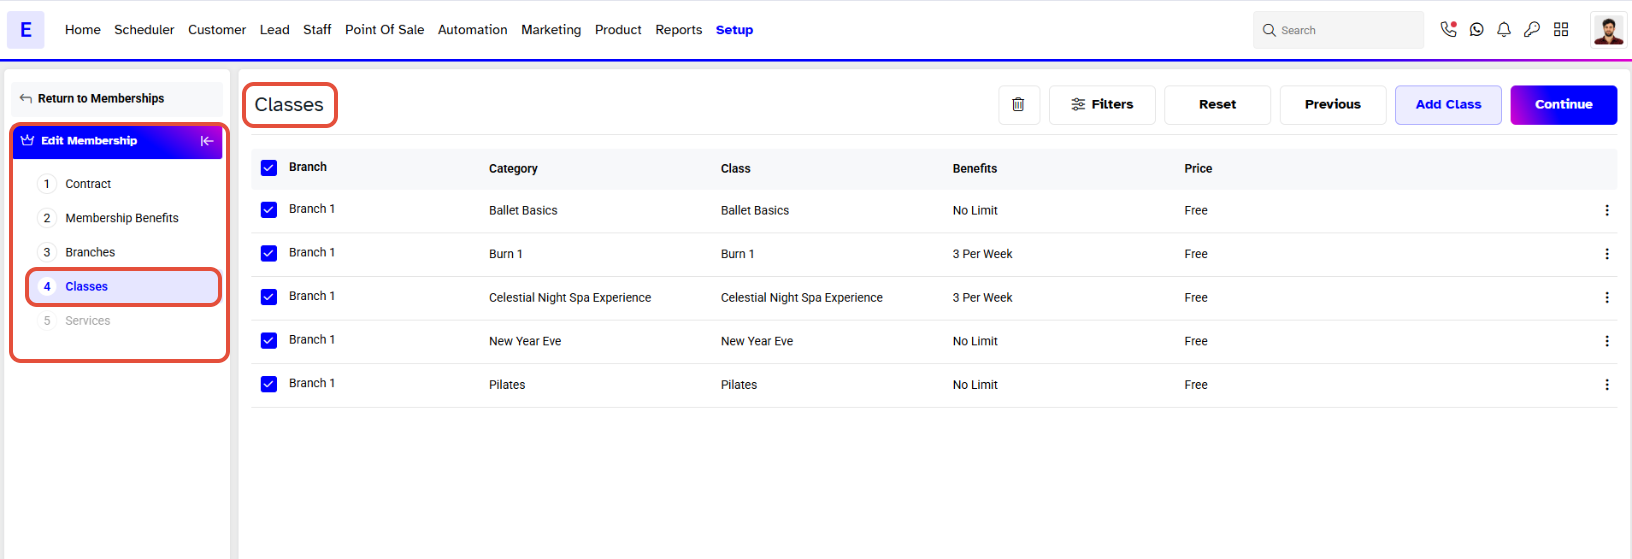
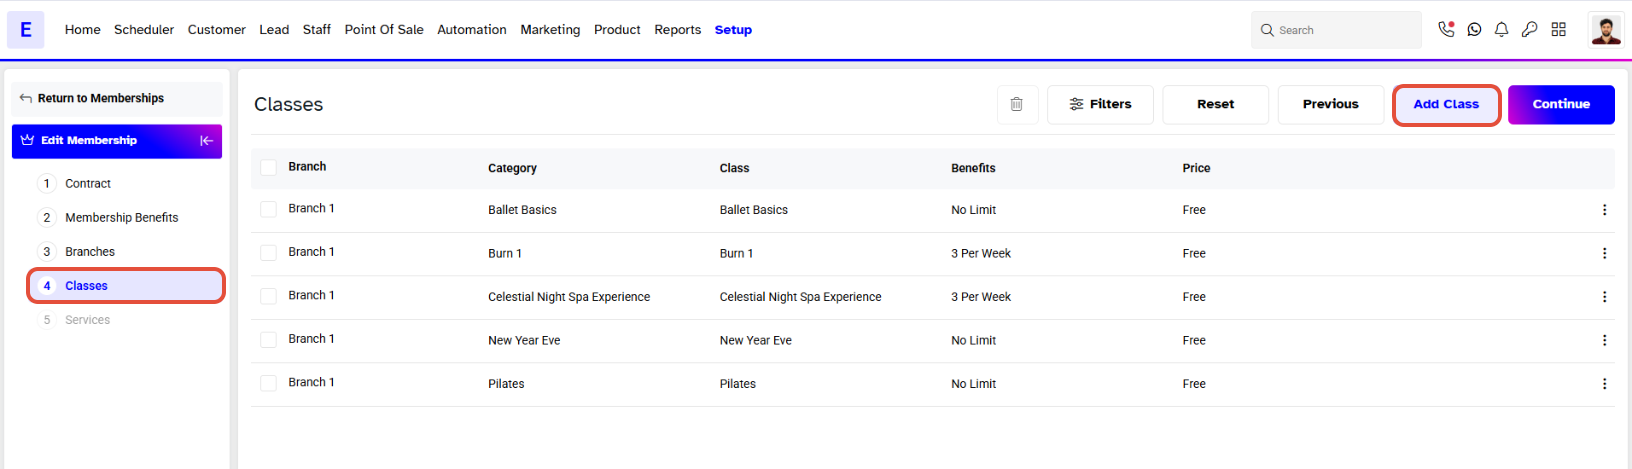
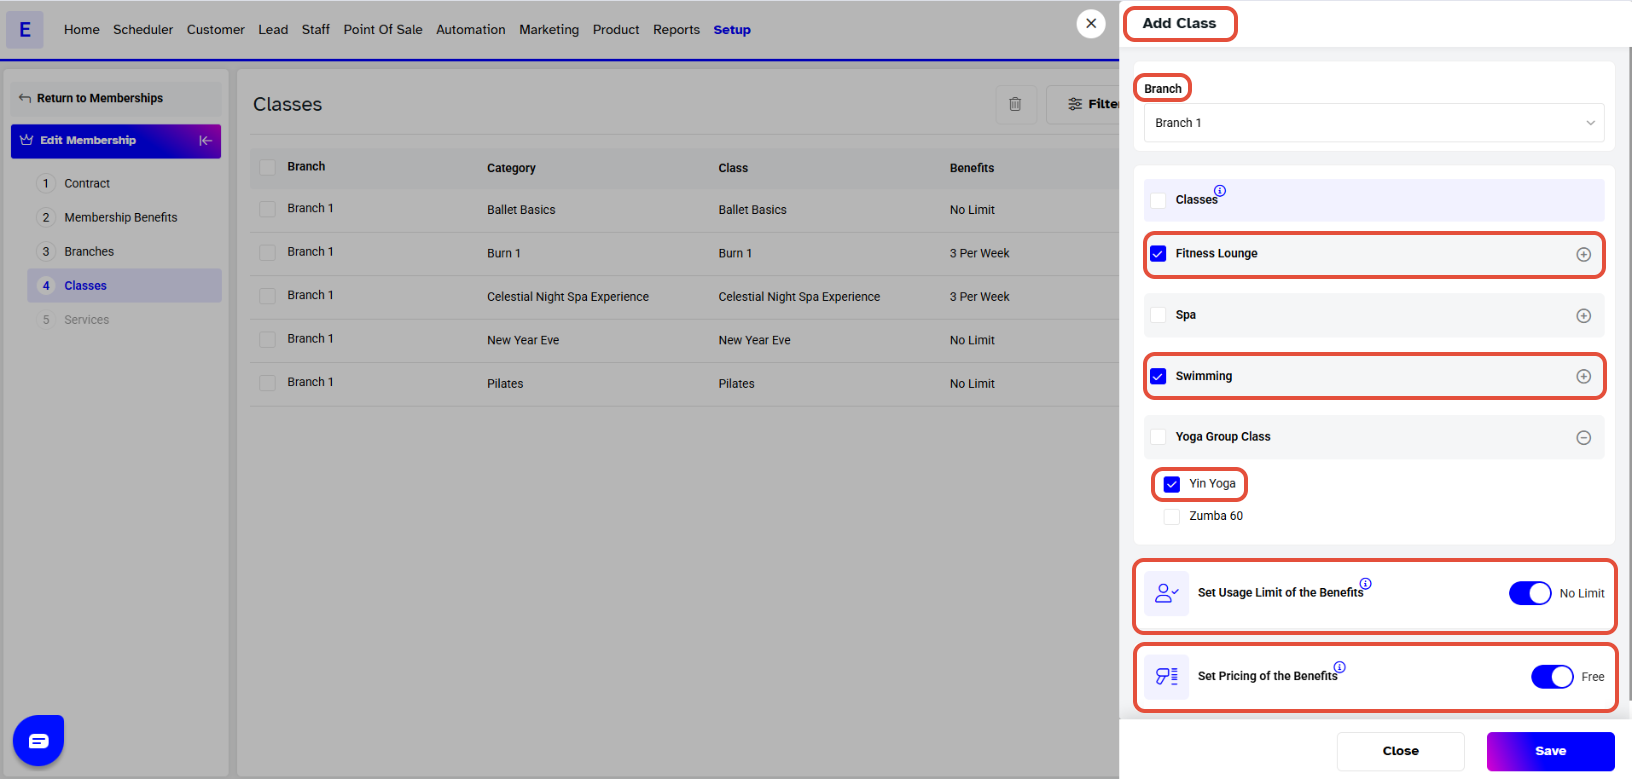
Navigate to Add Class.
Set the limit for benefits a member can avail.
Set pricing for individual benefits, including options for free or discounted benefits.
Step 5: Save the Membership
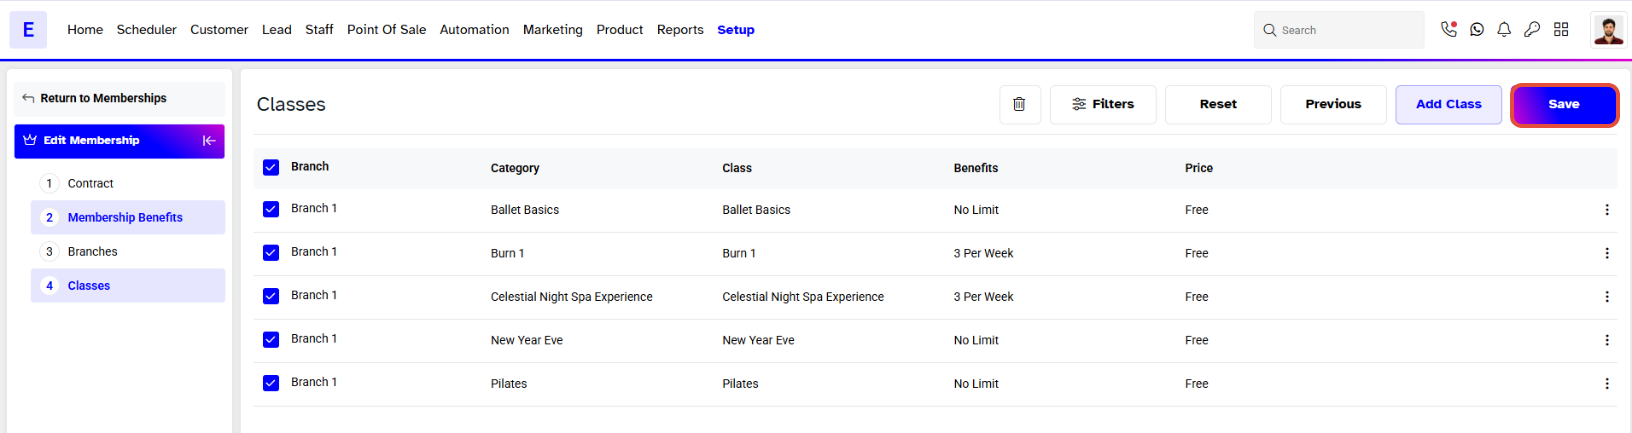
- Once all details are configured, you can view the class in your membership summary.
- Click the Save button to confirm your changes.