
TABLE OF CONTENTS
- Step 1: Navigate to Membership Categories
- Step 2: Add a New Category
- Step 3: Enter Category Details
- Step 4: Save the Category
Overview
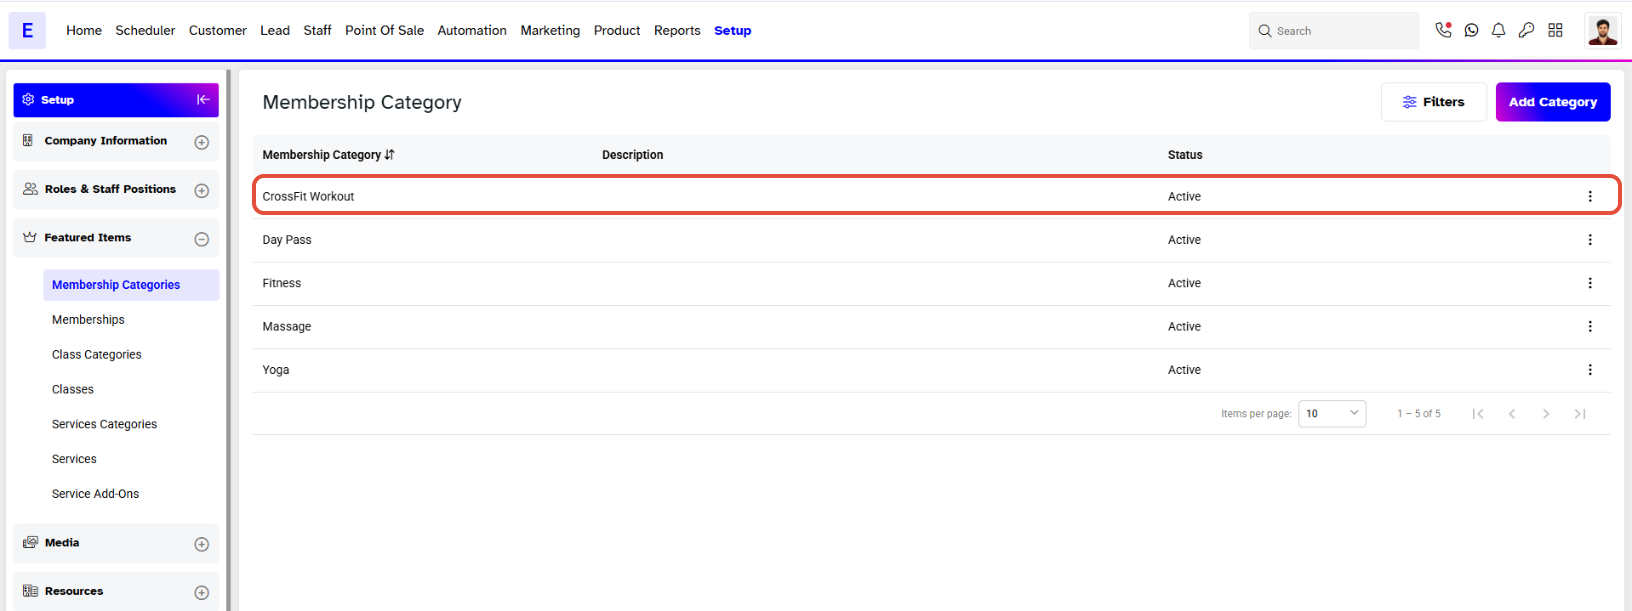
This guide explains how to create a Membership Category in Core. By following this guide, merchants can easily set up and organize categories for their memberships.
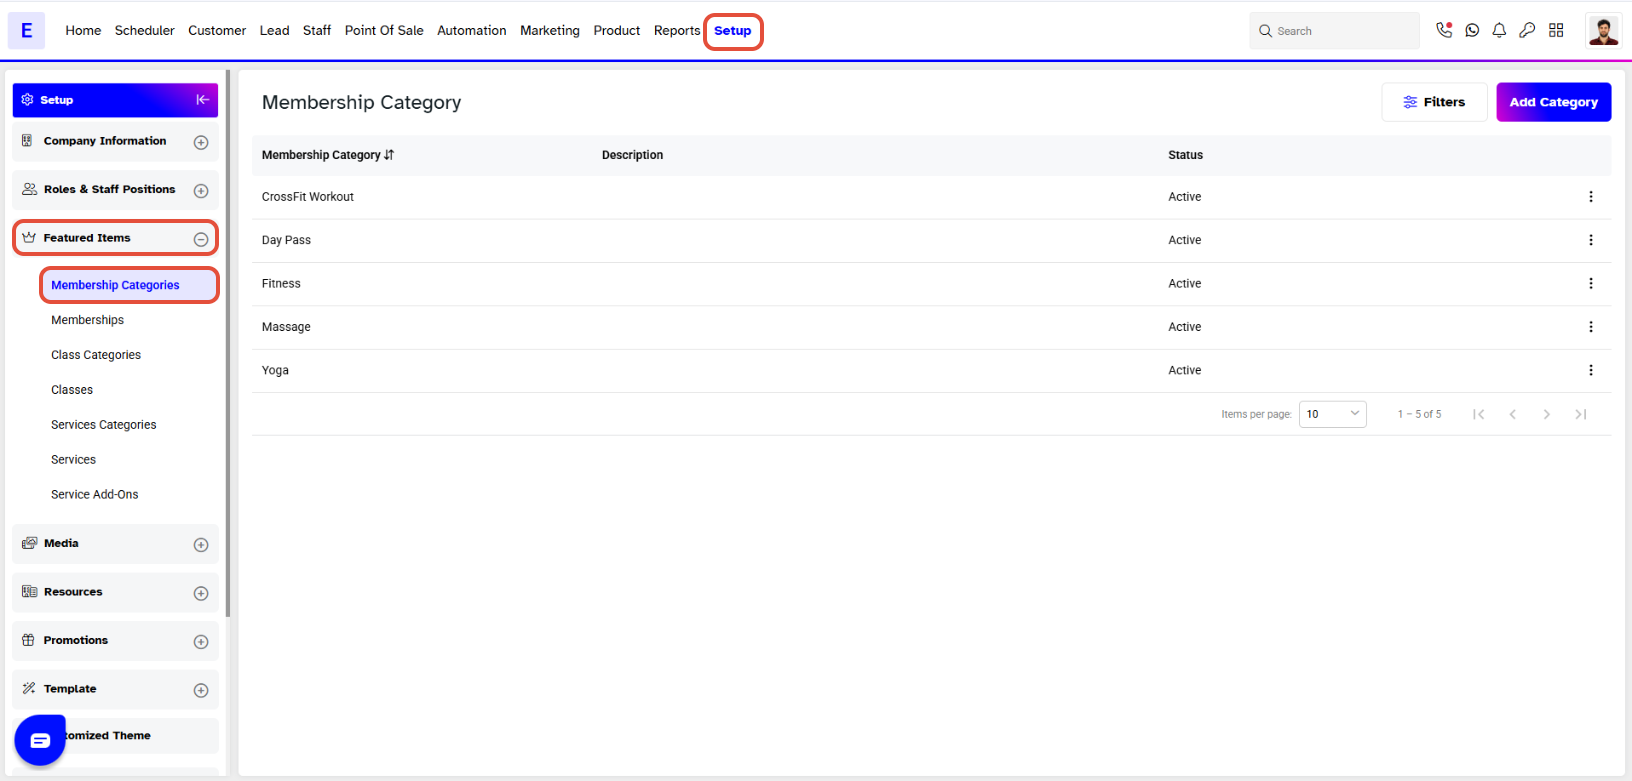
Step 1: Navigate to Membership Categories
- Go to the Setup module in Core.
- Click on the Memberships tab.
- Select Categories from the dropdown menu.
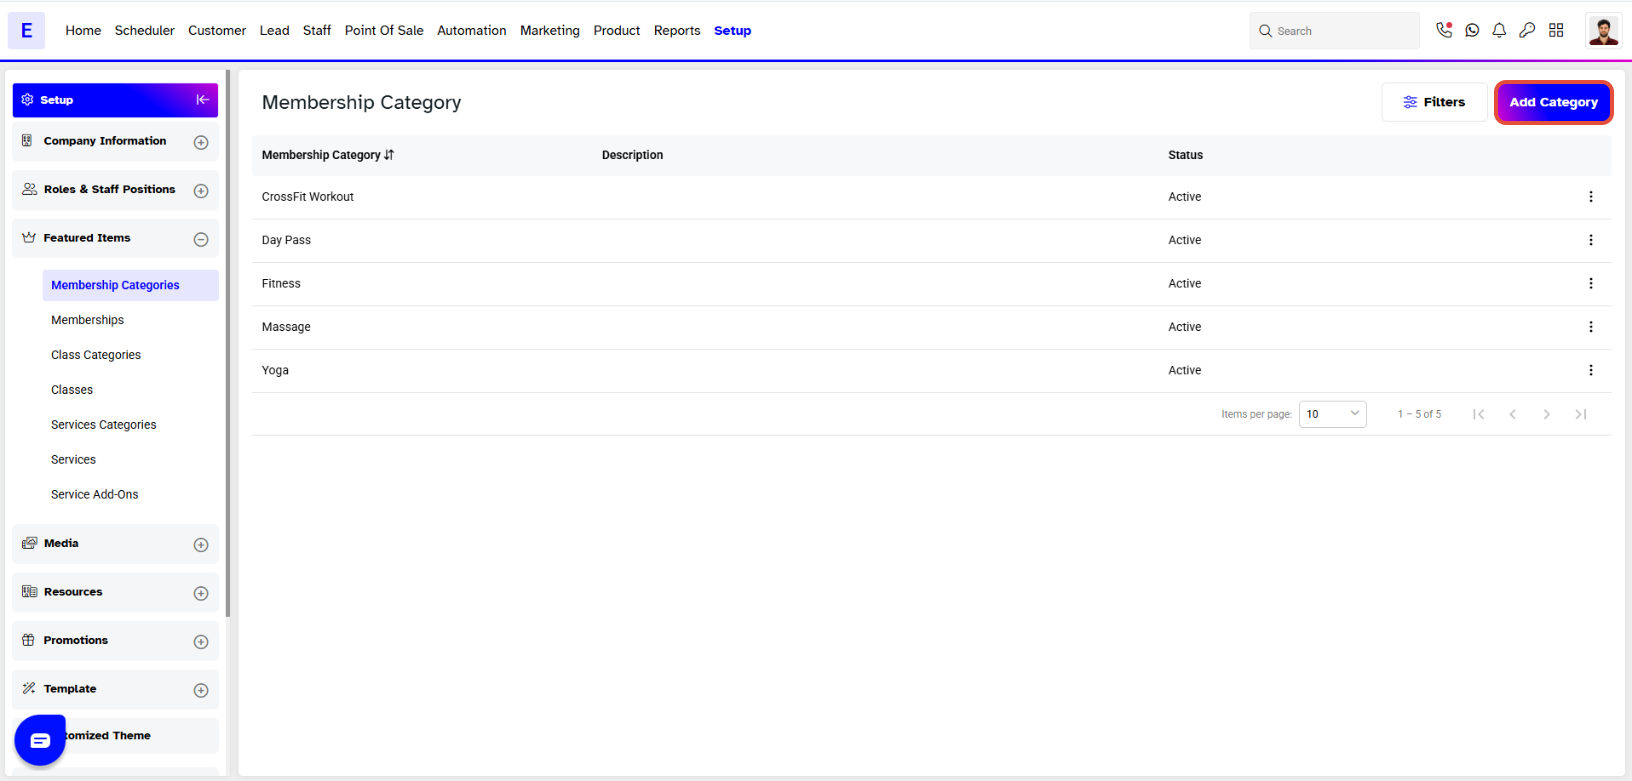
Step 2: Add a New Category
- Click on the Add Category button.
- A pop-up box will appear on the screen.
Step 3: Enter Category Details
- Fill in the following fields in the category section.
- Name: Enter the name of the category.
- Description: Enter a description for the category.
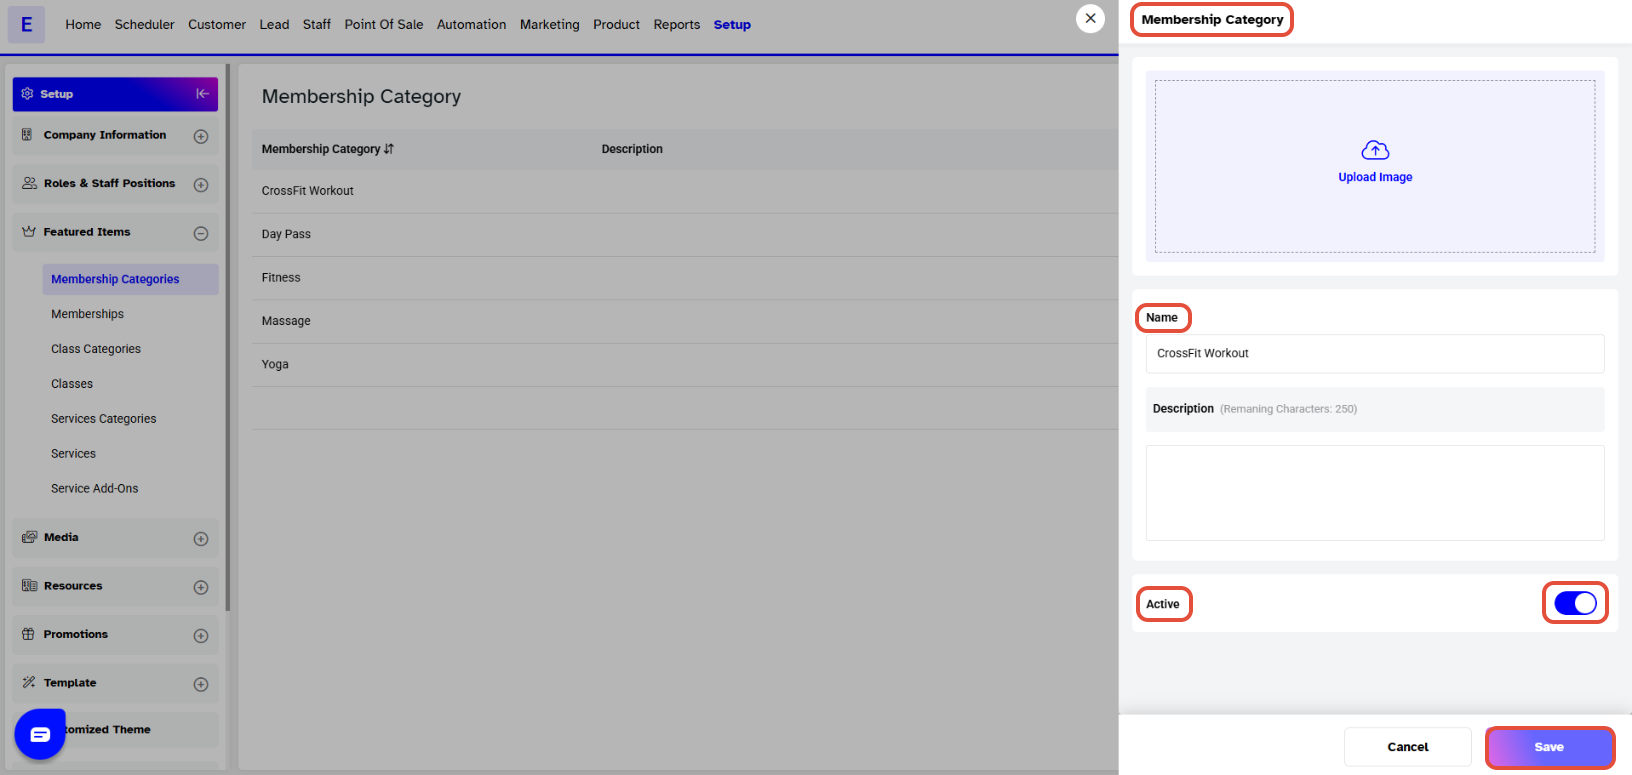
Step 4: Save the Category
- Click on the Save button.
- The membership category will now be visible