


TABLE OF CONTENTS
- Step 1: Navigate to the Scheduler
- Step 2: Select the Class
- Step 3: Access Edit Mode
- Step 4: Edit Series Details
- Step 5: Save the Changes
Overview
This guide explains how to edit a Class Series in Core. It covers the process of accessing the Scheduler module, selecting a recurring class, and updating series details. By following this guide, merchants can efficiently modify existing class series.
Step 1: Navigate to the Scheduler
- Go to the Scheduler module in Core

Step 2: Select the Class
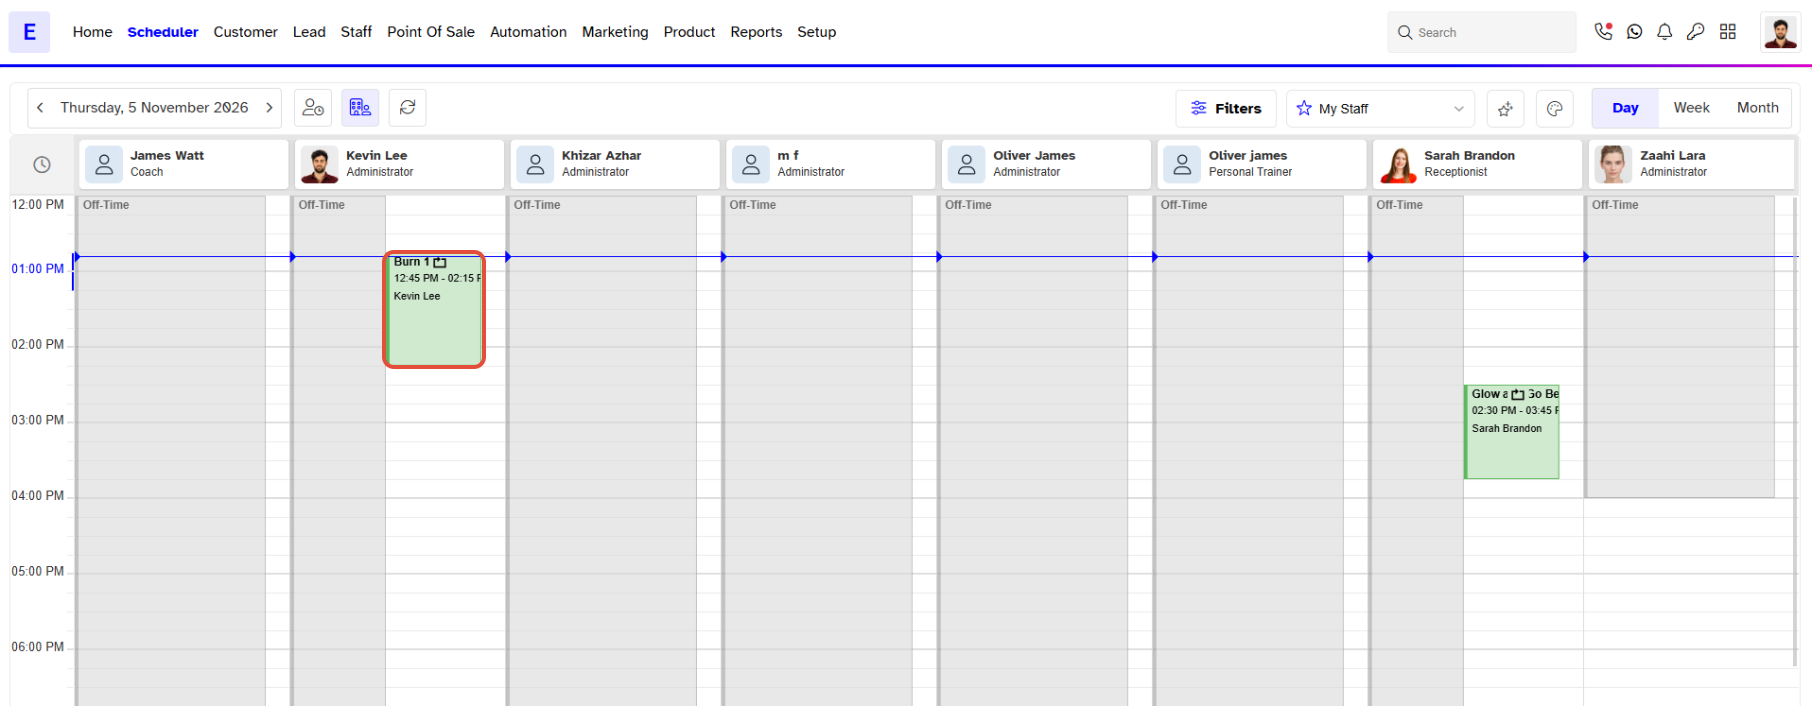
- Locate and select the Specific Class you wish to edit.
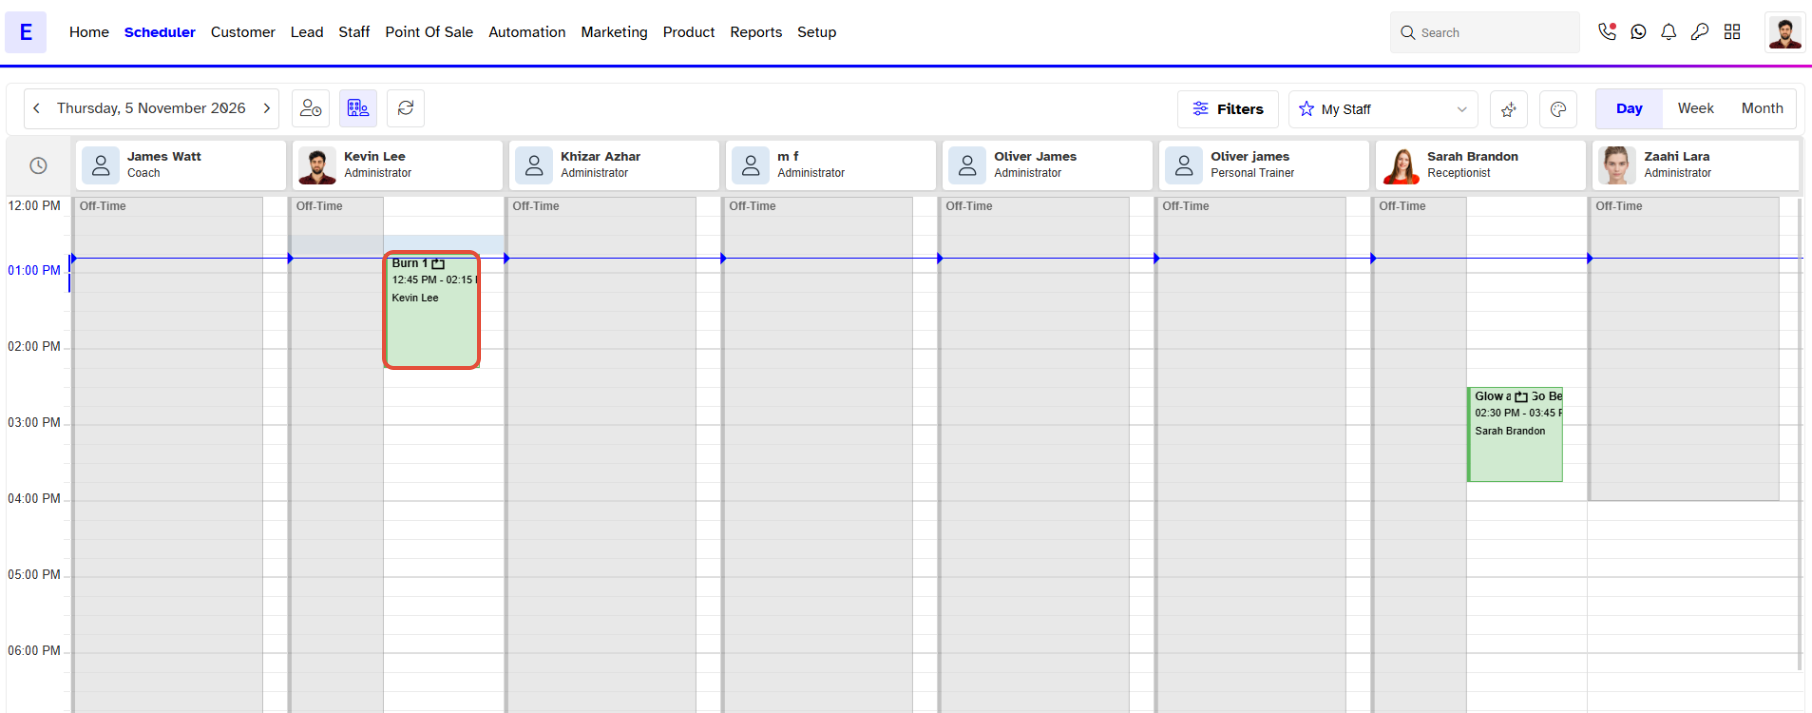
Step 3: Access Edit Mode
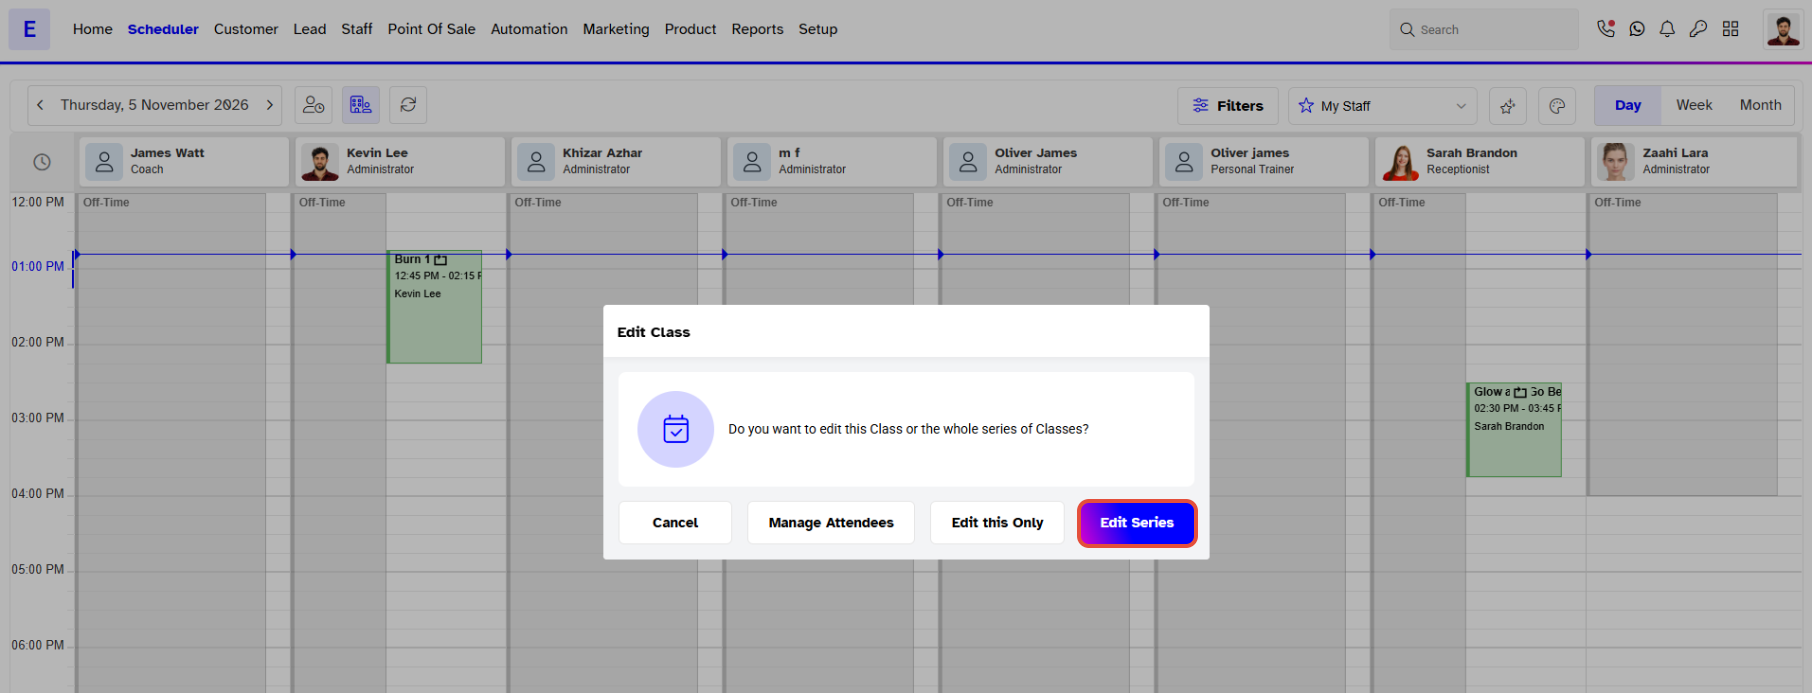
- Click on the Edit icon to open the class details.
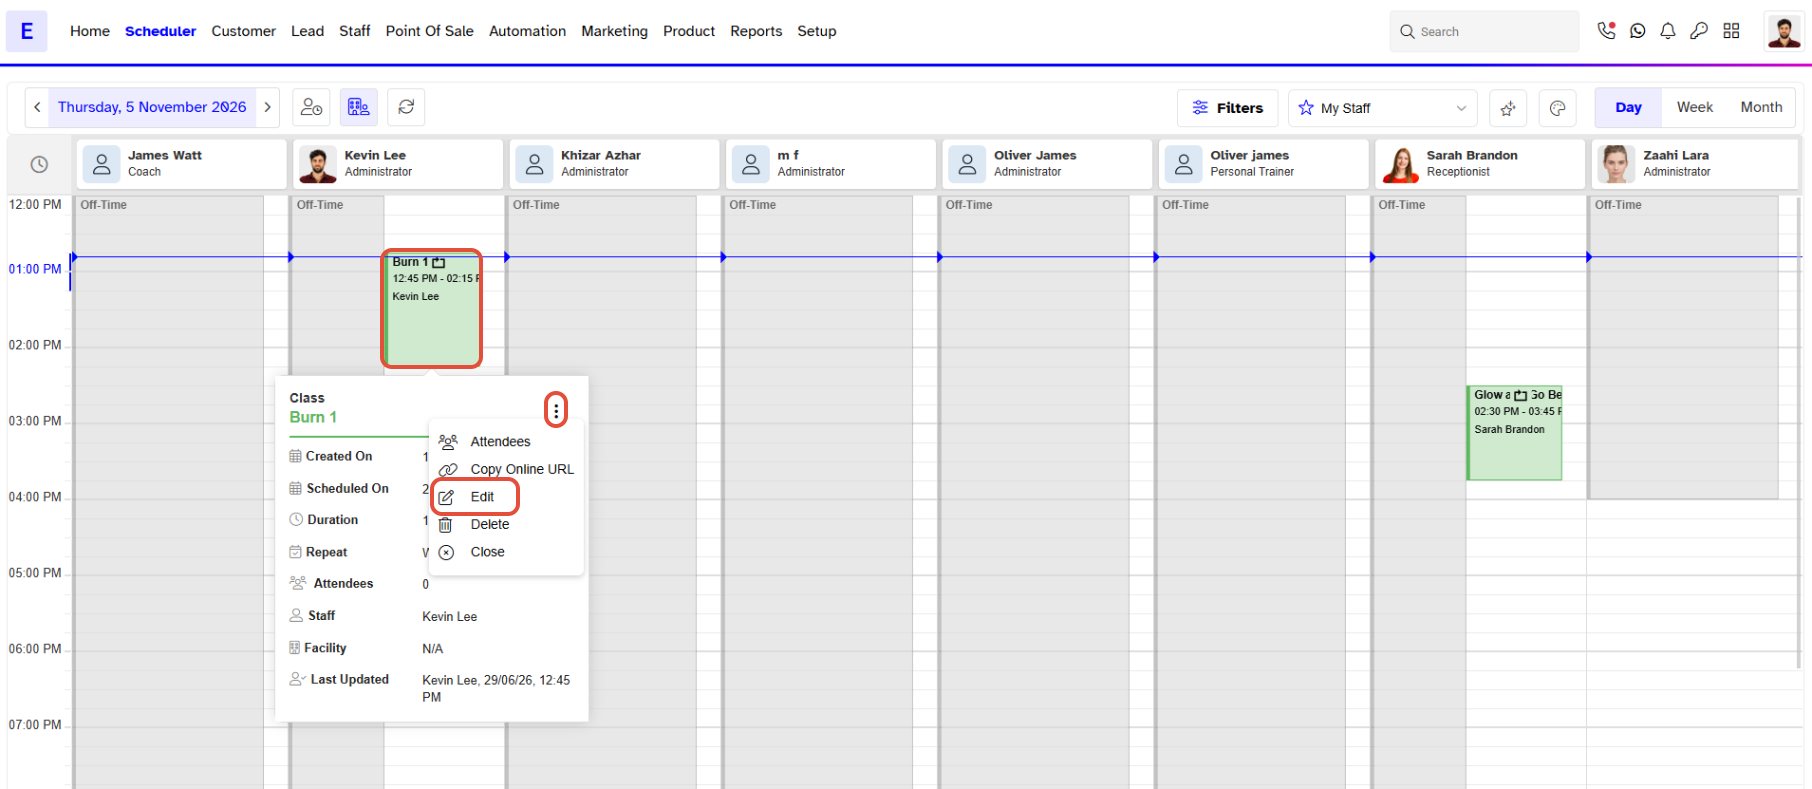
- Now click on the Edit Series Button.
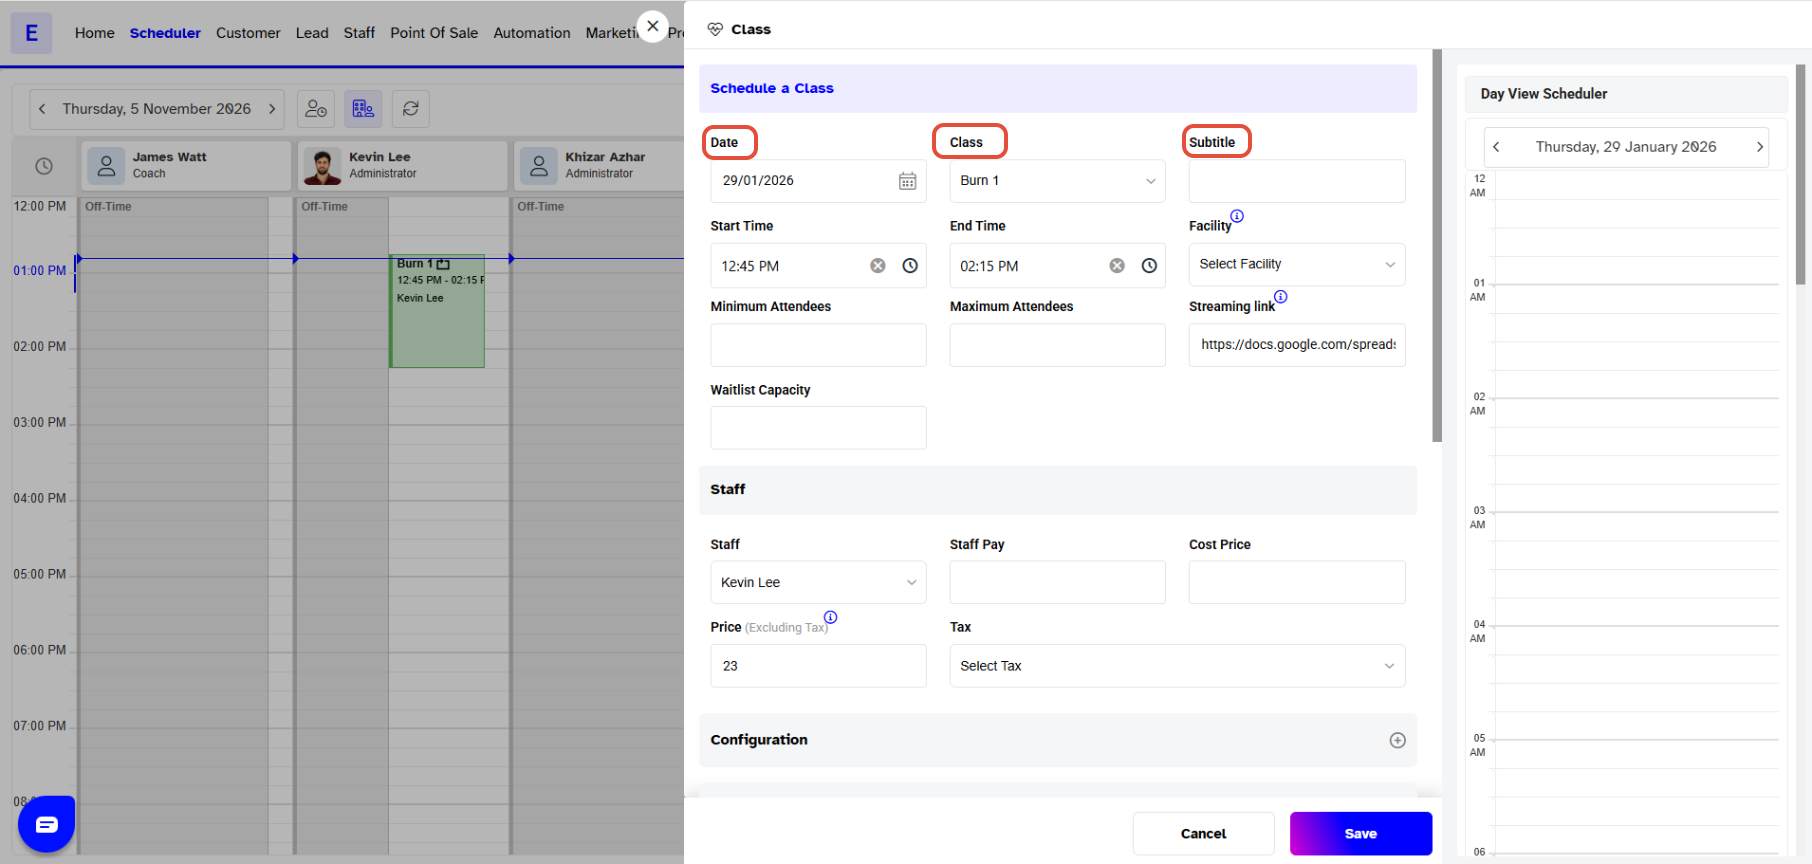
Step 4: Edit Series Details
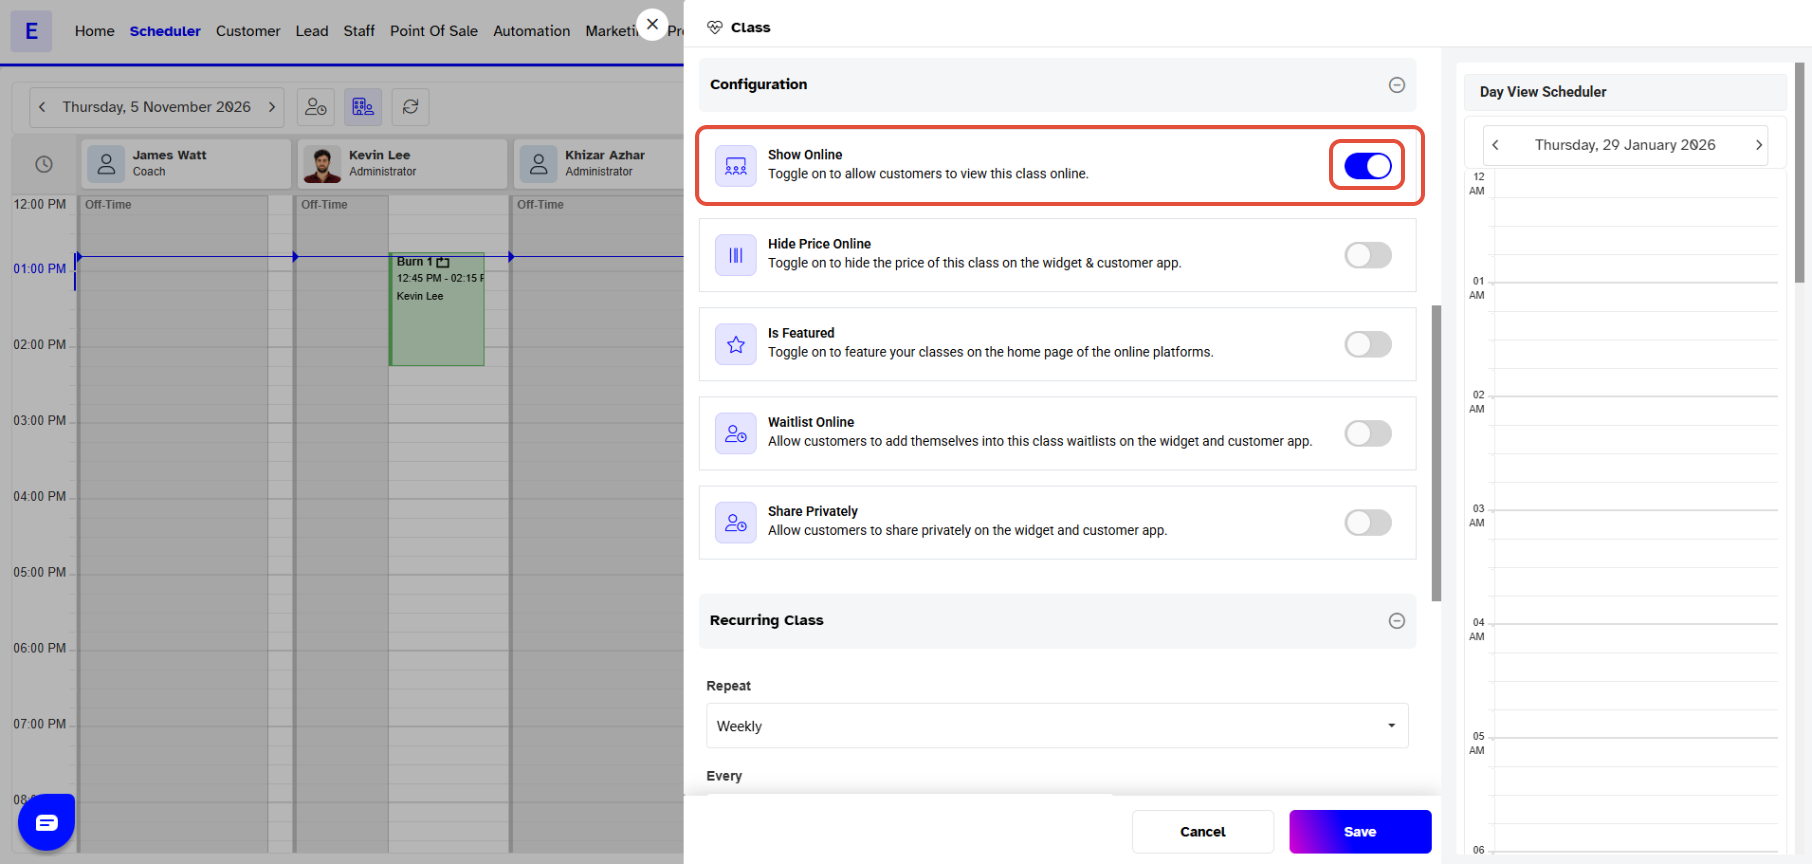
- Once the Class Pop-Up box appears, you may edit all available fields as required.
Step 5: Save the Changes
- Click on the Save button to confirm the changes.
- Once Done, the Edited Class will be Shown in the Scheduler.
Only a Series can be Edited if the Class is on Repeat.


