
TABLE OF CONTENTS
- Step 1: Navigate to Configurations
- Step 2: Manage Communication Settings
- Step 3: Configure Membership Benefits
- Step 4: Adjust Class Configurations
- Step 5: Define Service Configurations
- Step 6: Define Reward Program Configurations
- Step 7: Save the Configuration
Overview
This guide explains how to manage basic system settings in Core. It covers how to configure communication preferences, membership benefit suspensions, as well as class and service check-in parameters. By following this guide, merchants can ensure that system notifications, membership rules, and booking check-in processes are accurately aligned with their business operations.
Step 1: Navigate to Configurations
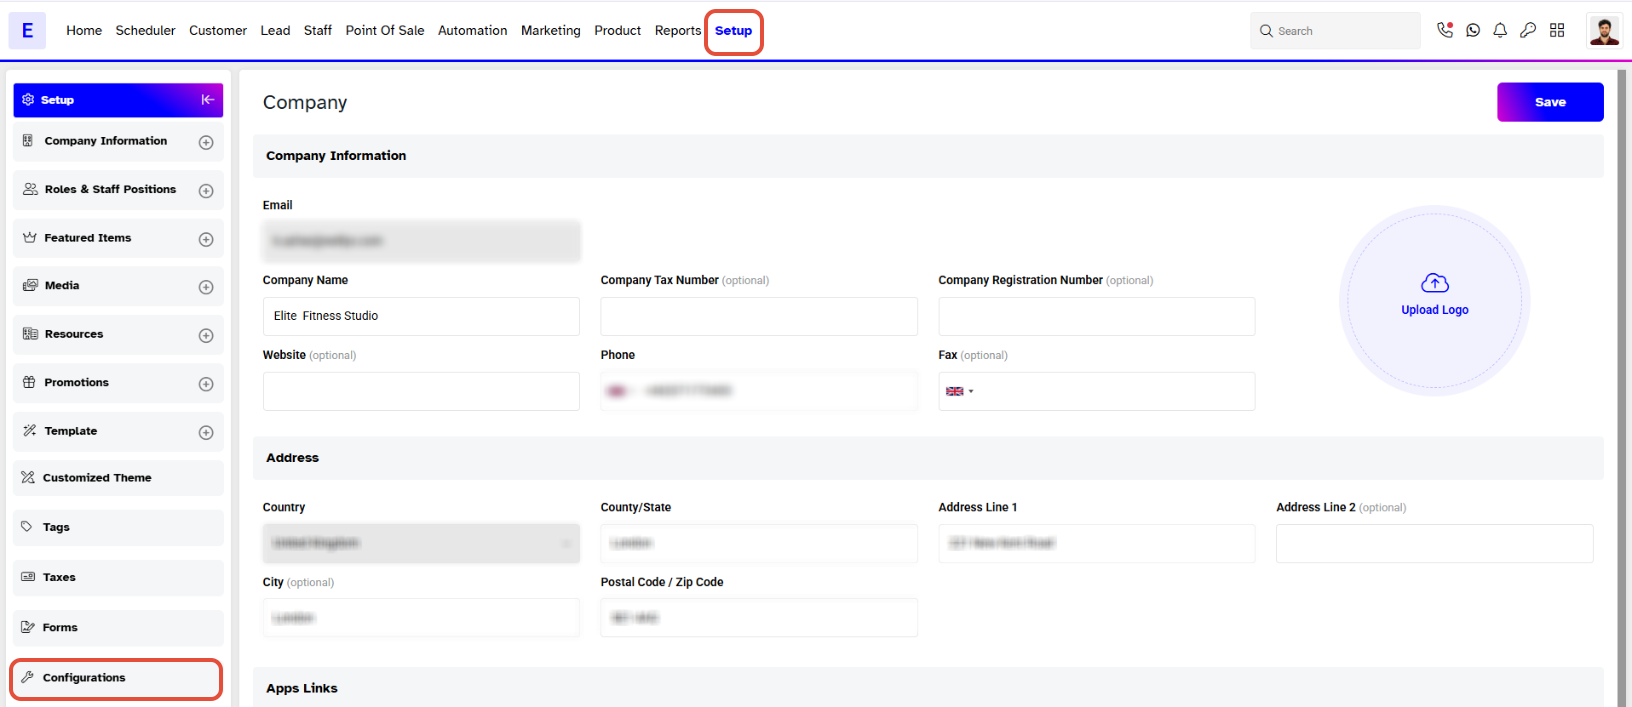
- From the Core Menu, go to the Setup module.
- By default, the Company Segment page will open.
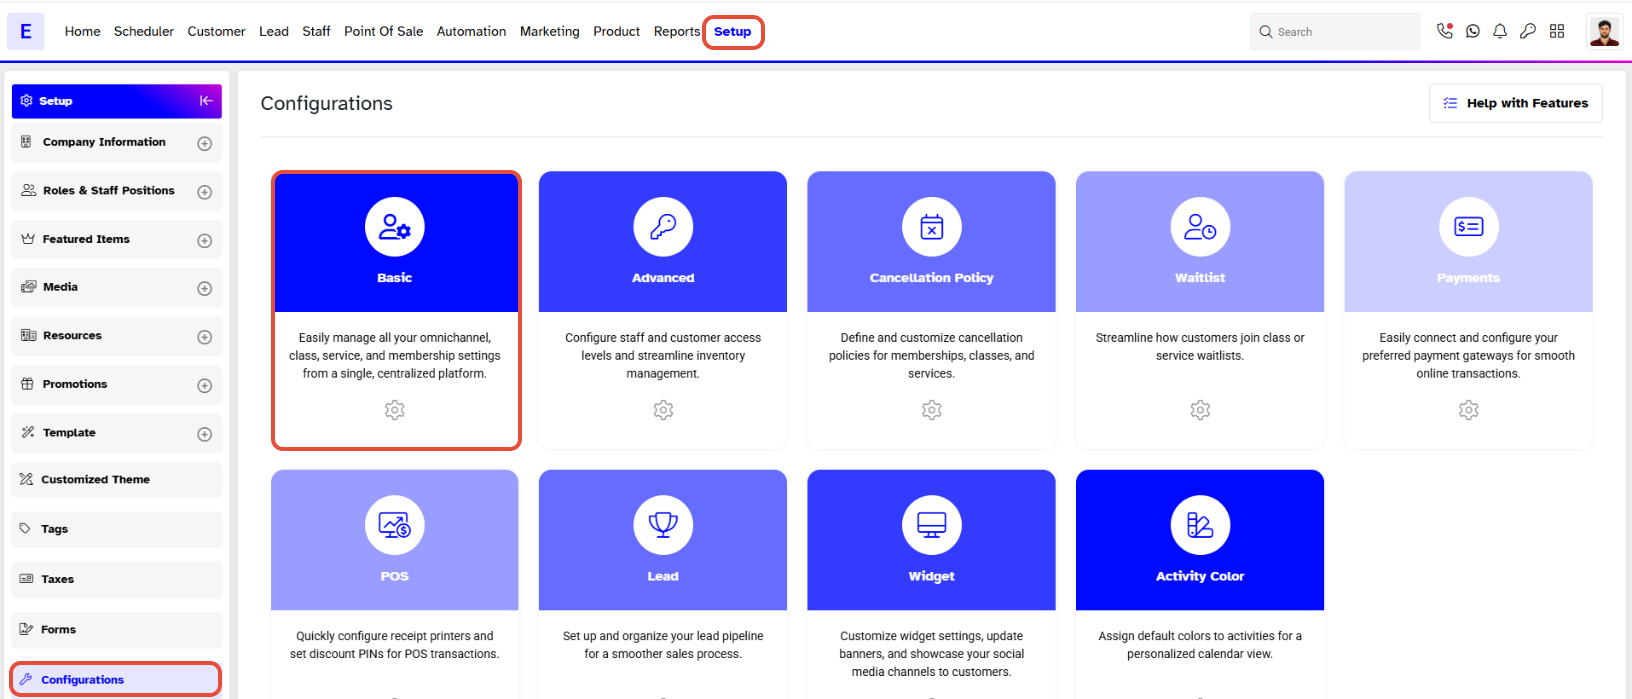
- Click on the Configurations tab.
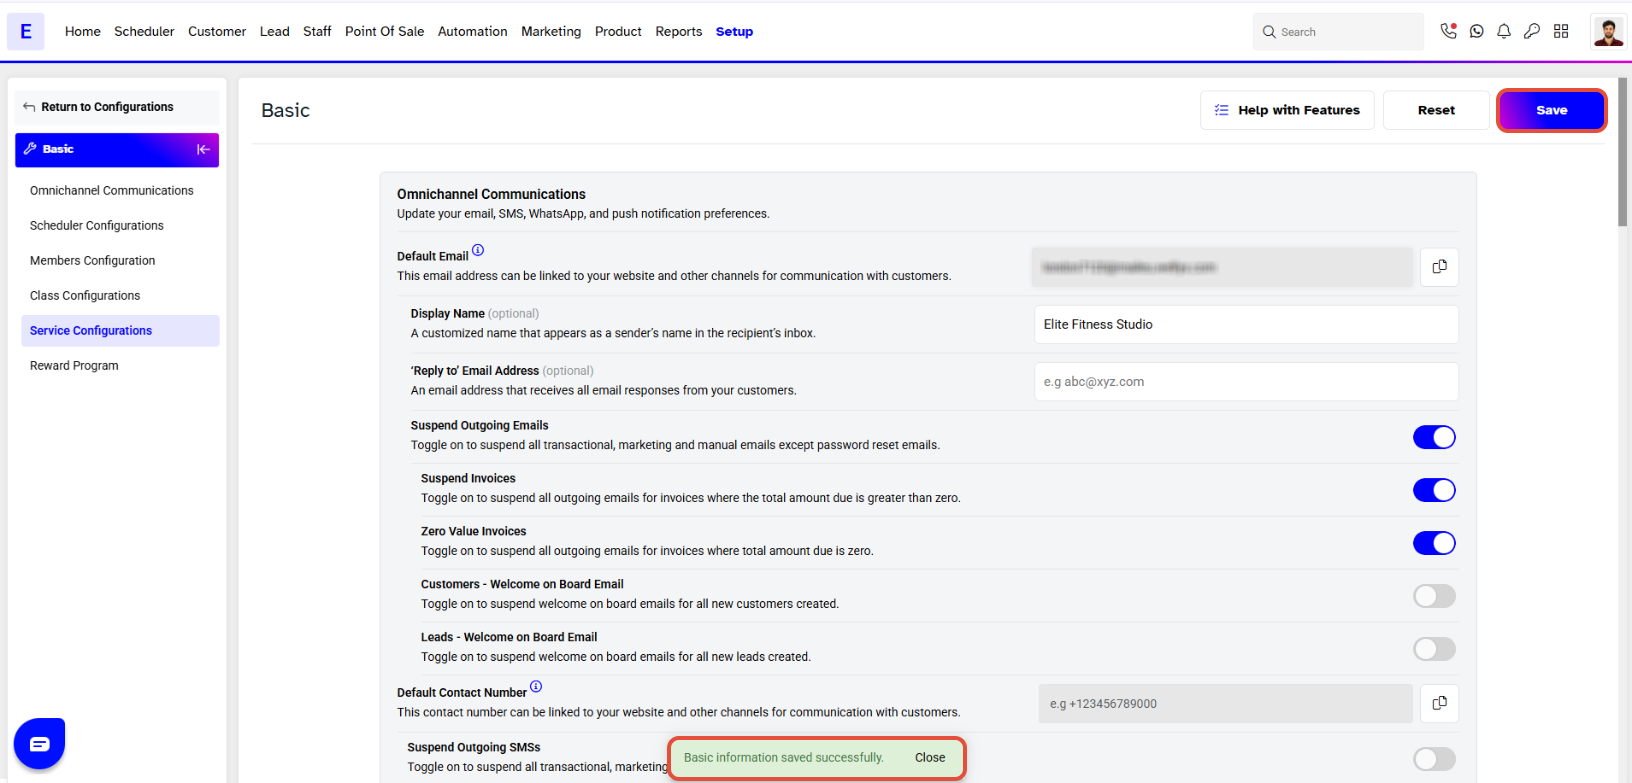
- Select the Basic tab.
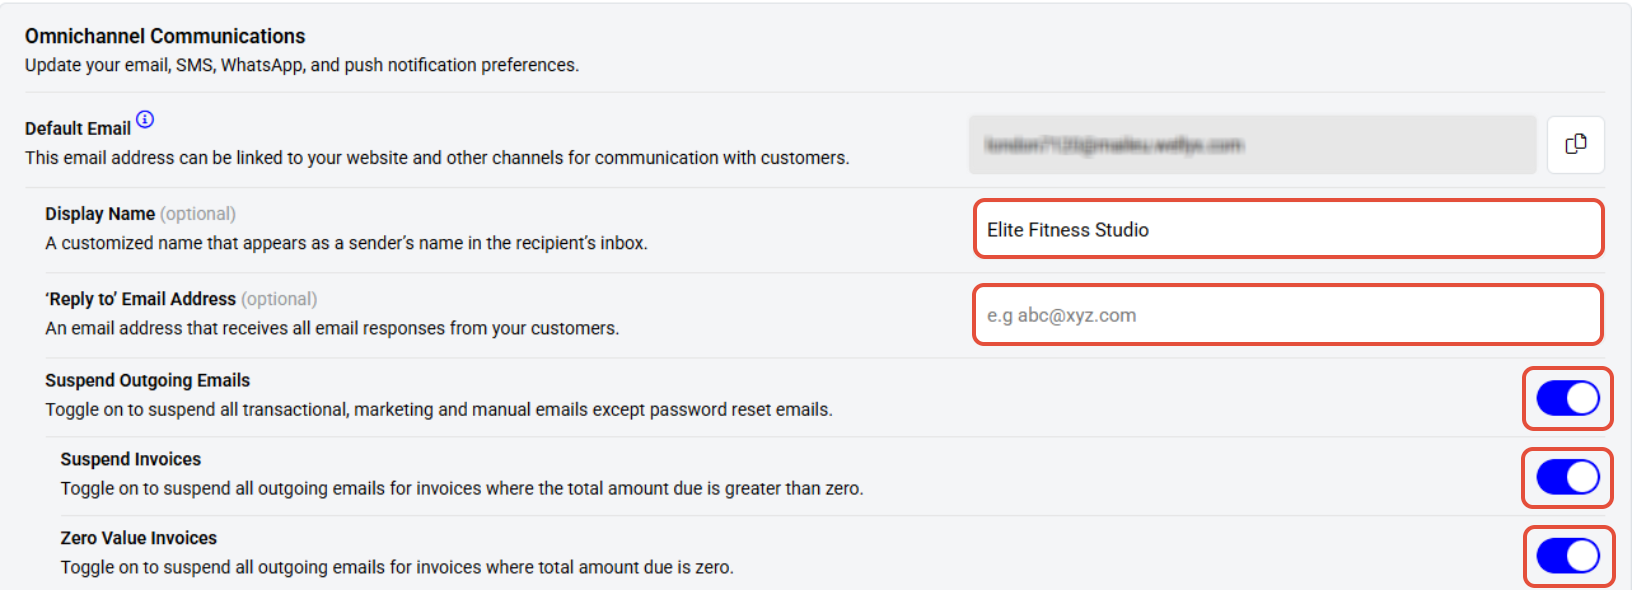
In the Communications section, you can manage how the system interacts with staff and customers.Step 2: Manage Communication Settings
- Display Name: Enter the name you want to appear as the sender in the recipient's inbox. (Optional)
- Reply to Email Address: Add an email address to receive all customer responses. (Optional)
- Zero Value Invoices: Toggle On to suspend all outgoing emails for invoices where the amount due is zero.
- Suspend Outgoing Emails:Toggle On to suspend all system-generated emails, with the exception of password reset emails.
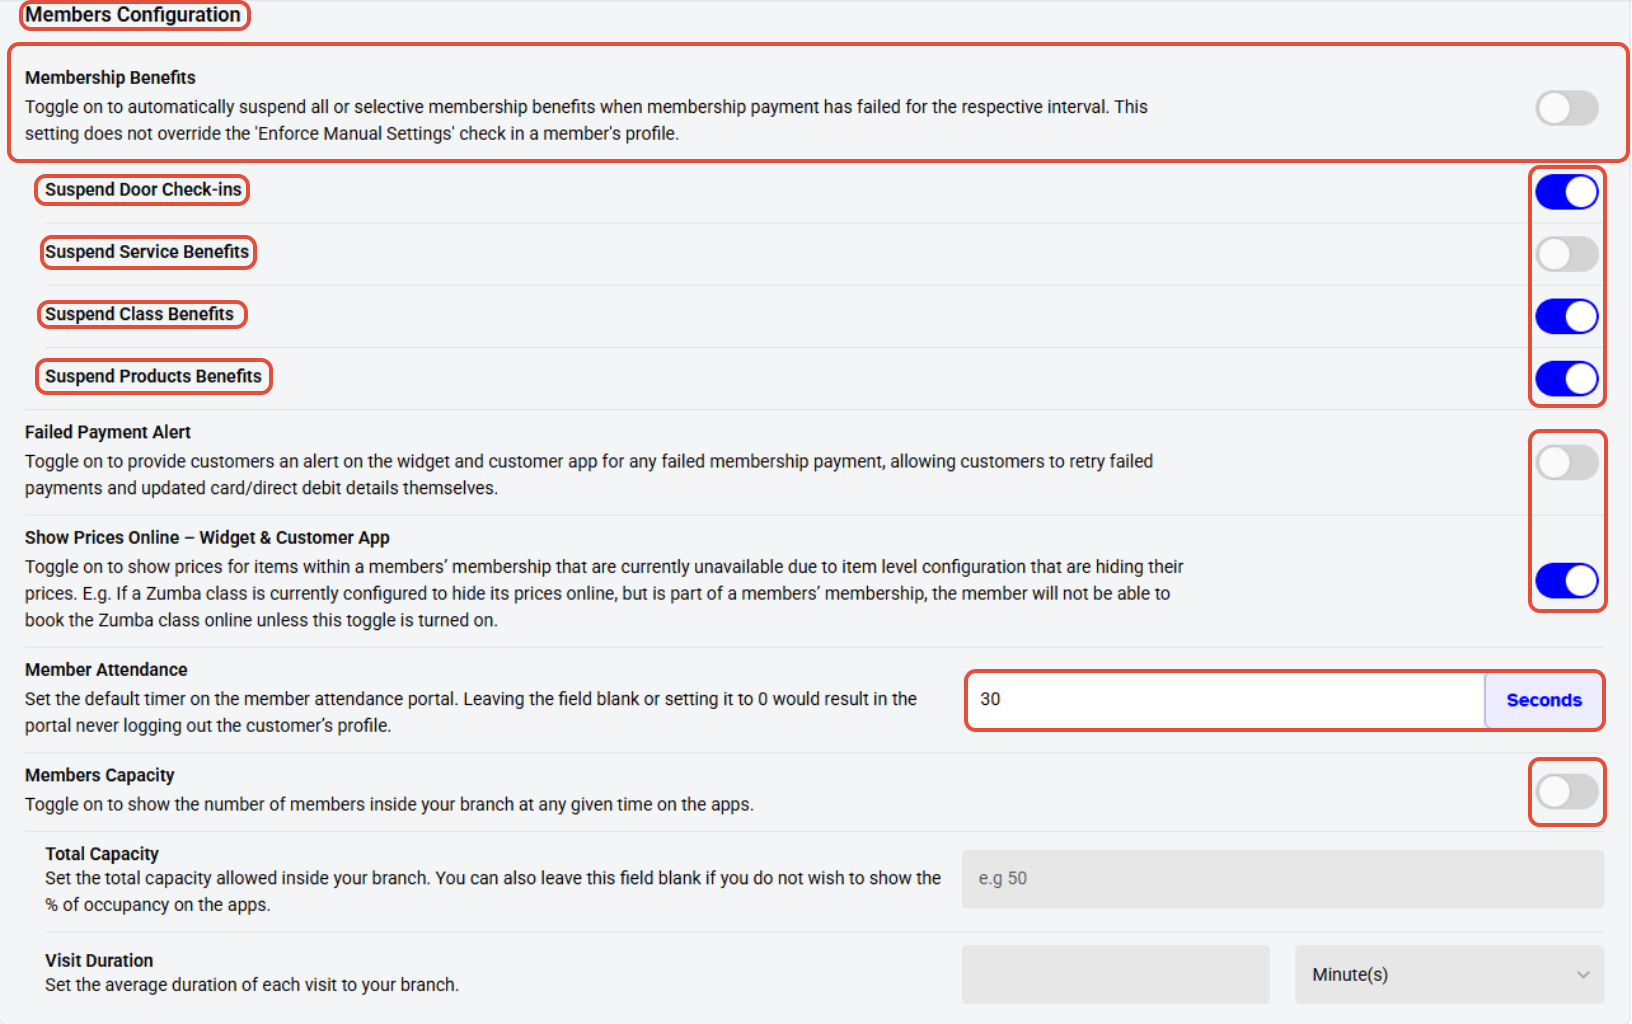
In the Membership Benefits section, define rules for when membership payments fail.
Step 3: Configure Membership Benefits
- Suspend All Benefits: Toggle On to automatically suspend all or selective benefits for a membership when a payment fails.
- Suspend Door Check-Ins: Toggle On to suspend door Check-In benefits for a member.
- Suspend Service Benefits: Toggle On to suspend service benefits for a member when a payment fails.
- Suspend Class Benefits: Toggle On to suspend class benefits for a member.
- Suspend Product Benefits: Toggle On to suspend product benefits for a member upon payment failure for an interval.
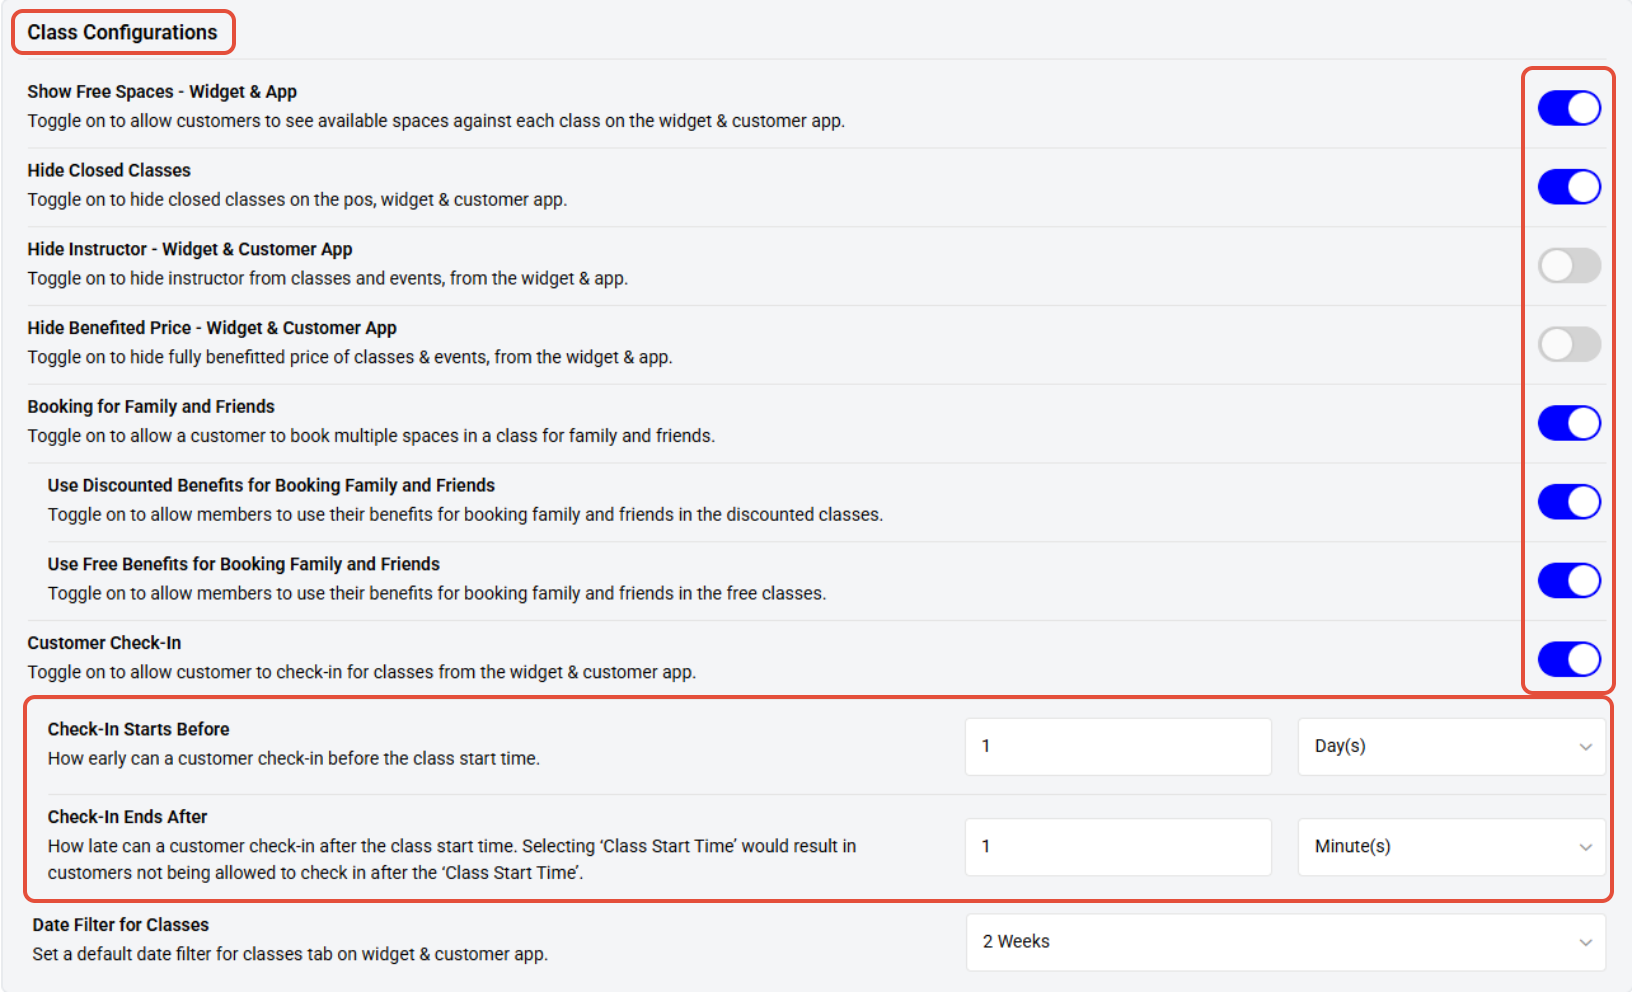
In the Class Configurations section, define how customers interact with classes via the Widget and App.
Step 4: Adjust Class Configurations
- Show Free Spaces - Widget & App: Toggle On to allow customers to view available spaces for each class.
- Customer Check-In: Toggle On to enable customers to check in to their classes.
- Check-In Starts Before: Specify how early a customer can check in before the class start time.
- Check-In Ends After: Set a time limit for how late a customer can check in after the class start time. Selecting Class Start Time' prevents check-ins after the class has begun.
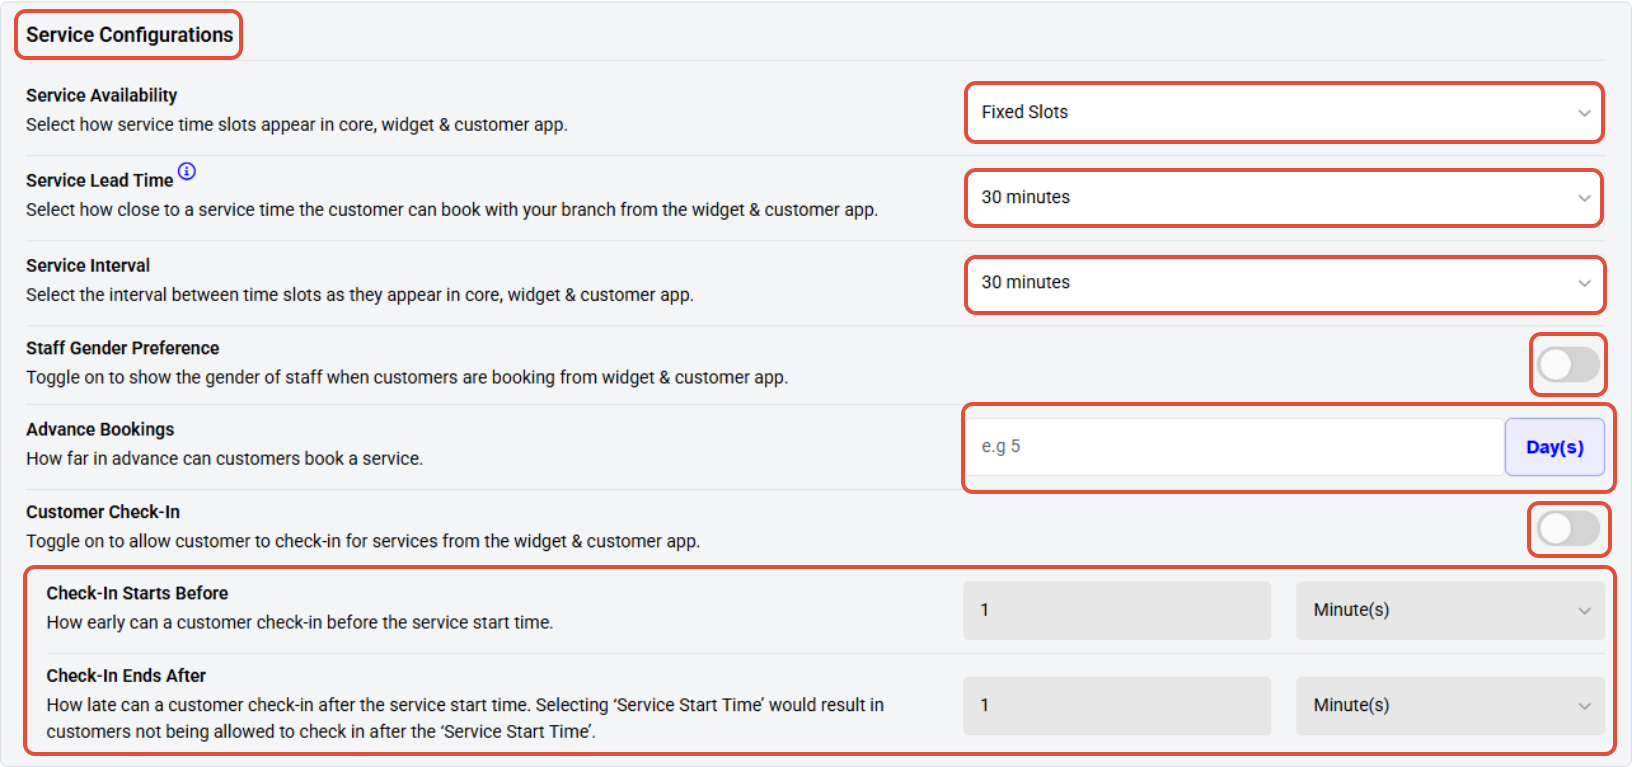
In the Service Configurations section, manage settings for service bookings.
Step 5: Define Service Configurations
- Customer Check-In: Toggle On to allow customers to check in for services via the Widget and Customer App.
- Check-In Starts Before: Set how early a customer can check in before the service start time.
- Check-In Ends After: Set the time limit for how late a customer can check in after the service start time. Selecting 'Service Start Time' prevents check-ins after the service has begun.
- Service Lead Time: Select how close to a service time a customer can book a session via the Widget and Customer App.
- Service Interval: Choose the interval between time slots as displayed in Core, the Widget, and the Customer App.
Step 6: Define Reward Program Configurations
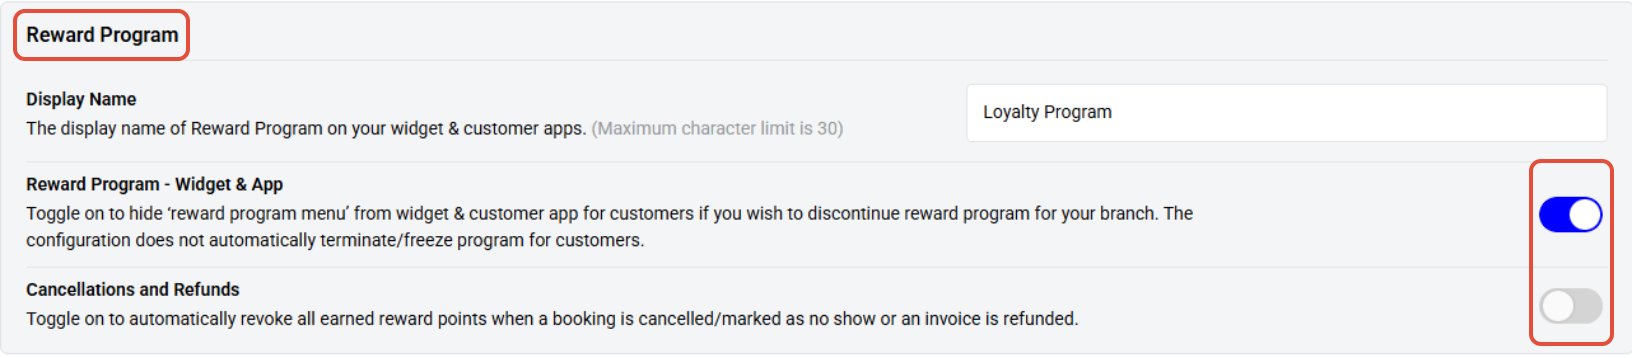
- Display Name: Enter the display name for the Reward Program as it will appear on your widget and customer apps. (Maximum character limit is 30)
- Reward Program - Widget & App: Toggle on to hide the ‘reward program menu’ from the widget and customer app if you wish to discontinue the reward program for your branch. This configuration does not automatically terminate or freeze the program for customers.
- Cancellations and Refunds:Toggle on to automatically revoke all earned reward points when a booking is cancelled, marked as no show, or an invoice is refunded.
Step 7: Save the Configuration
- Once all desired changes are made, scroll up and click on the Save button.
- A "Basic Information Saved Successfully" message will appear at the bottom right of the page to confirm your updates.