
TABLE OF CONTENTS
To create an Automation Rule for Class Booking Reminders for Customers, follow the steps below:
How To Create An Automation Rule For Class Booking Reminders For Customers
This article covers the following topics:
From Core click on the Automation Module and click on Add Automation.

Add Automation
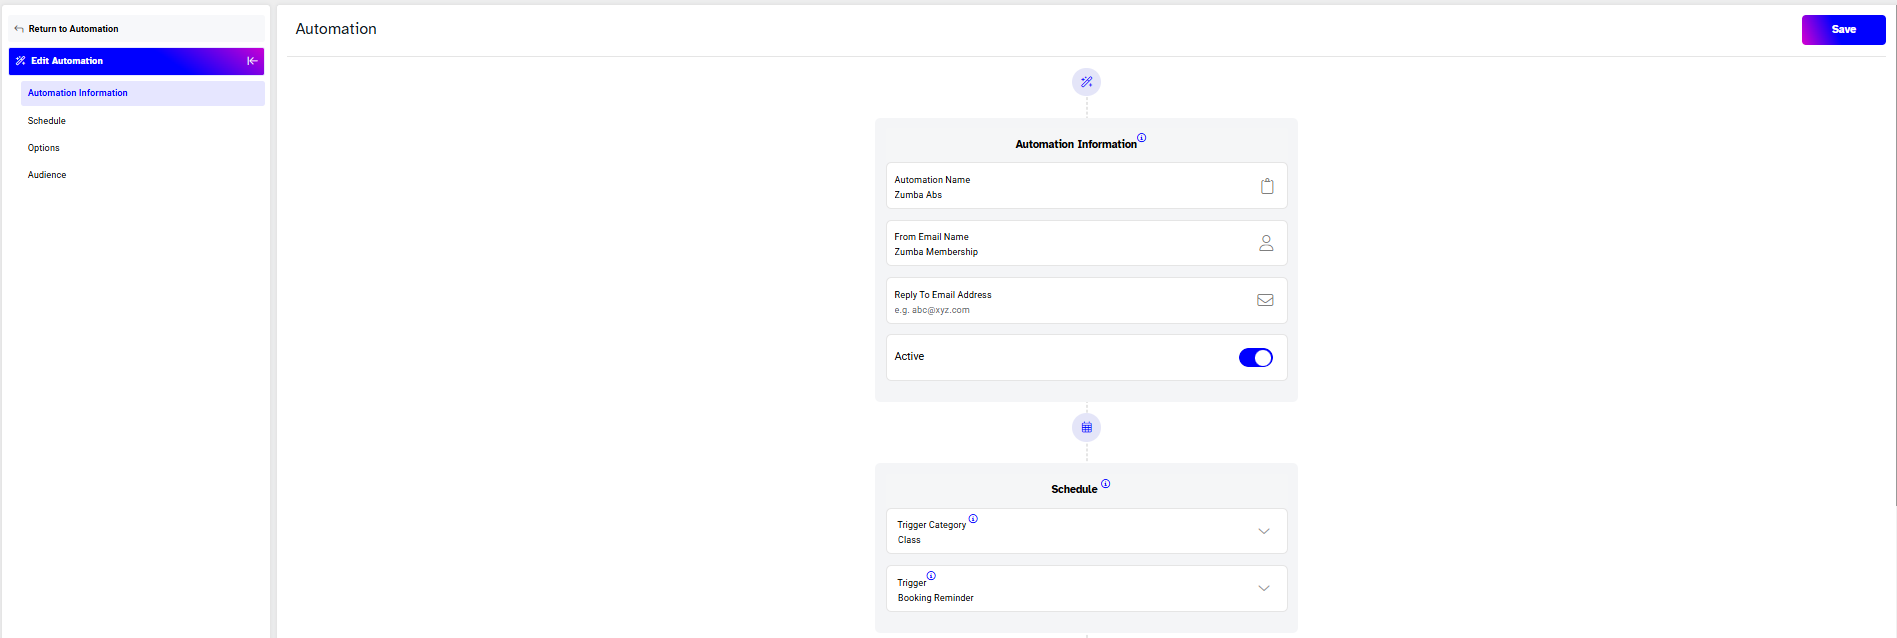
- Automation Name - allocate a name for the Automation.
- From Email Name - this will act as the signature on your email.
- Reply Email Address - enter the email address that your recipients can respond to.
Schedule
- Trigger Category - select Class from the dropdown menu.
- Trigger - select Booking Reminder from the dropdown menu.
Options
- Do not send notifications before - from the dropdown menu merchants will select a time slot of which the notification will be not be sent before.
- Do not send notifications after - from the dropdown menu merchants will select a time slot of which the notification will be not be sent after.
- Remind Before - by default reminders are sent out 24 hours, Merchants can choose to change this to their preference.
- Duration - from the dropdown menu select Minute(s), Hour(s), or Day(s)
Audience
Navigate to the Audience section and checkmark the Contact List All Customers.
Merchants also have the option of selecting to send Automation alerts to Related Staff by placing a checkmark next to it under the Contact List Related Staff option.
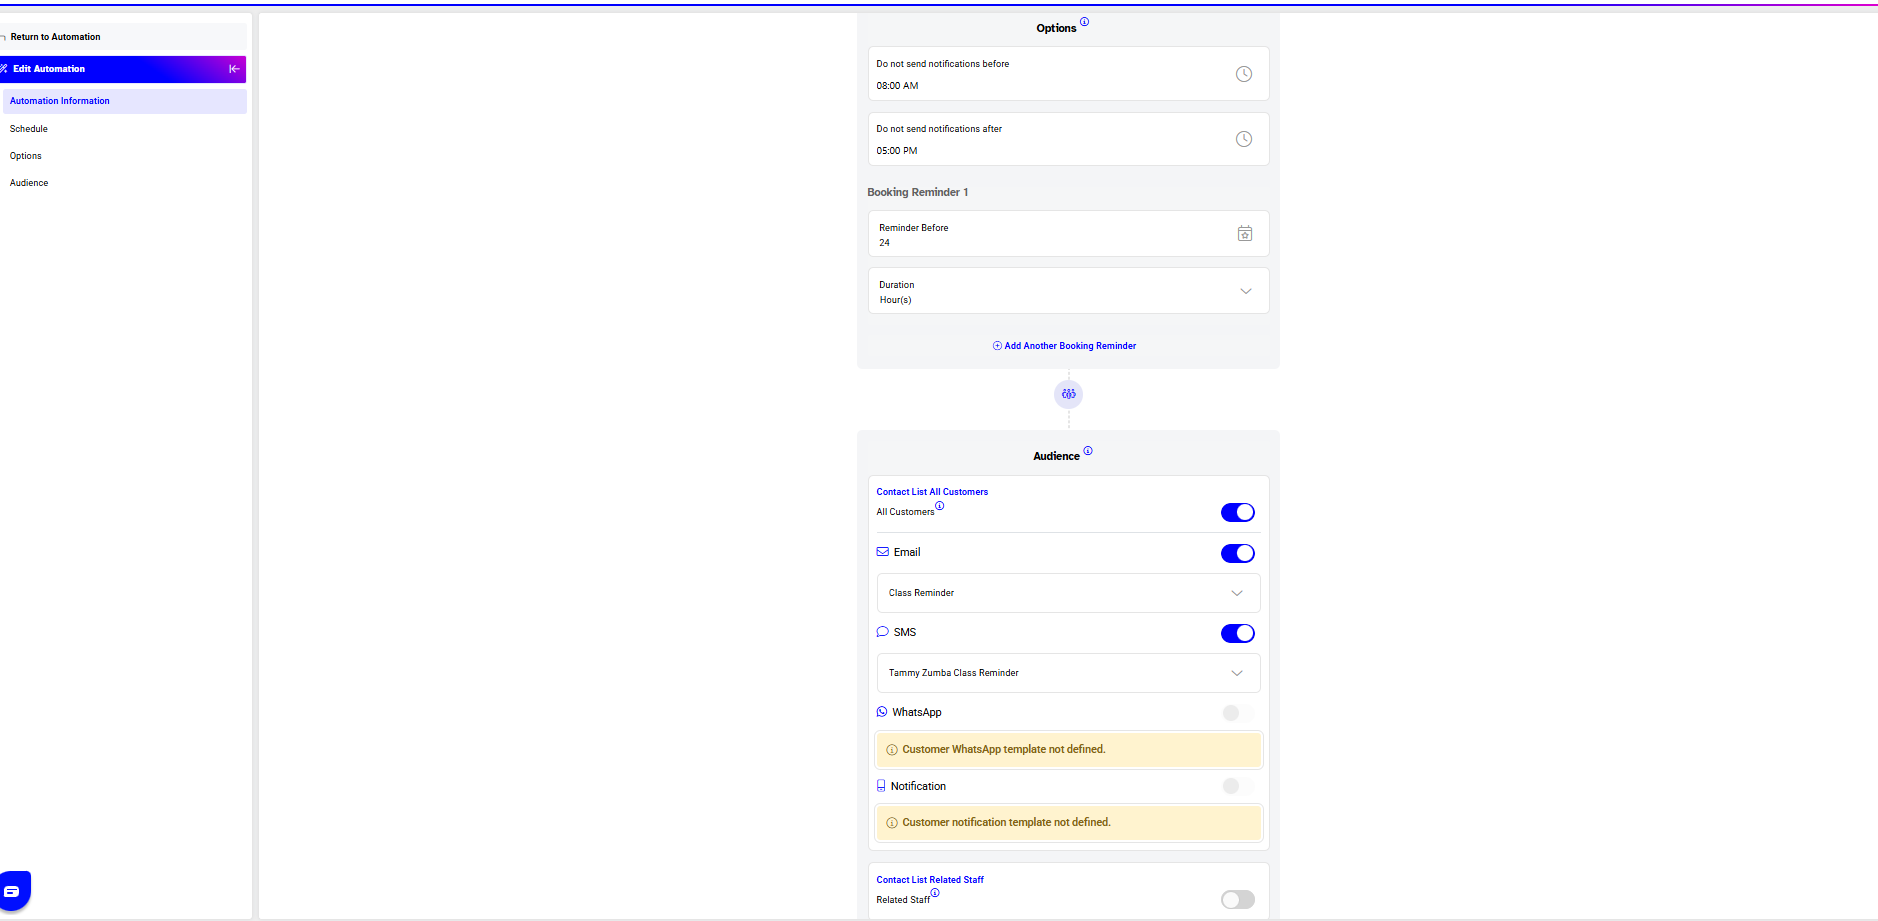
Merchants will toggle on the medium of their choice through which they wish to send the Automation.
- SMS
- Notification
Click Save to proceed.
An Automation Rule Saved Successfully message will appear and the new Automation can be seen under the main Automation page.