


This article covers the followings topics:
From Core click on the Automation Module and click on Add Automation.

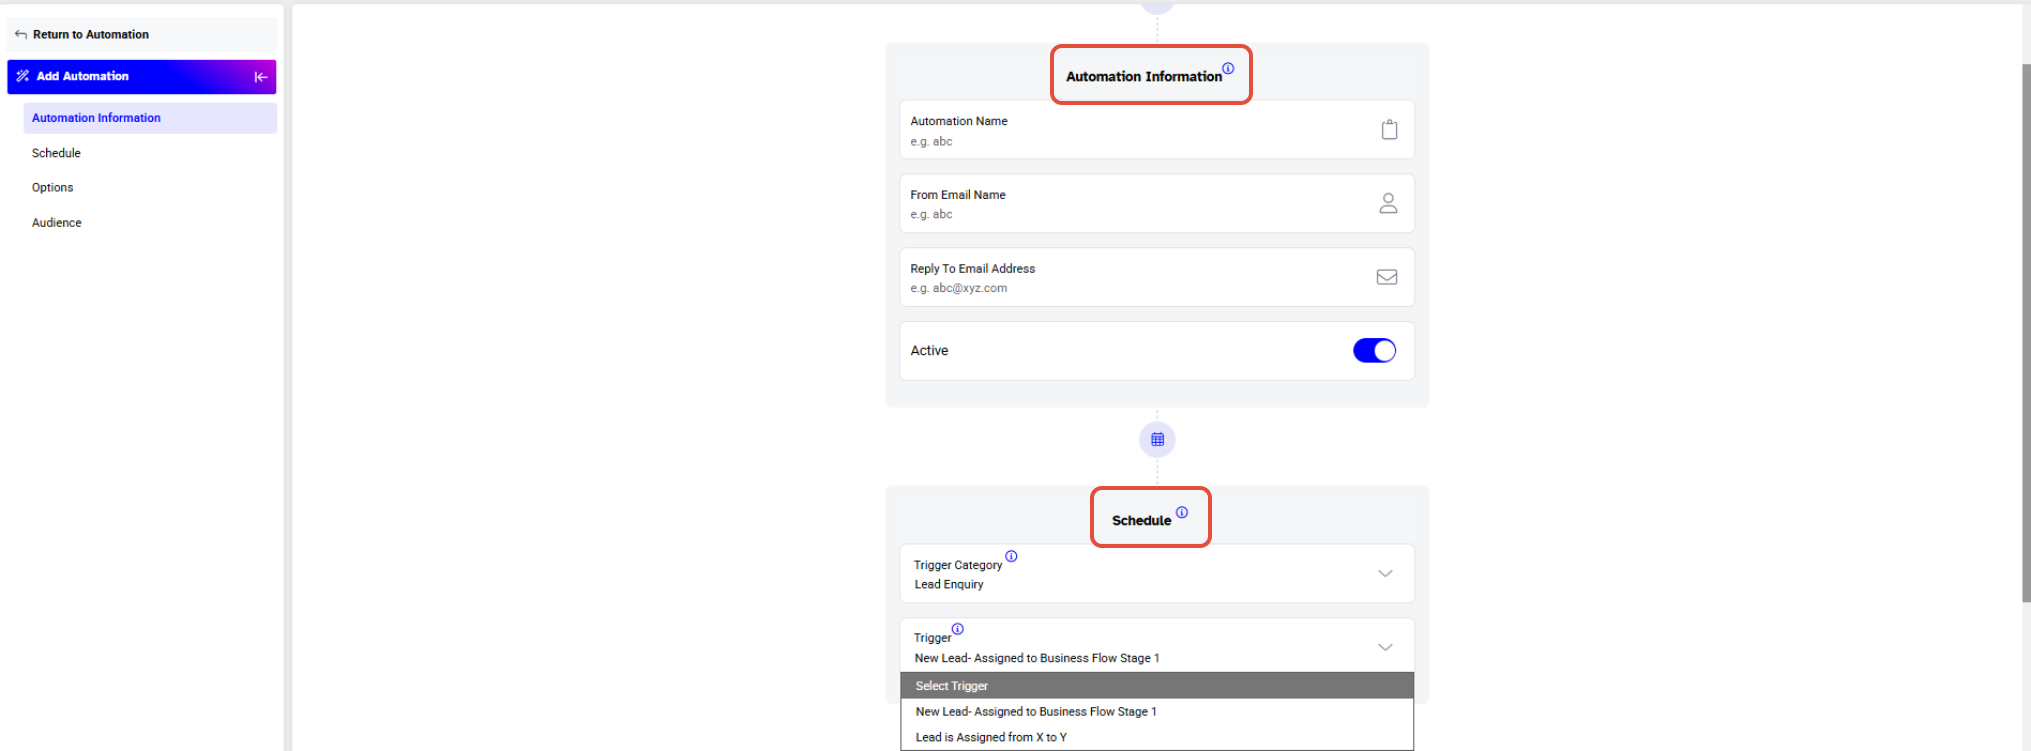
Ensure the Active button is toggled ON.
Add Automation
- Automation Name - allocate a name for the Automation.
- From Email Name - this will act as the signature on your email.
- Reply Email Address - enter the email address that your recipients can respond to.
Schedule
- Trigger Category - select Lead Enquiry from the dropdown menu.
- Trigger - select New Lead - Assigned to Bussiness Flow Stage 1 from the dropdown menu.
Options
- Do not send notifications before - from the dropdown menu merchants will select a time slot of which the notification will be not be sent before.
- Do not send notifications after - from the dropdown menu merchants will select a time slot of which the notification will be not be sent after.
Audience
Merchants audience selection will vary based on the Trigger Category and Trigger selected in the Schedule section.
Since Lead Enquiry and New Lead - Assigned to Business Flow Stage 1 have been selected a Contact List All Customer will appear - checkmark the All Customers box.
Also, if merchants want to notify related Customers that will checkmark the two boxes under Contact List Related Staff and Staff Position. By clicking in the box next to Staff Position Merchants can choose specific Role types that will get the Automation alert.
For this particular rule, Merchants will be given an option for Customer, Related Staff and Related Positions.
Click Save to proceed.
An Automation Rule Saved Successfully message will appear and the new Automation can be seen under the main Automation page.
For a list of terms used in the Wellyx application & across the support website, please consult our Glossary.