This article covers the following topics:
From Core click on the Automation Module and click on Add Automation.

Ensure the Active button is toggled ON.
Add Automation
- Automation Name - allocate a name for the Automation.
- From Email Name - this will act as the signature on your email.
- Reply Email Address - enter the email address that your recipients can respond to.
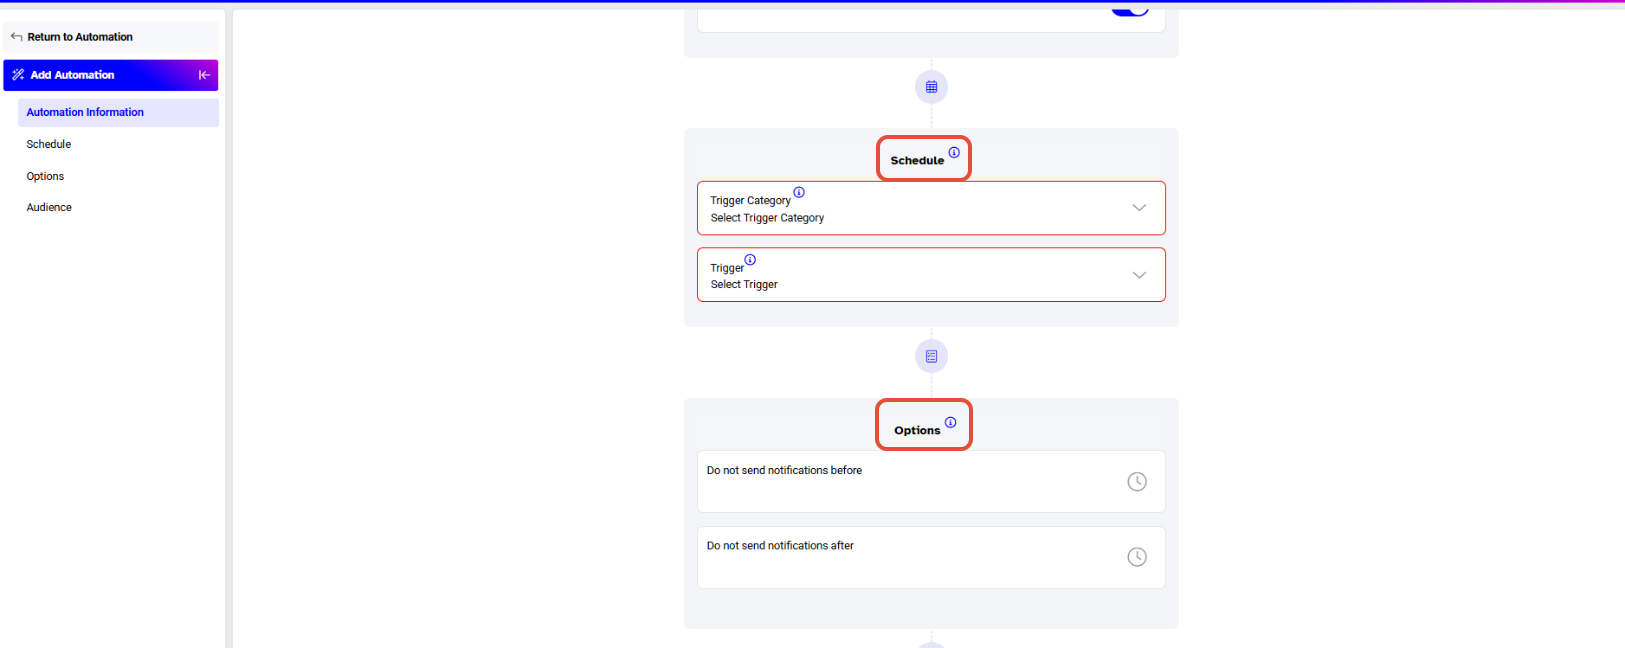
Schedule
- Trigger Category - select Class from the dropdown menu.
- Trigger - select Booking Reminder from the dropdown menu.
Options
- Do not send notifications before - from the dropdown menu merchants will select a time slot of which the notification will be not be sent before.
- Do not send notifications after - from the dropdown menu merchants will select a time slot of which the notification will be not be sent after.
- Remind Before - by default reminders are sent out 24 hours, Merchants can choose to change this to their preference.
- Duration - from the dropdown menu select Minute(s), Hour(s), or Day(s)
The Merchant can add a maximum of Three Booking Reminders.
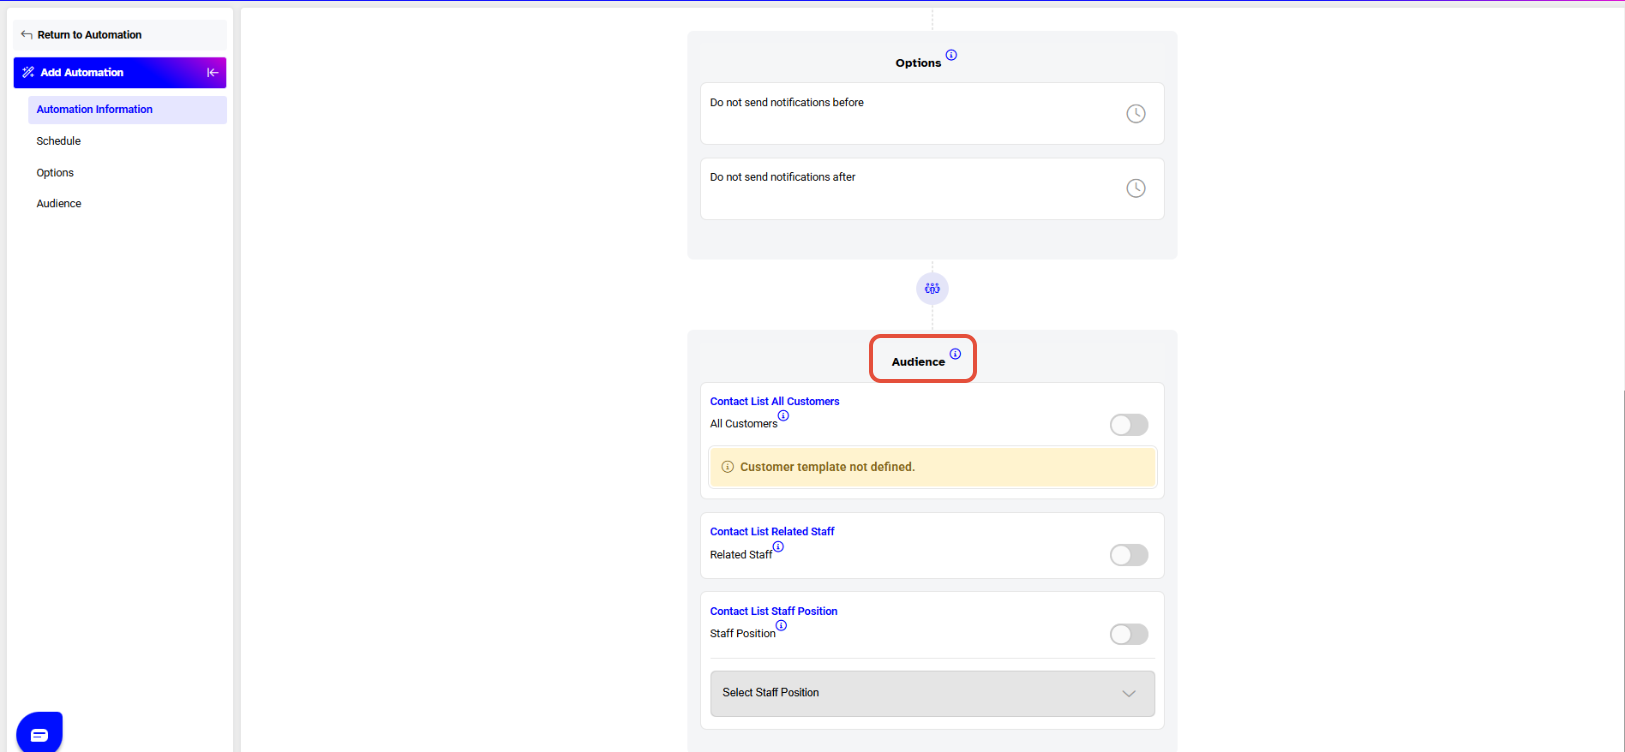
Audience
A Merchants audience selection will vary based on the Trigger Category and Trigger selected in the Schedule section.
Since Class and Booking Reminder has been selected a Contact All Customers will appear - checkmark the Related Staff box.
Merchants also have the option of selecting to send Automation alerts to Related Staff by placing a checkmark next to it under the Contact List Related Staff option.
Click Save to proceed.

For a list of terms used in the Wellyx application & across the support website, please consult our Glossary.