


TABLE OF CONTENTS
To Create an Automation Rule for Service Booking in Core, follow the steps below:
How To Create An Automation Rule For Service Booking In Core
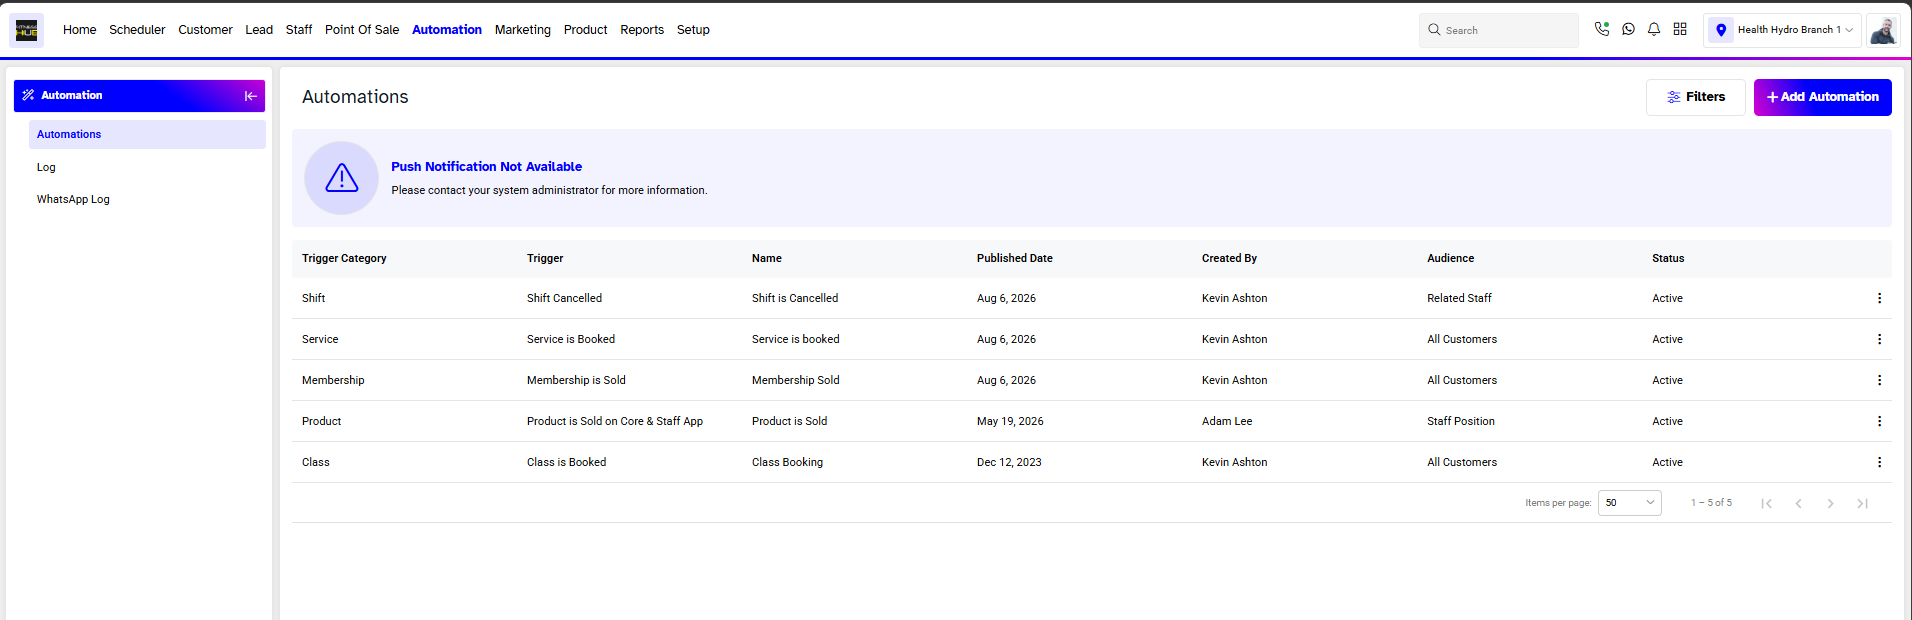
Go to the Automation Module and click on Add Automation.
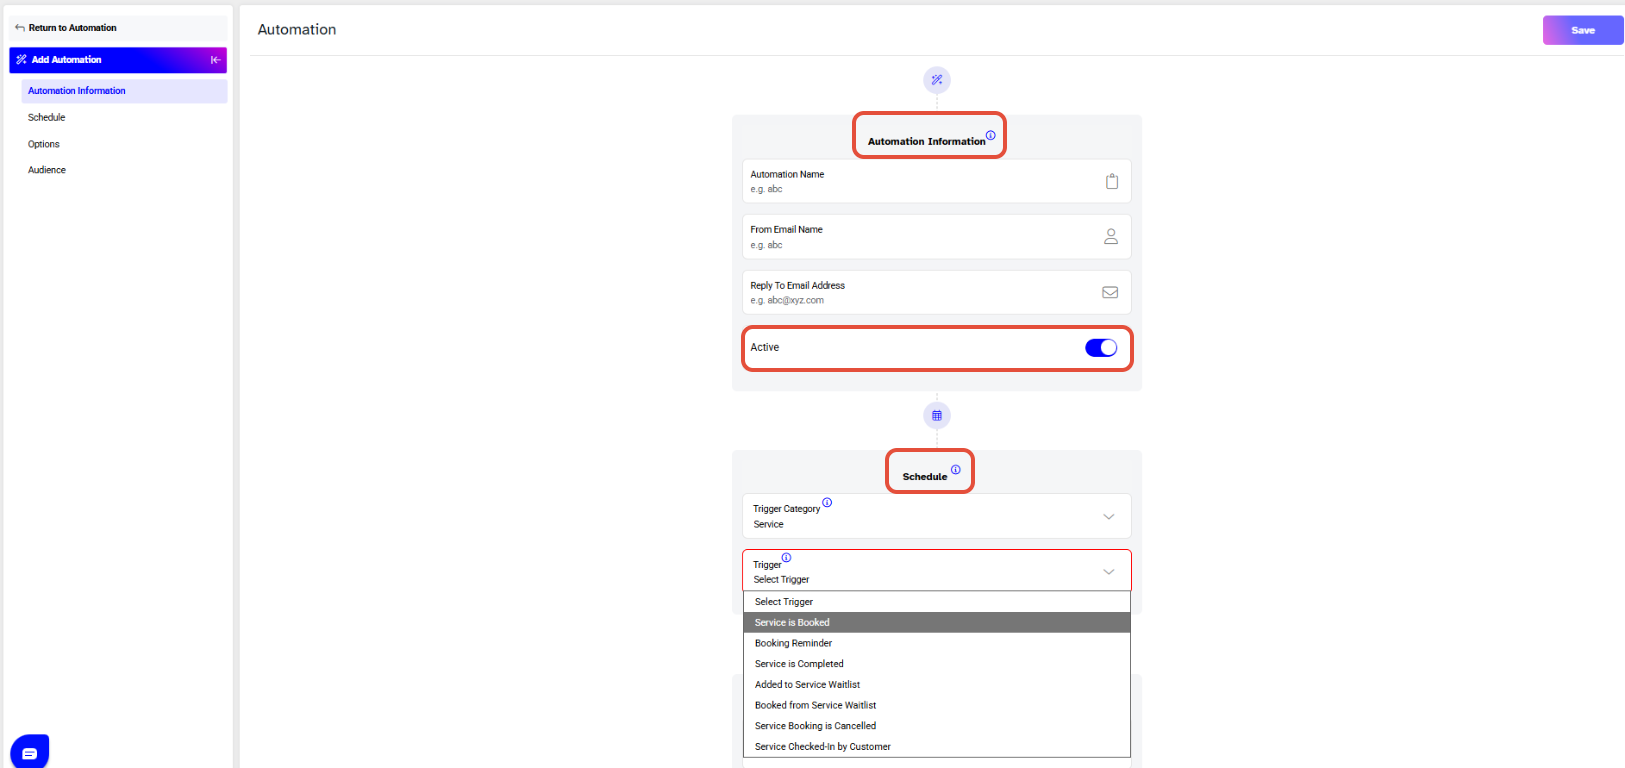
Toggle on the Active Button to Activate the Automation in the Branch.
Add Automation
- Automation Name - allocate a name for the Automation.
- From Email Name - enter a name for the email that will appear to the recipients when they will receive it.
- Reply Email Address - enter the Email address to which your recipients can respond.
Schedule
- Trigger Category - select Service from the dropdown menu.
- Trigger - select Service is Booked from the dropdown menu.
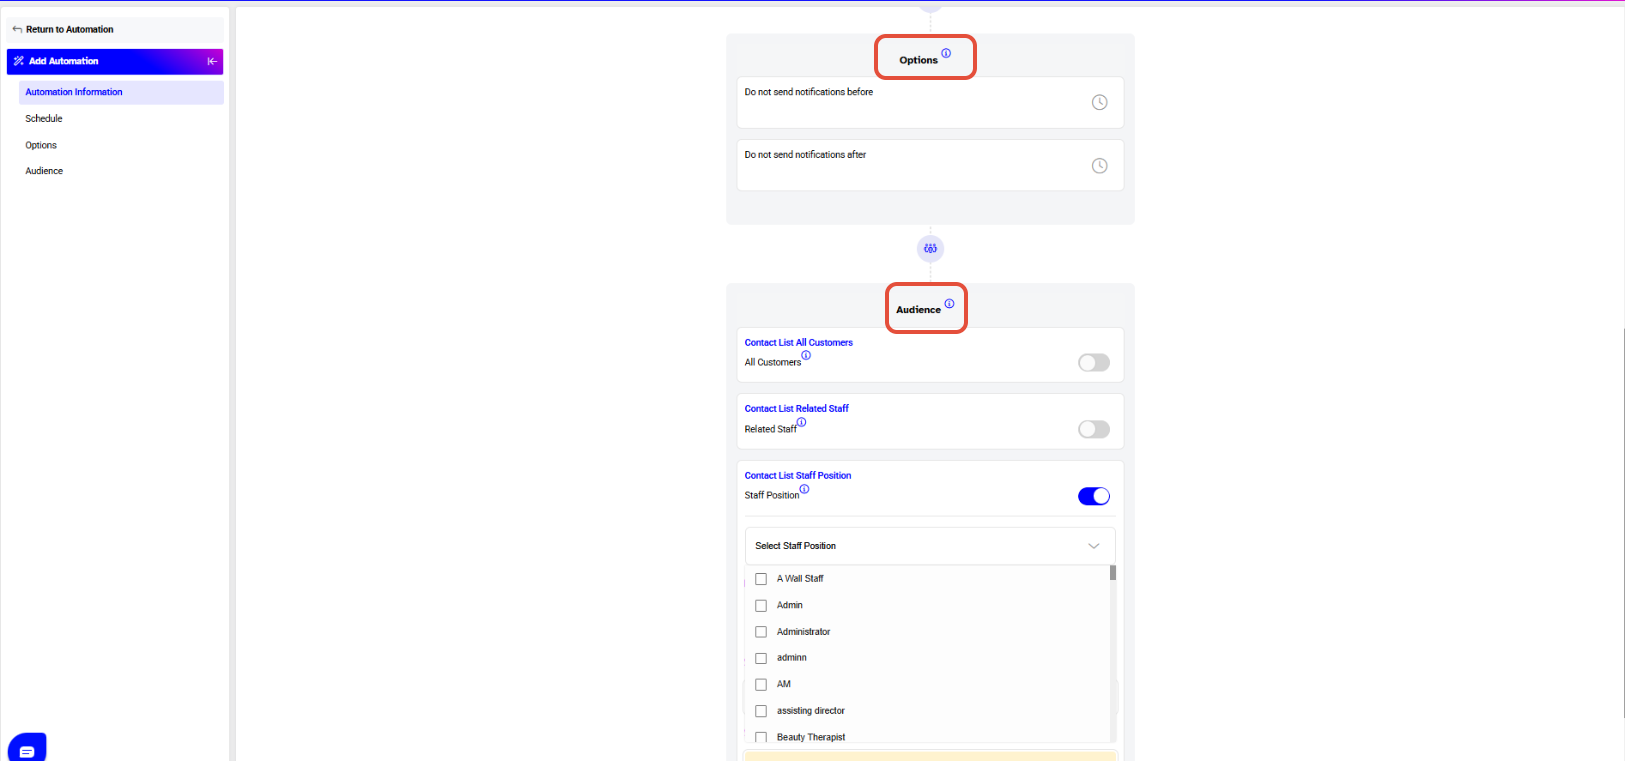
Options
- Do not send notifications before - from the dropdown menu merchants will select a time slot before which the notification will not be sent to the customer.
- Do not send notifications after - from the dropdown menu merchants will select a time slot after which the notification will not be sent to the customer.
Audience
To choose the contact type, check the box next to the option you prefer: All Customers, Related Staff, or Staff Positions.
Select the Staff Position from the dropdown menu if the Staff Position check box is checked.
The Merchants will toggle on the medium they choose through which they wish to send the Automation.
- SMS
- Notification
Once done, click on the Save Button.

An Automation Rule Saved Successfully message will appear and the new Automation can be seen under the main Automation page.