TABLE OF CONTENTS
To set up a Product Sold Automation, follow the steps below:
How To Setup A Product Sold Automation For Widget And Customer App
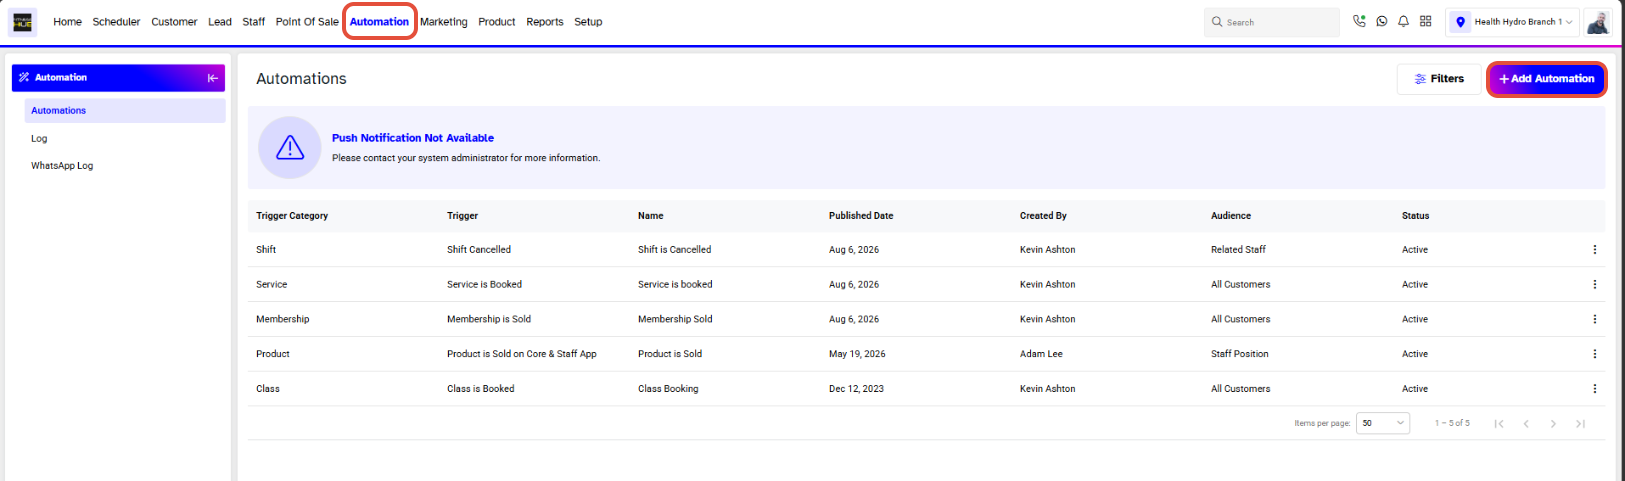
Go to the Automation Module.
Click on the Add Automation Button.
Add Automation
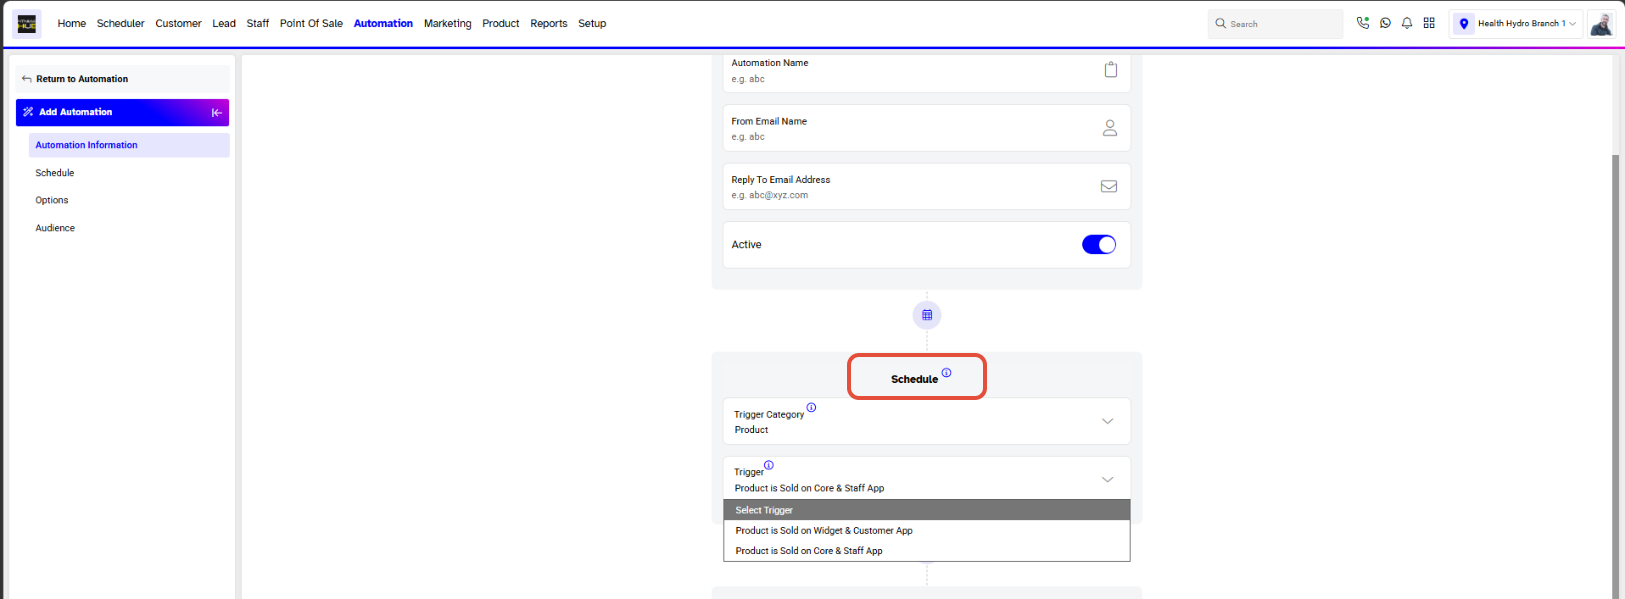
- Automation Name - Add a name for the Automation.
- From Email Name - This will act as the signature on the Email.
- Reply Email Address - Enter the Email Address that recipients can respond to.
Schedule
- Trigger Category - Select Product from the dropdown menu.
- Trigger - Select Product is Sold on Widget & Customer App from the dropdown menu.
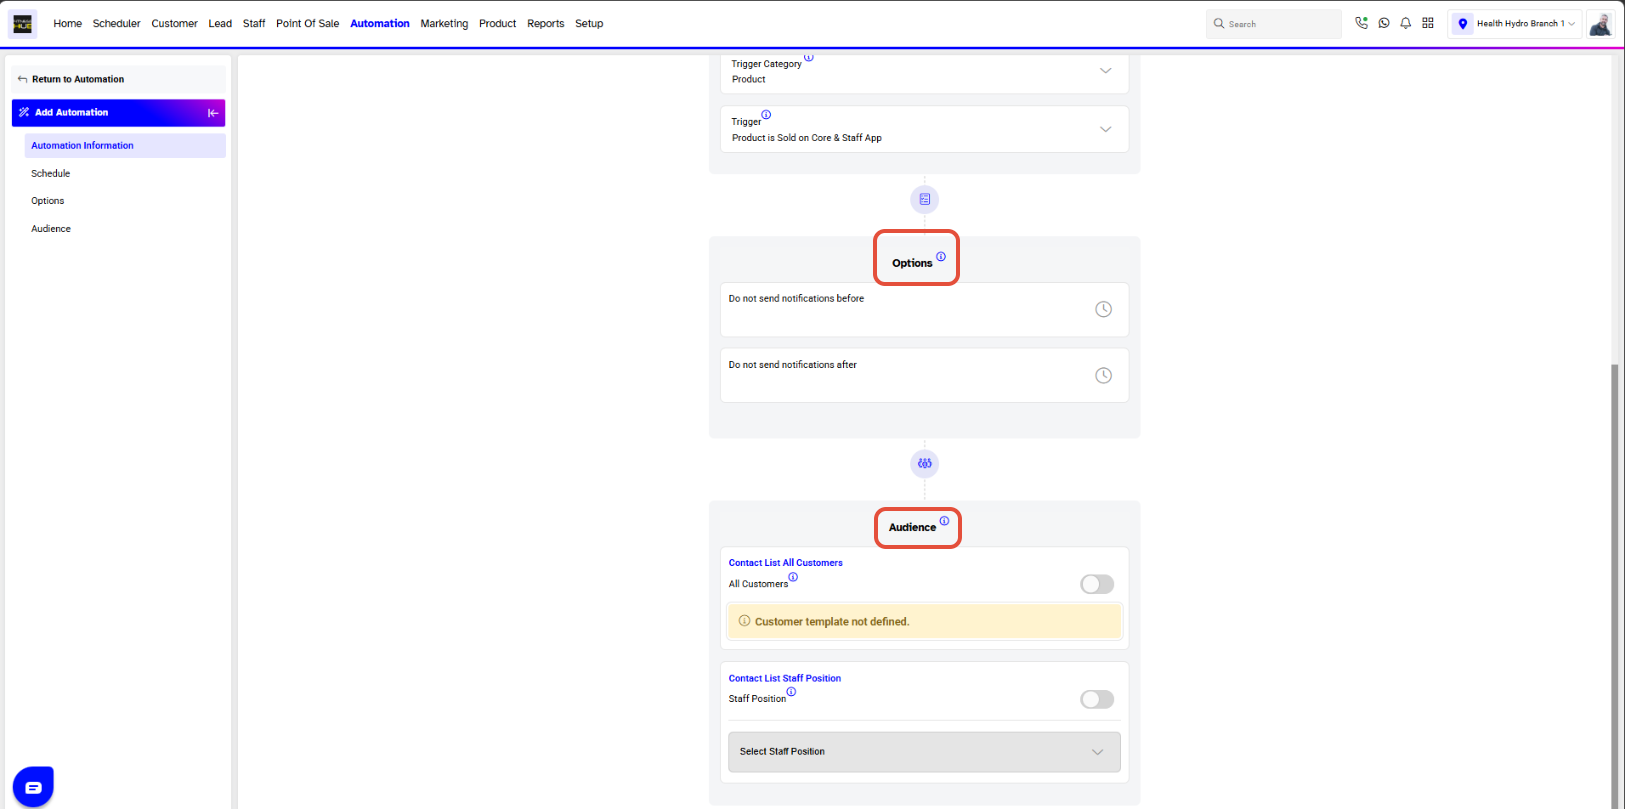
Options
- Do not send notifications before - From the dropdown menu select a time slot before which the notification will not be sent.
- Do not send notifications after - From the dropdown menu select a time slot after which the notification will not be sent.
Audience
- Contact List All Customers - Checkmark against all Customers to send the Automation to all the Customers.
- Contact List Staff Position - Checkmark against Staff Position to send the Automation to all relative Staff Members.
Once done, click on the Save Button.
A Product Sold Automation has been saved successfully message will appear on the screen.