TABLE OF CONTENTS
- Overview
- Step 1: Navigate to the Customer Module
- Step 2: Fill in Personal Information
- Step 3: Enter Home Address
- Step 4: Add Billing and Shipping Address
- Step 5: Fill in General Information
- Step 6: Set Permissions
- Step 7: Continue to Membership Setup
- Step 8: Enter Payment Details (if applicable)
- Step 9: Save the Member
Overview
This guide explains how to add a new member in Core step by step, including filling in personal, address, and membership details.
Step 1: Navigate to the Customer Module
Go to the Customer module.
- Click on the Add Member button.

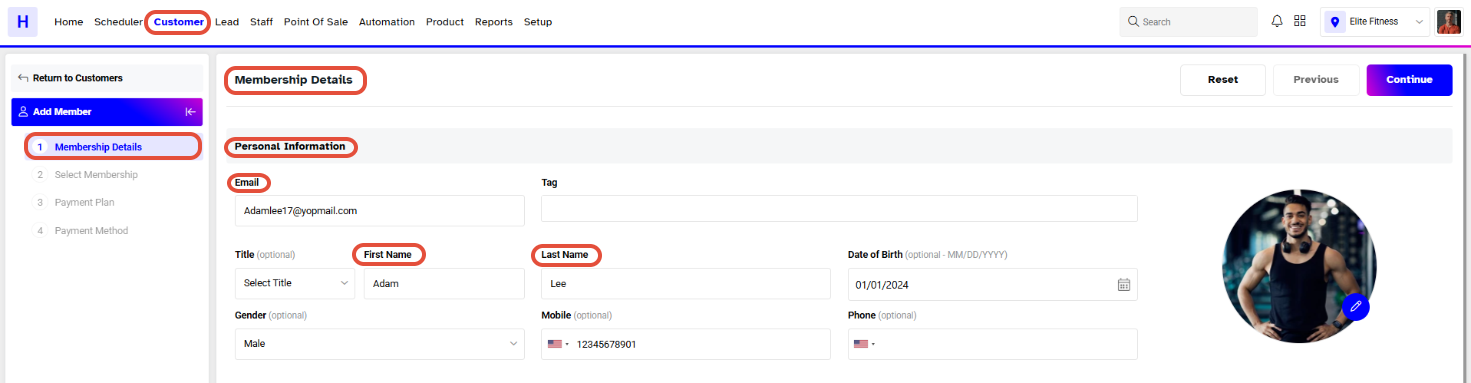
Step 2: Fill in Personal Information
The Personal Information segment includes the following fields:
Email: Enter the member’s email address (unique for every member).
Title: Select the member’s title.
First Name: Enter the first name.
Last Name: Enter the last name.
Gender: Select gender.
Date of Birth: Choose the date of birth.
Mobile: Enter the member’s mobile number.
Phone: Enter the member’s phone number.
- Upload Image: Add the member’s profile image.
Email, First Name, and Last Name are mandatory fields.
Step 3: Enter Home Address
Fill in the details under the Home Address segment:
Country
State/County
Address Line 1
Address Line 2
City
Postal Code/Zip Code

Step 4: Add Billing and Shipping Address
The Billing Address and Shipping Address sections contain the same fields as the Home Address.
To copy the Home Address details automatically, check the box “Save as Home Address.”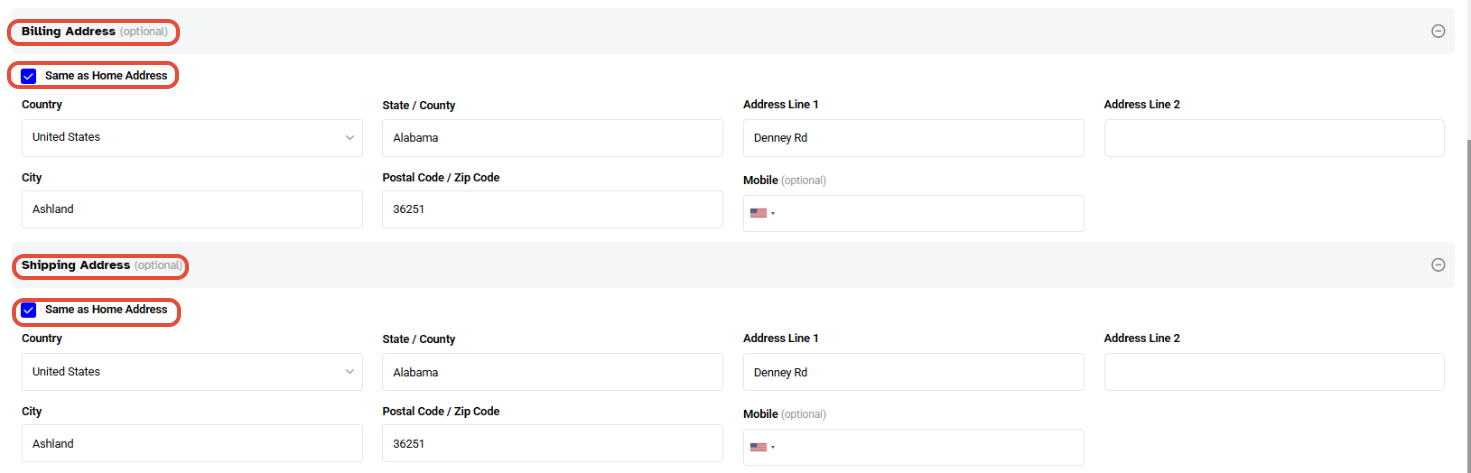
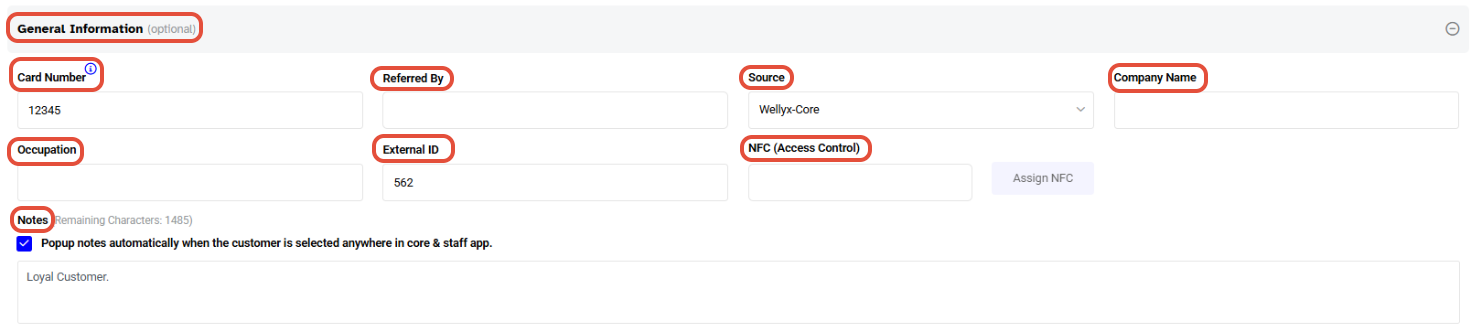
Step 5: Fill in General Information
Enter the following details under General Information:
Card Number: Member’s card number (if assigned).
Referred By: Name of the person who referred the member.
Source: Select the source from the dropdown list.
Company Name: Enter the company name.
Designation: Enter the designation.
NFC (Access Control): Assign NFC if using access control.
Notes: Add any relevant notes about the member.
Step 6: Set Permissions & Communication
Toggle ON the required permissions and communication for the member as per their access needs.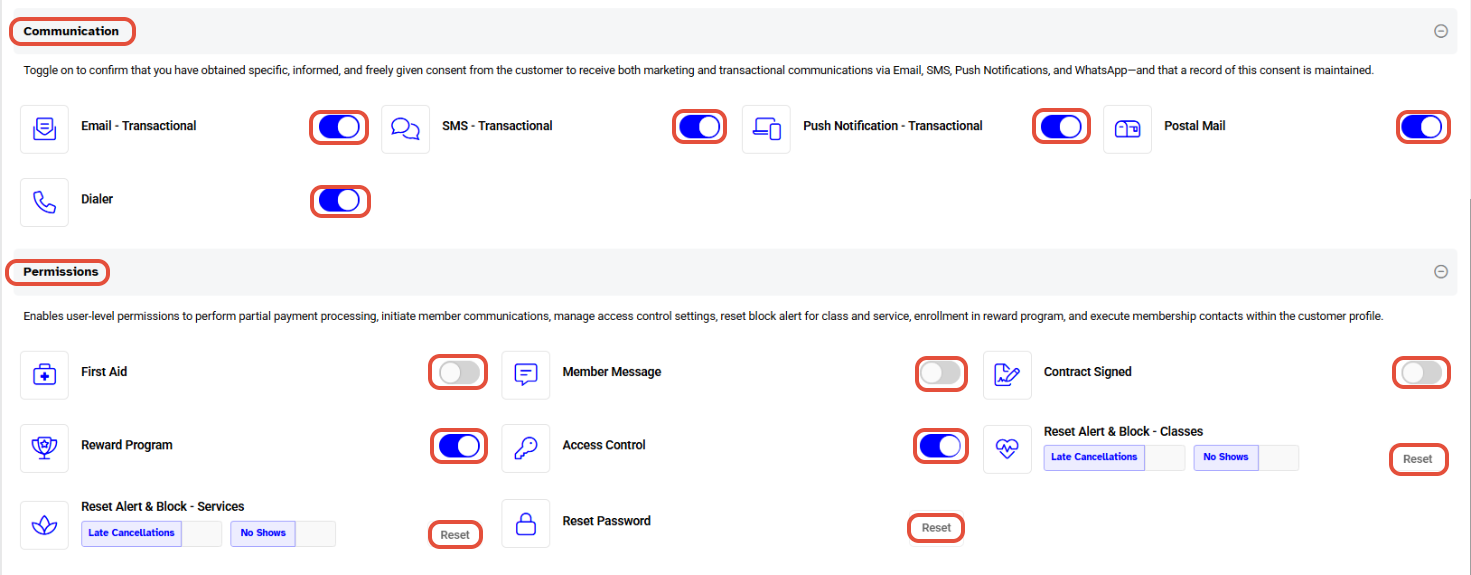
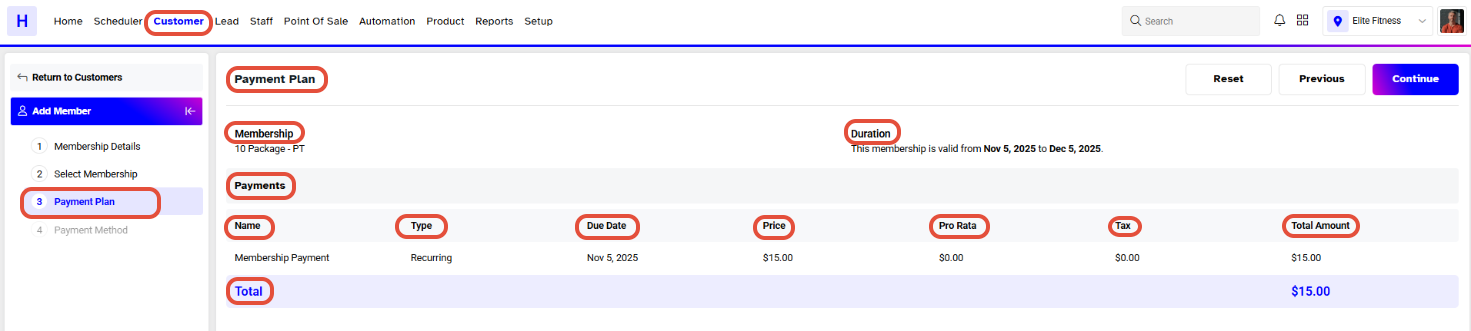
Step 7: Continue to Membership Setup
Click on Continue to proceed to the Select Membership section.
Fill in the following details:
Membership: Choose a membership from the dropdown list.
Start Date: Select the start date of the membership.
Payment Method: Choose between Cash, Stripe, or Direct Debit.
Collection Date: Specify the payment collection date.
Click Continue once done.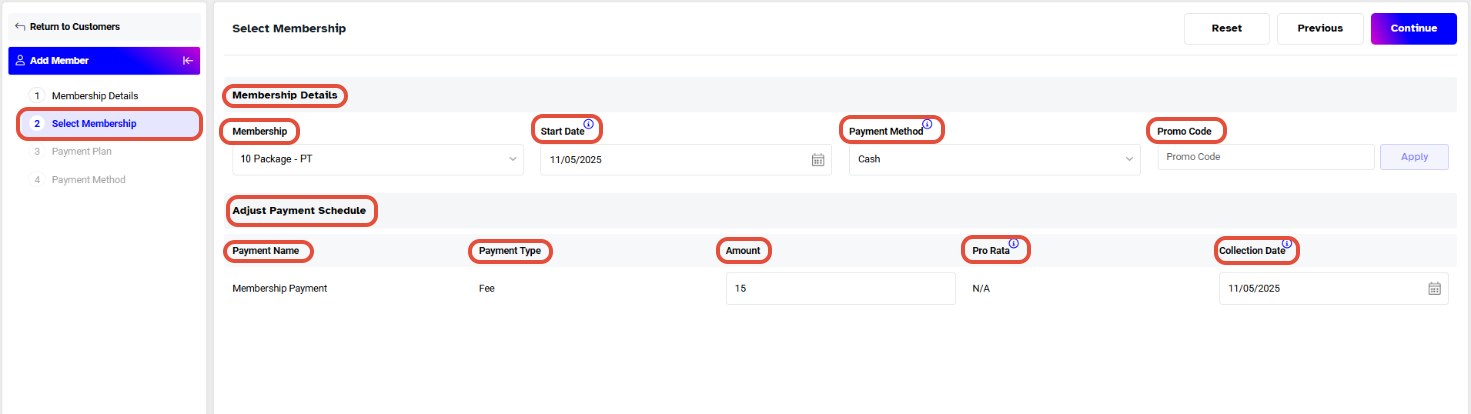
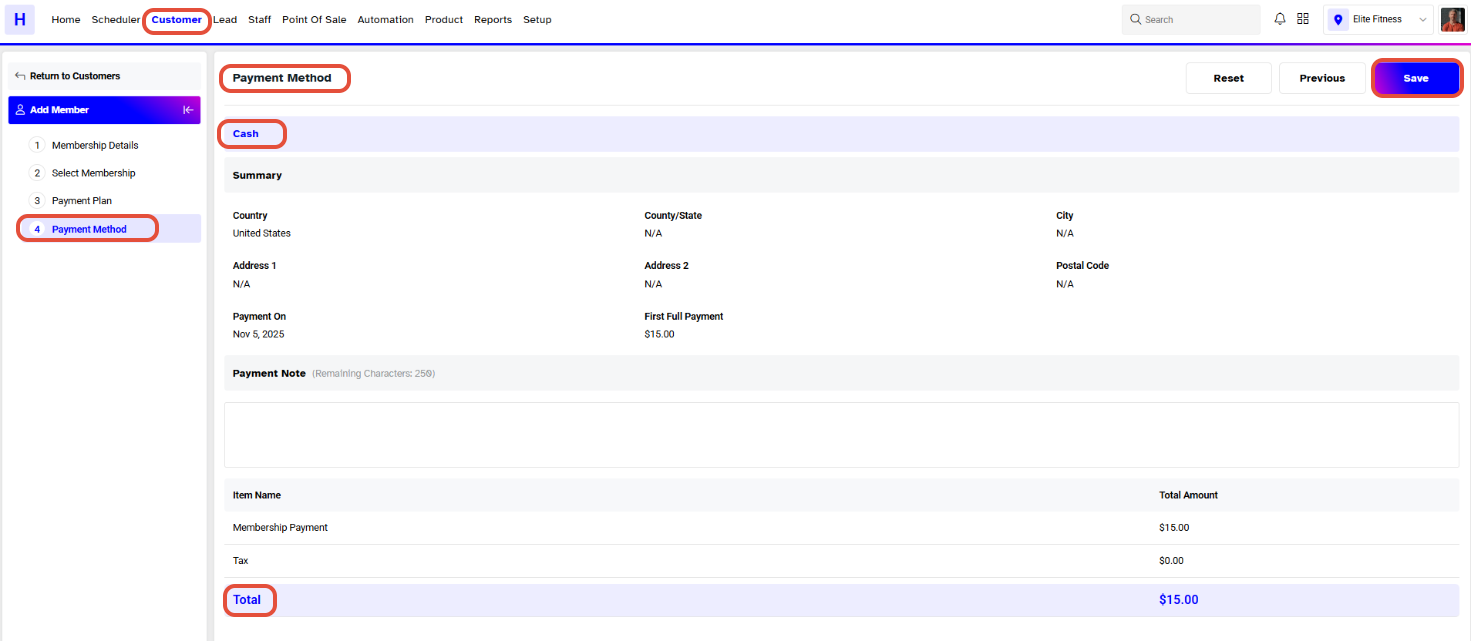
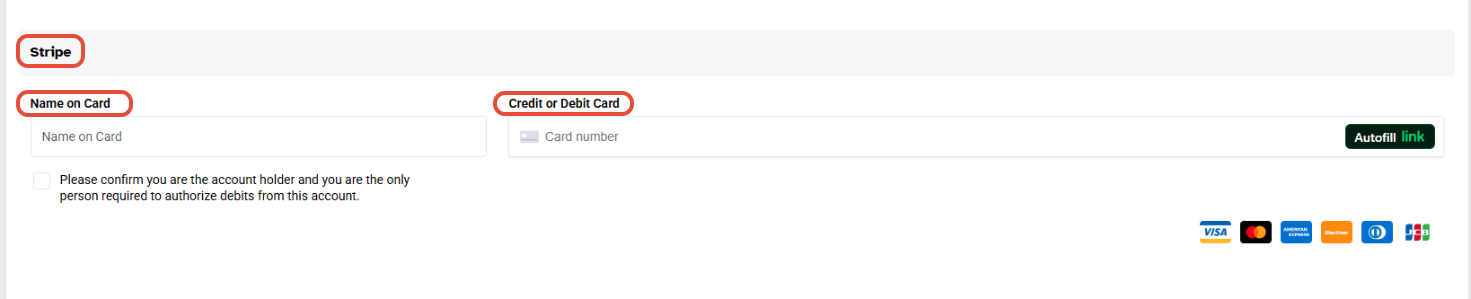
Step 8: Enter Payment Details (if applicable)
If Stripe is selected as the payment method:
Enter the card details.
Confirm the payment plan.
Click Continue to move forward.
Step 9: Save the Member
In the Payment Method section:
Review all payment details.
Click Save to complete the process.
The member will now be successfully added to the Wellyx syetem.