TABLE OF CONTENTS
- Step 1: Navigate to Memberships
- Step 2: Enter Package Information
- Step 3: Configure Package Settings
- Step 5: Configure Package Payments
- Step 6: Configure Single Payment
- Step 7: Configure Recurring Payment
- Step 8: Configure Package Benefits
- Step 9: Configure Branches
Overview
This guide explains how to create a Package in Core. It covers configuring package settings, entering package information, setting up single or recurring payments, adding package benefits, and assigning the package to branches.
Step 1: Navigate to Memberships
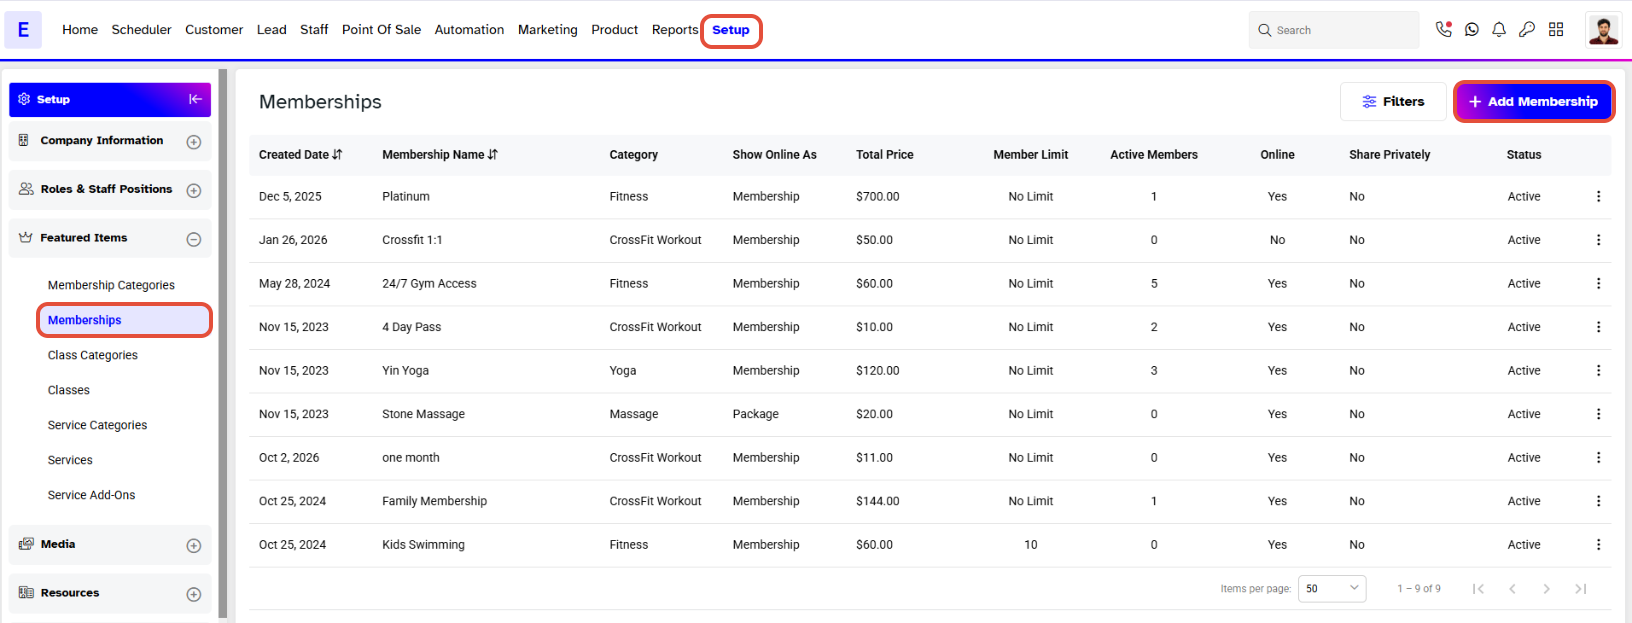
Go to the Setup Module in Core.
Click on the Memberships Tab.
Click on the Add Membership Button to create a new package.
Step 2: Enter Package Information
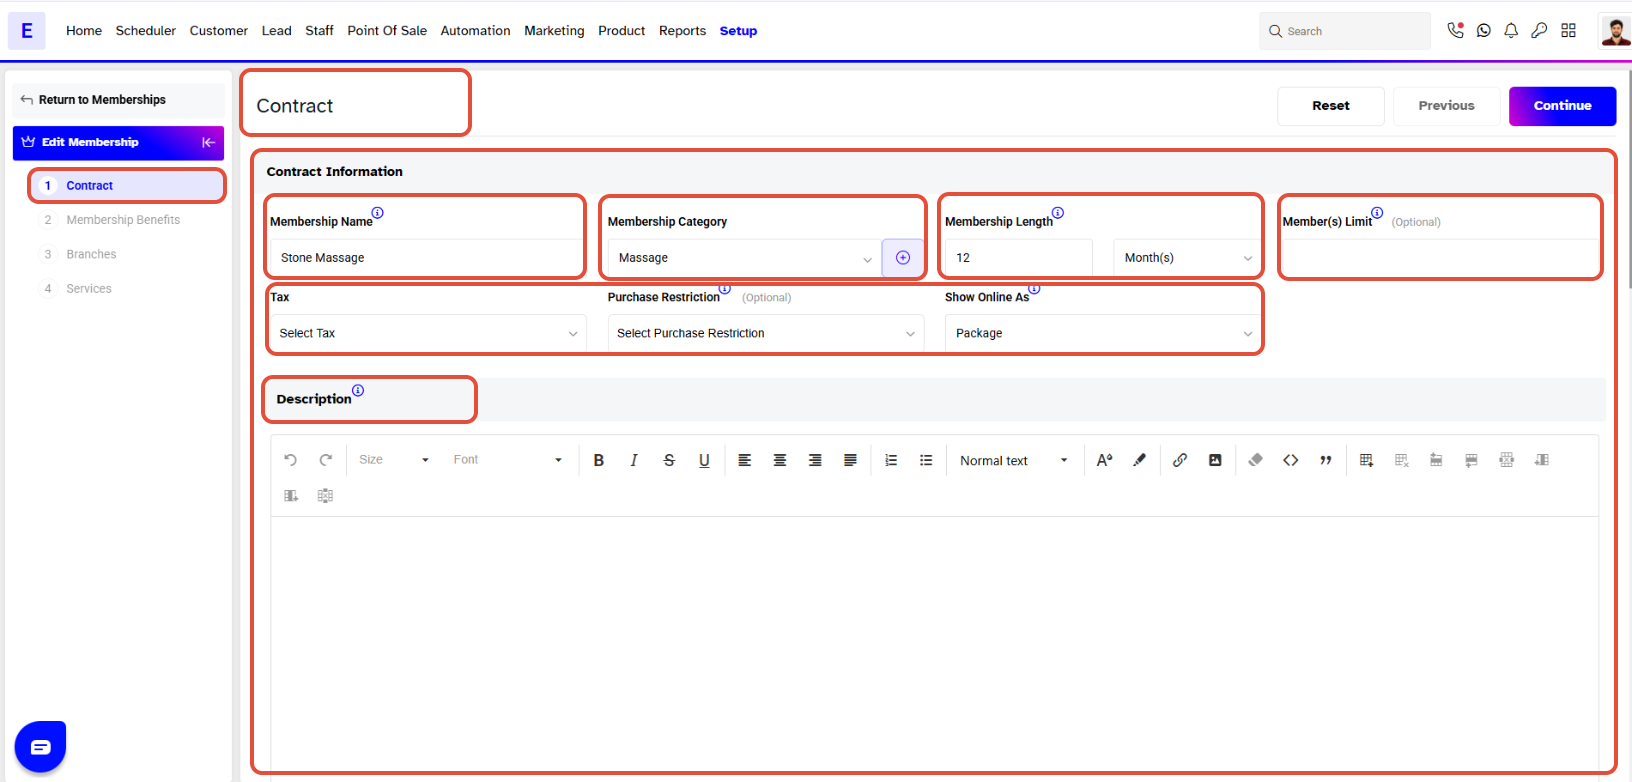
In the Package Information section, complete the following fields:
Membership Name: Enter the Package name in the Membership Name Box.
Package Category: Choose a category from the pre-existing Categories.
Show Online As: Set the option to Package.
Package Length: Enter the Package Length in the Memberships Length Field and select the period from the Dropdown Menu:
Day(s)
Week(s)
Month(s)
Quarter(s)
Year(s)
Members Limit: Specify the number of Members that can be allocated to the Package.
Member Limit, Tax, and Purchase Restriction: These are optional fields.
Description: Enter a Package description of up to 450 characters.
Step 3: Configure Package Settings
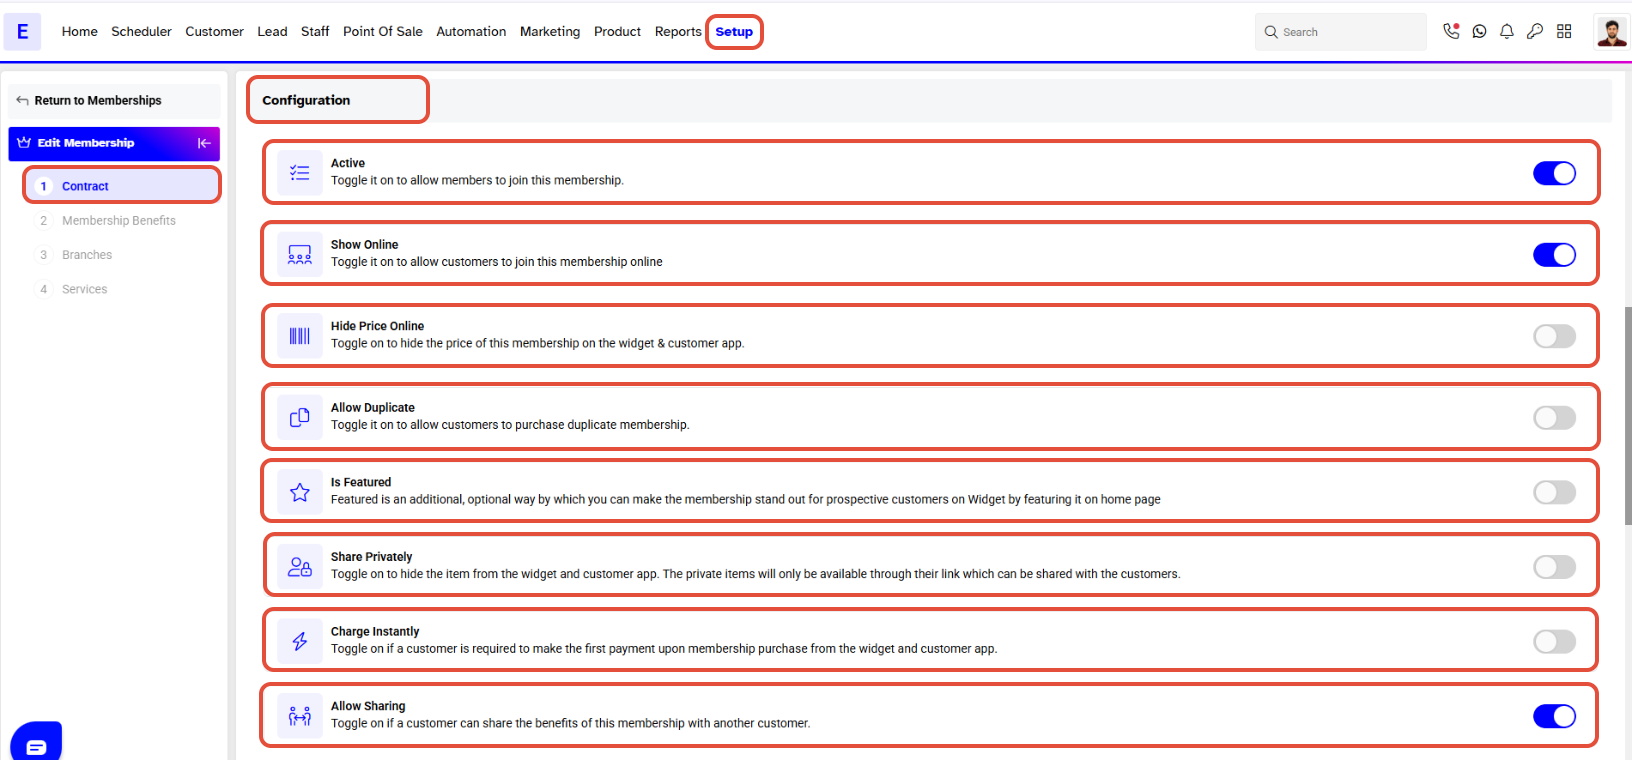
In the Contract section, configure the following toggles:
Active Toggle: Activate or deactivate the Package.
Show Online Toggle: Allow Customers to join the Package through the Widget and App.
Hide Price Online Toggle: Hide the Package price from Customers on the Widget and App.
Allow Duplicate Toggle: Allow Customers to purchase the same Package more than once at the same time.
Is Featured Toggle: Feature the Package on the Widget and App Home Page to make it stand out to prospective Customers.
Charge Instantly Toggle: Charge the first payment when the Package is purchased through the Widget and Customer App.
Member Limit, Tax and Purchase Restriction are optional fields for creating a Package.
Step 5: Configure Package Payments
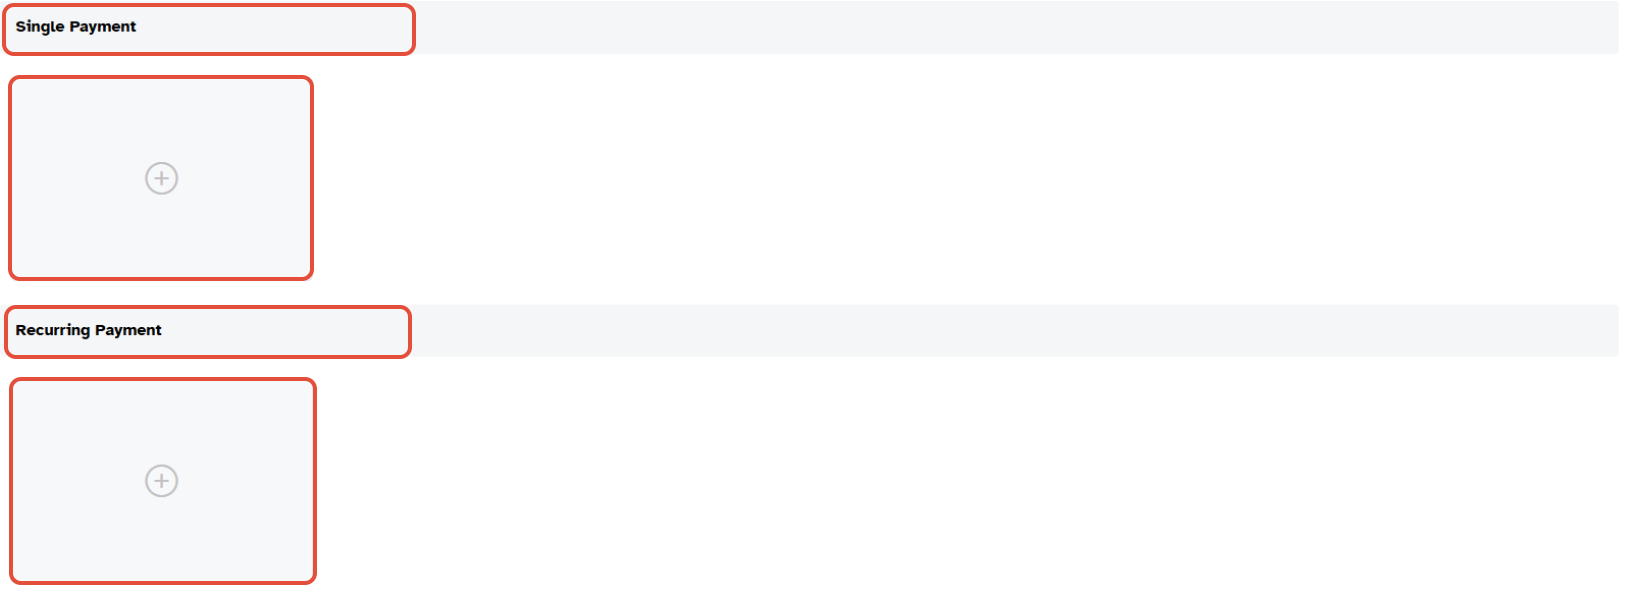
There are two types of Package Payments:
Single Payment: A one-time payment for a Package.
Recurring Payment: A payment arrangement based on selected intervals.
Step 6: Configure Single Payment
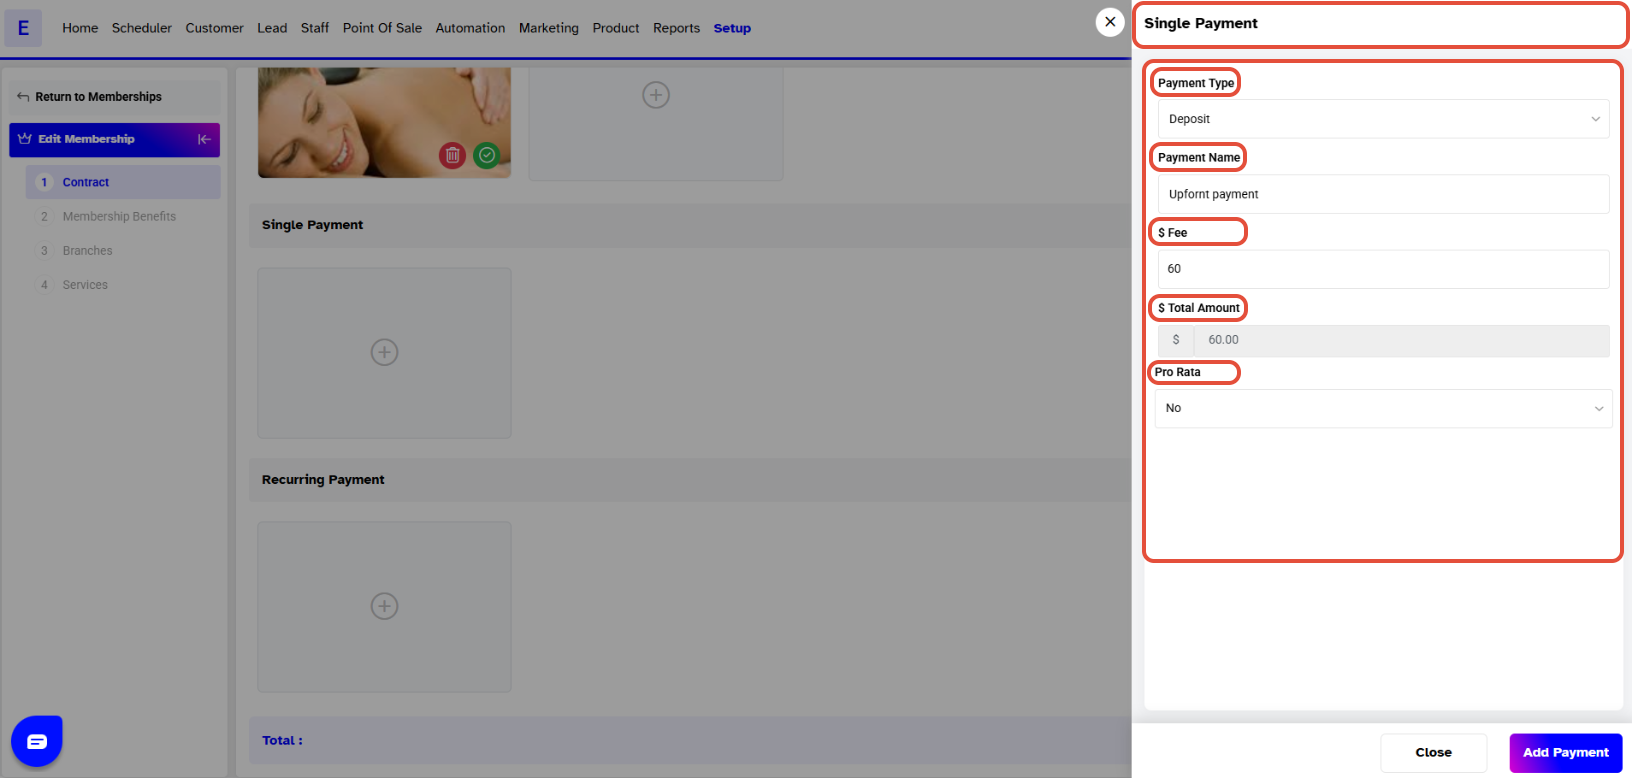
To add a Single Payment Package:
Click on the Add New Payment Button.
Select the Payment Type:
Deposit
Member Payment
Enter the Payment Name.
Set the Fee for the Package.
The Total Amount will display the Package Fee, including Tax (if any).
Pro-Rata: This is an optional checkbox defined by the usage of the Package and rolling it over into the following month, before any payment has been generated.
A Single Payment can be added more than once.
Step 7: Configure Recurring Payment
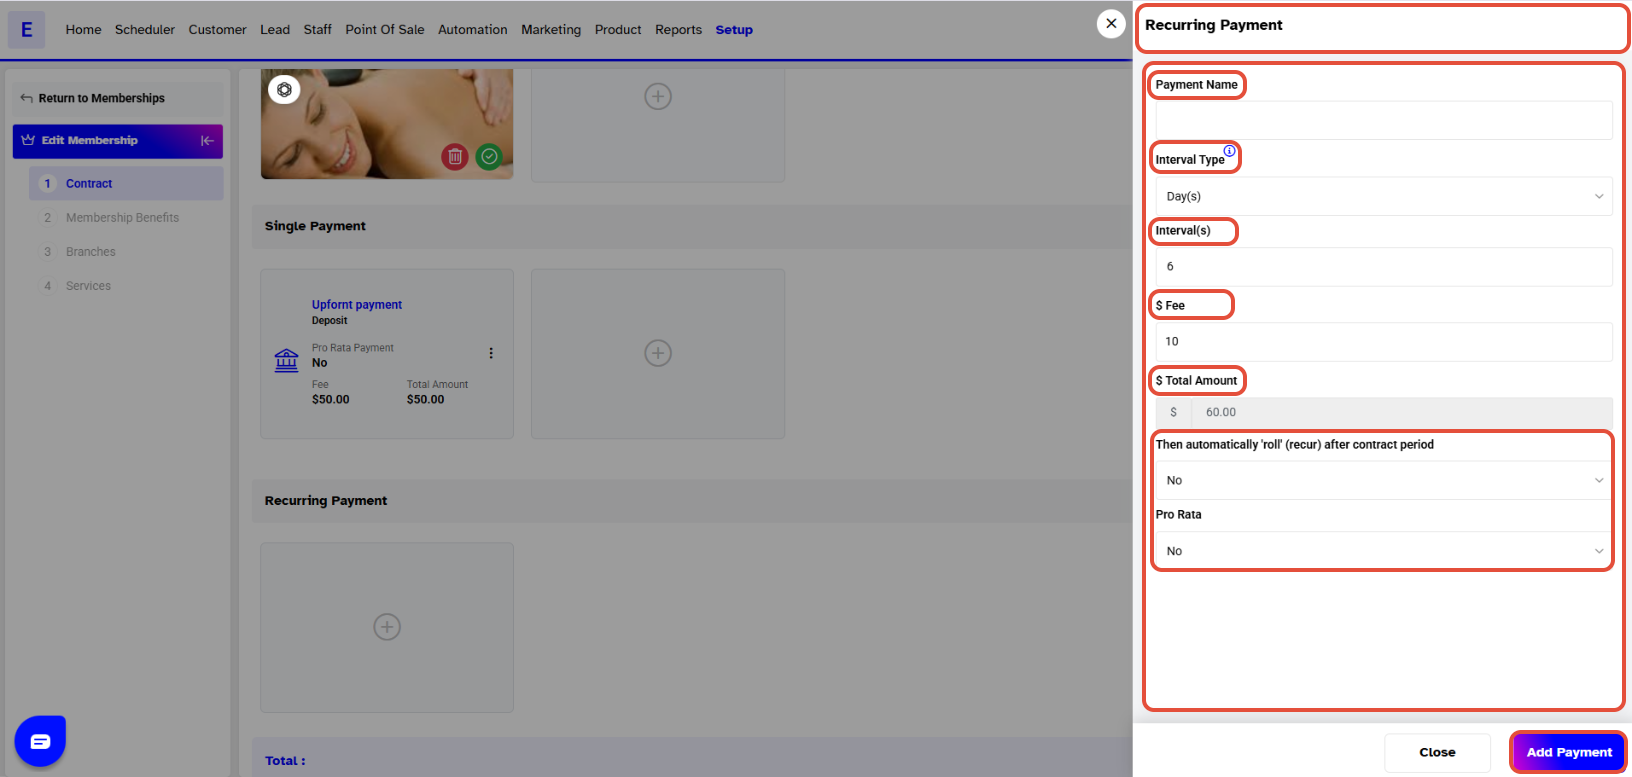
To set up a Recurring Payment:
Enter the Recurring Payment Name in the Name Box.
Select the Interval Type from the Dropdown Menu:
Day(s)
Week(s)
Bi-week(s)
Month(s)
Six Month(s)
Quarter(s)
Year(s)
Enter the Number of Intervals.
Choose the Date or Day according to the selected Interval Type.
Set the Fee for the Package.
The Total Amount will display the sum of all Package Intervals, including Tax (if any).
Select the Automatically Roll Checkbox if the Package should automatically renew once it expires.
Pro-Rata: This is an optional checkbox defined by the usage of the Package and rolling it over into the following month, before any payment has been generated.
Click on the Continue Button to move to Package Benefits.
Step 8: Configure Package Benefits
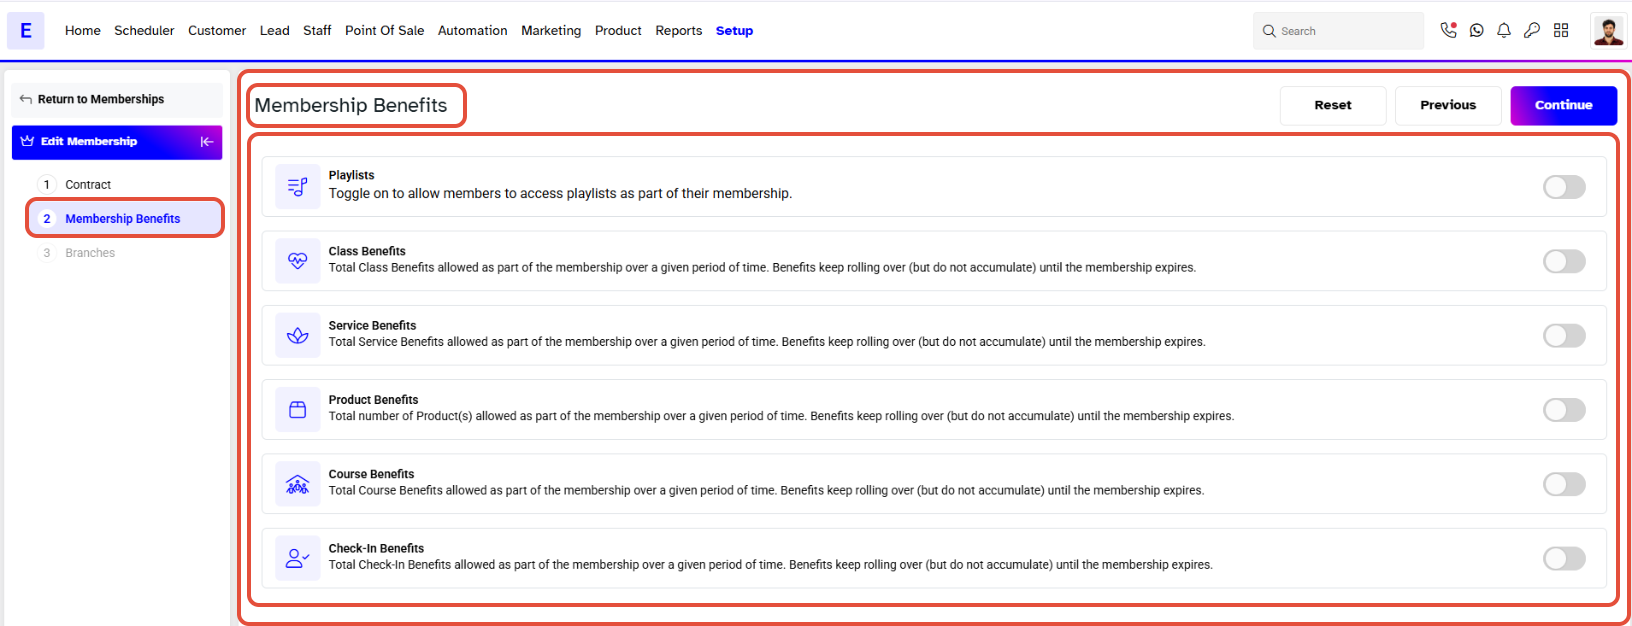
Configure the available benefits by toggling on the relevant options:
Class Benefits: Toggle on to add Classes to the Package.
Service Sessions: Toggle on to add Services to the Package.
Product Benefits: Toggle on to provide Product Benefits, defining the total number of Products allowed as part of the Package over a given period.
Playlist Benefits: Toggle on to add Playlists to the Package.
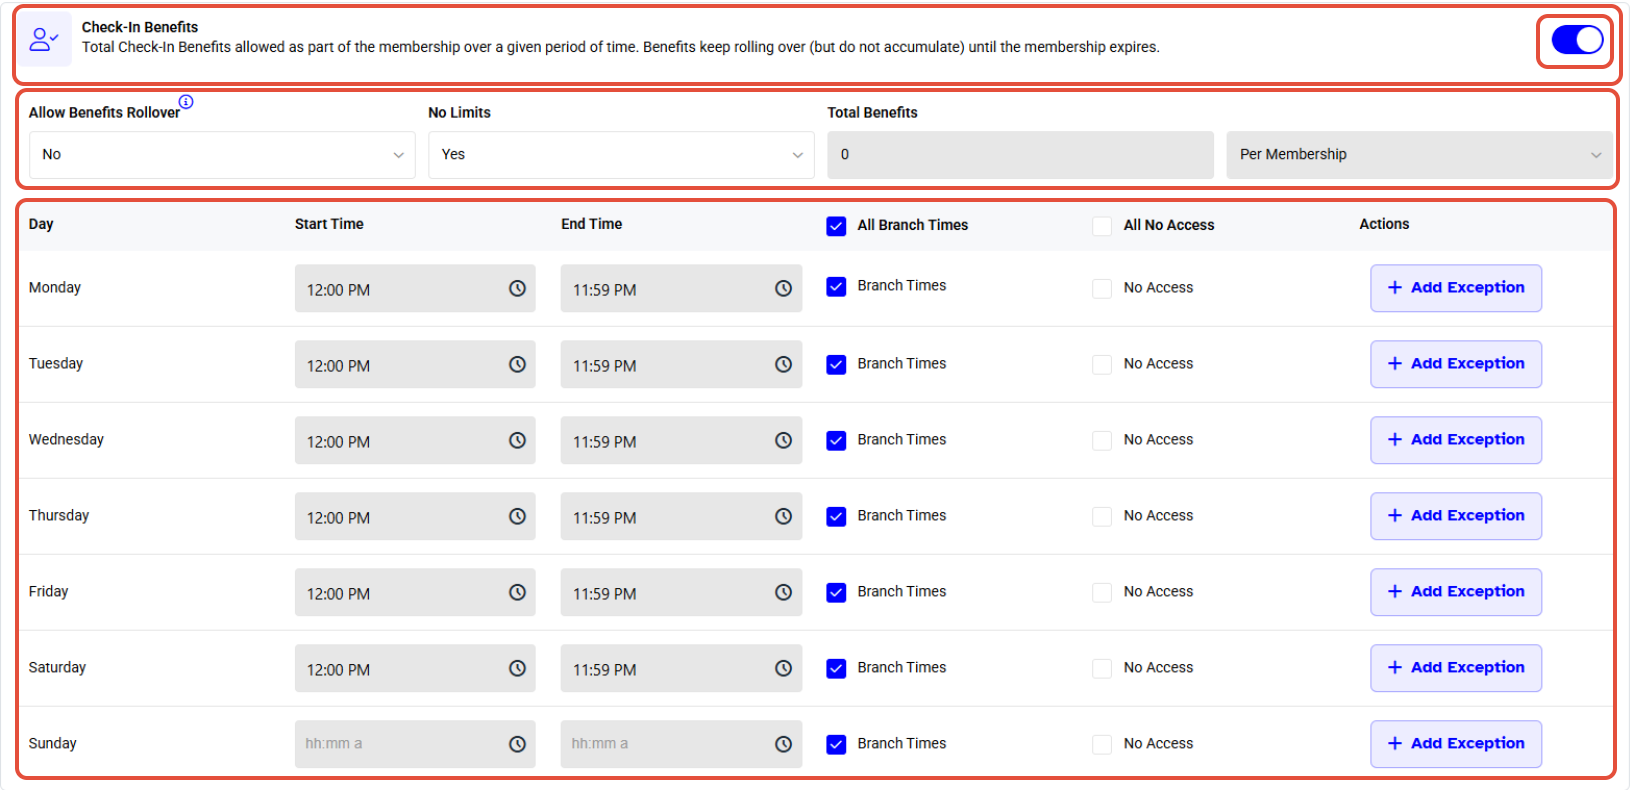
Check-In Benefits: Toggle on to activate Check-In Benefits.
Course Benefits: Toggle on to add Courses to the Package.
Additional benefit settings:
No Limits: Check this box to provide Unlimited Benefits to Customers through the Package.
To manually adjust the Benefits, uncheck the No Limits box.
Allow Benefits Rollover: Check this box to roll over the Package Check-In, Product, Service, and Class Benefits.
Set the Benefits time by either checking All Branch Time or setting a Default Timing manually.
When Class Benefits, Service Benefits, or Product Benefits are toggled on, their respective sections will appear on the screen to add Classes, Services, or Products.
Step 9: Configure Branches
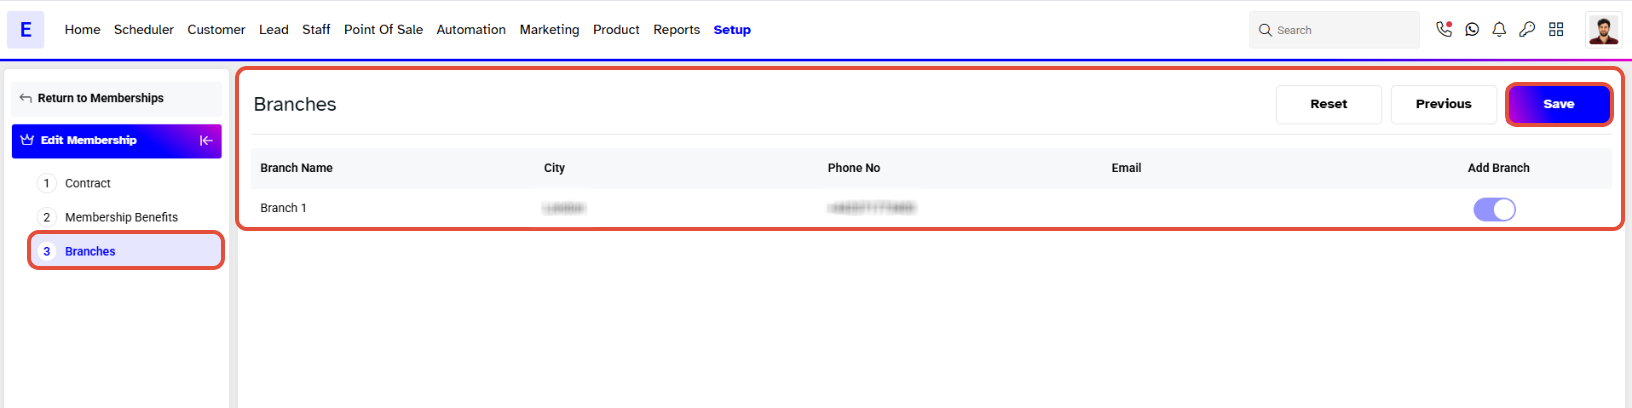
In the Branches section, the Package is assigned by default to the Branch where it is created.
To add the Package to multiple Branches, toggle on the option under Actions against the relevant
Once all the required information and settings have been configured, click on the Save Button.