


TABLE OF CONTENTS
- Overview
- Step 1: Navigate to Waitlist Configurations
- Step 2: Enable Class Waitlist
- Step 3: Configure Waitlist Options
- Step 4: Enable Waitlists Online
- Step 5: Set Notifications
- Step 6: Save Configurations
Overview
This guide explains how to configure class waitlist settings in Core, covering general waitlist options, online waitlist management, and notification preferences.
Step 1: Navigate to Waitlist Configurations
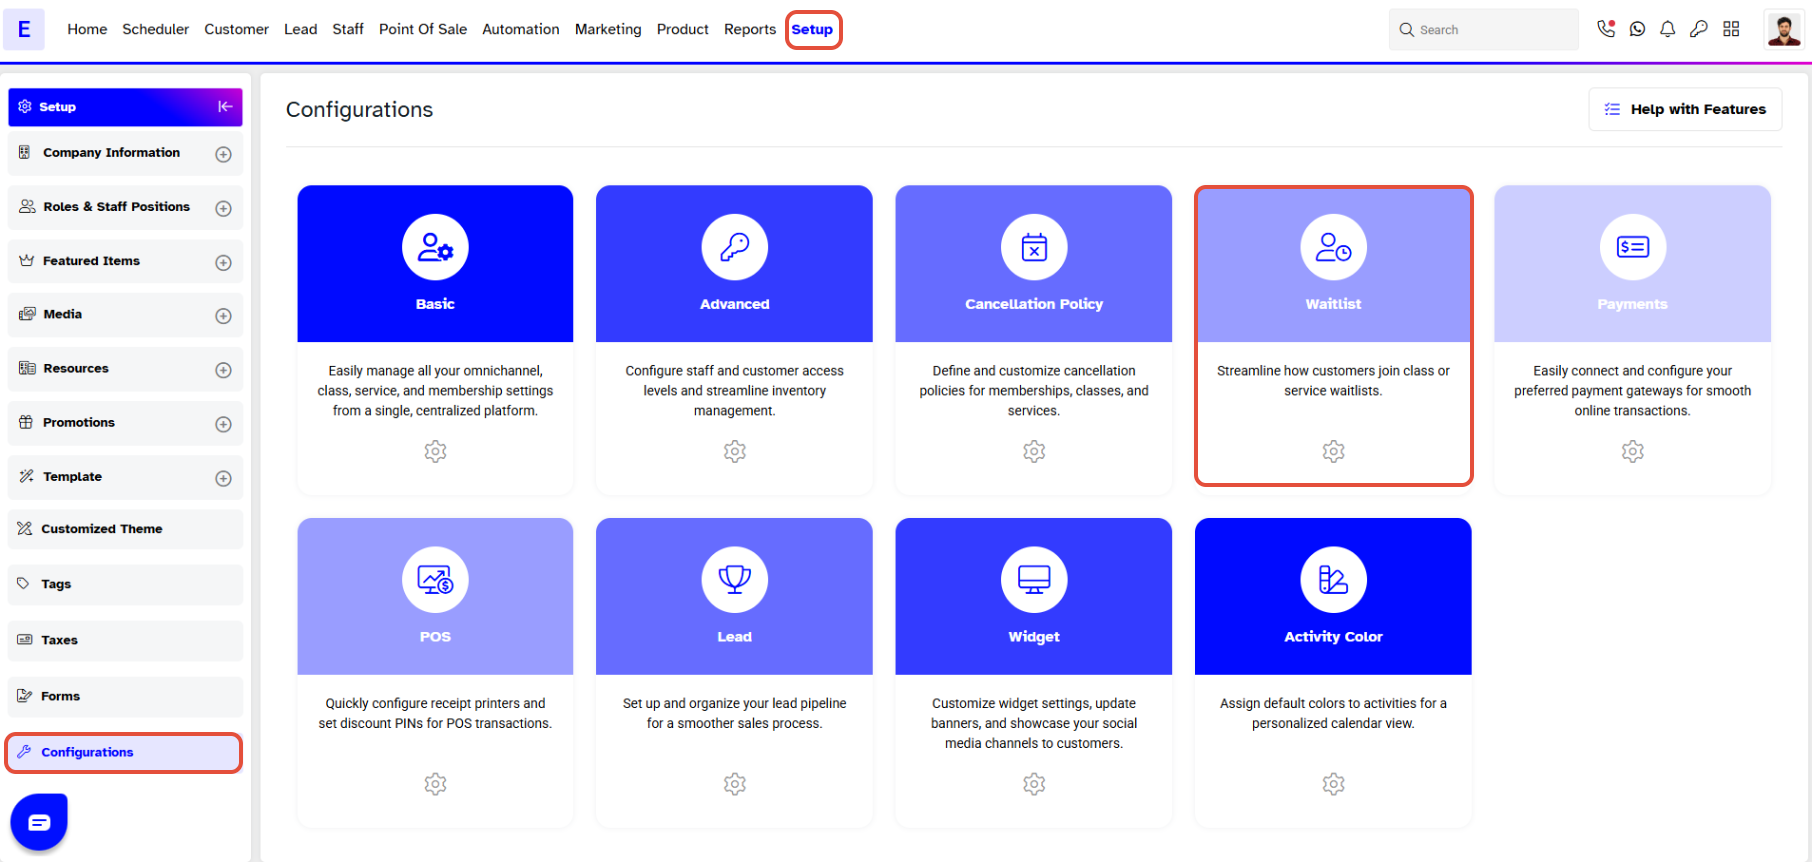
- Go to the Setup Module.
- Click on the Configurations Segment.
- Select Waitlist to access the settings for the Waitlist Configurations.
Step 2: Enable Class Waitlist
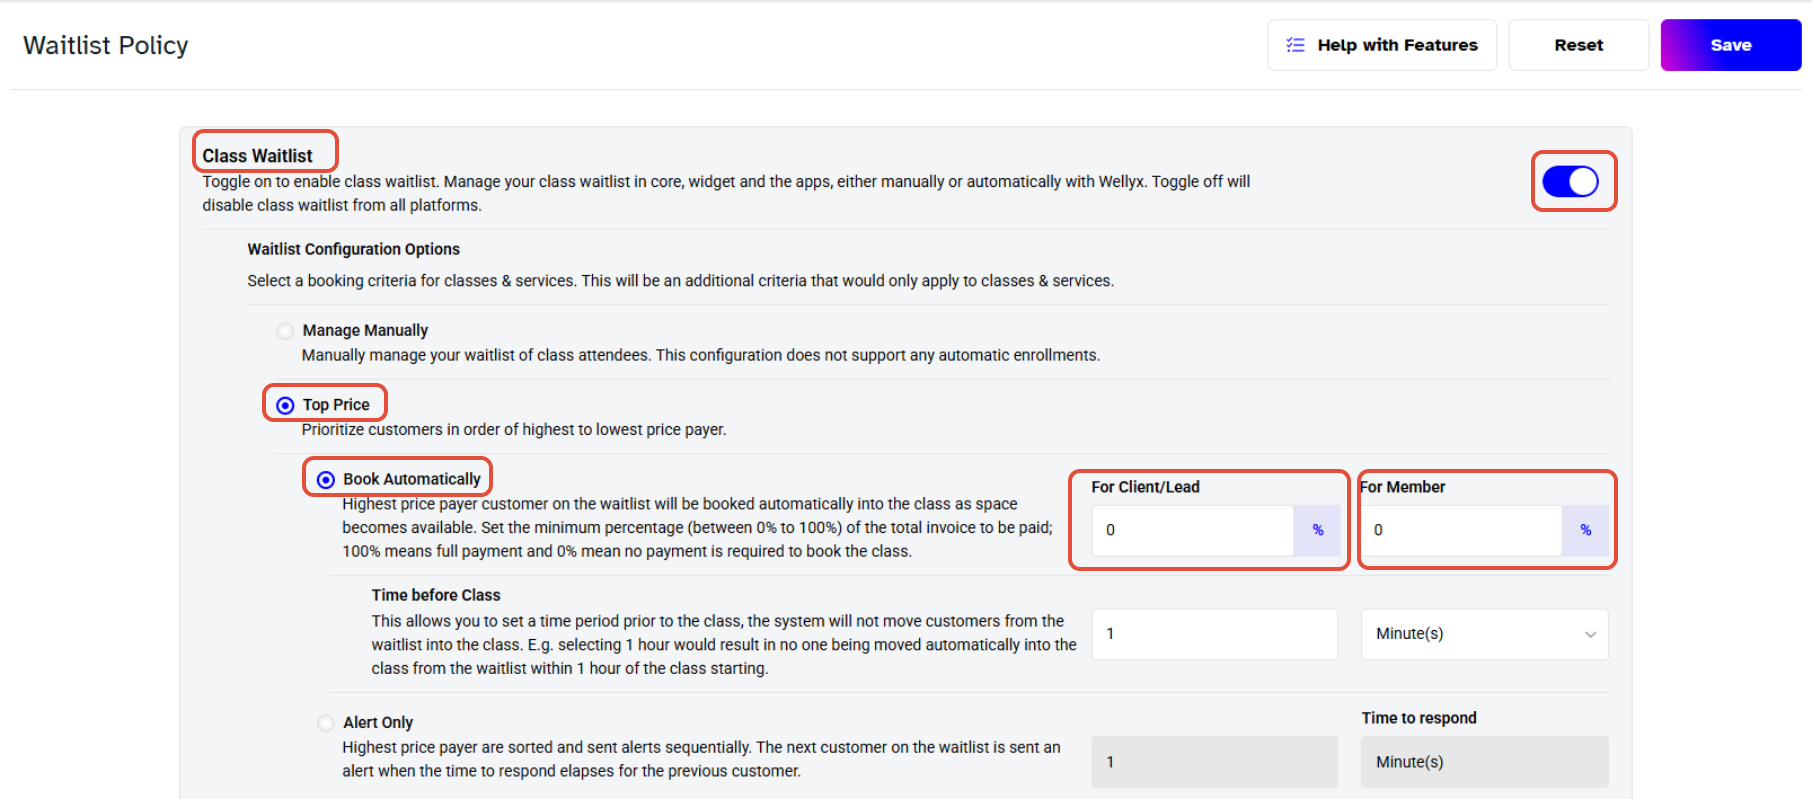
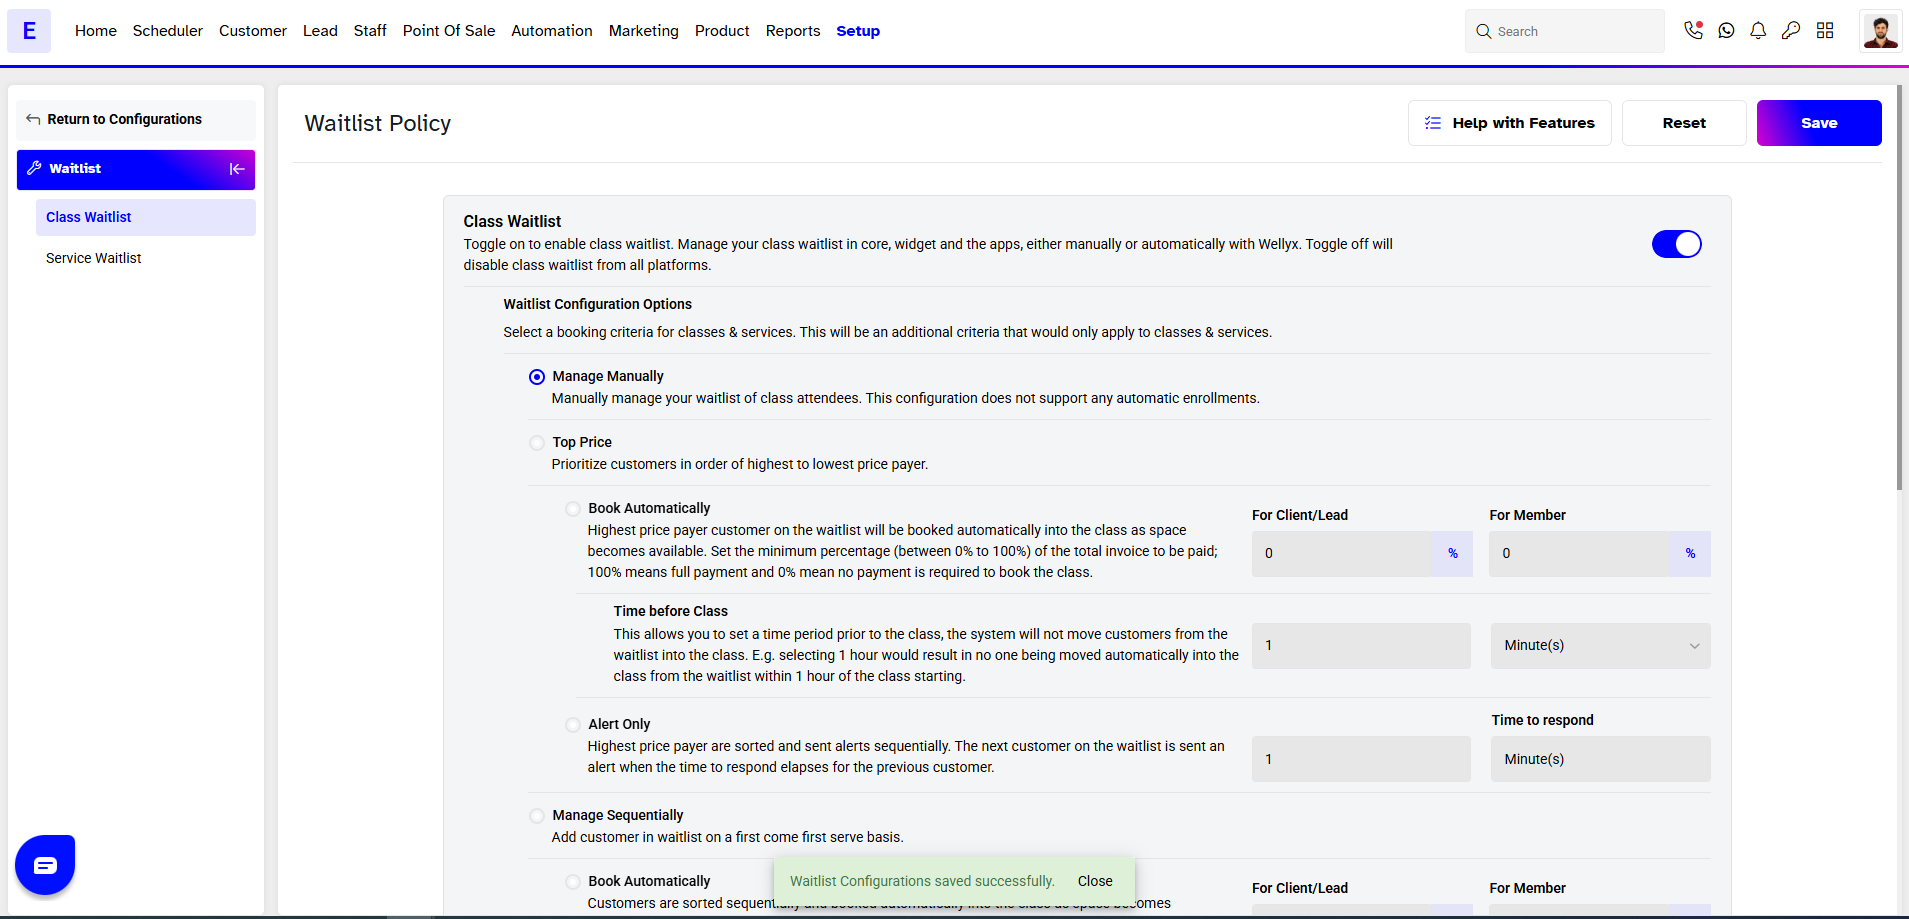
- Toggle ON Class Waitlist to enable a class waitlist.
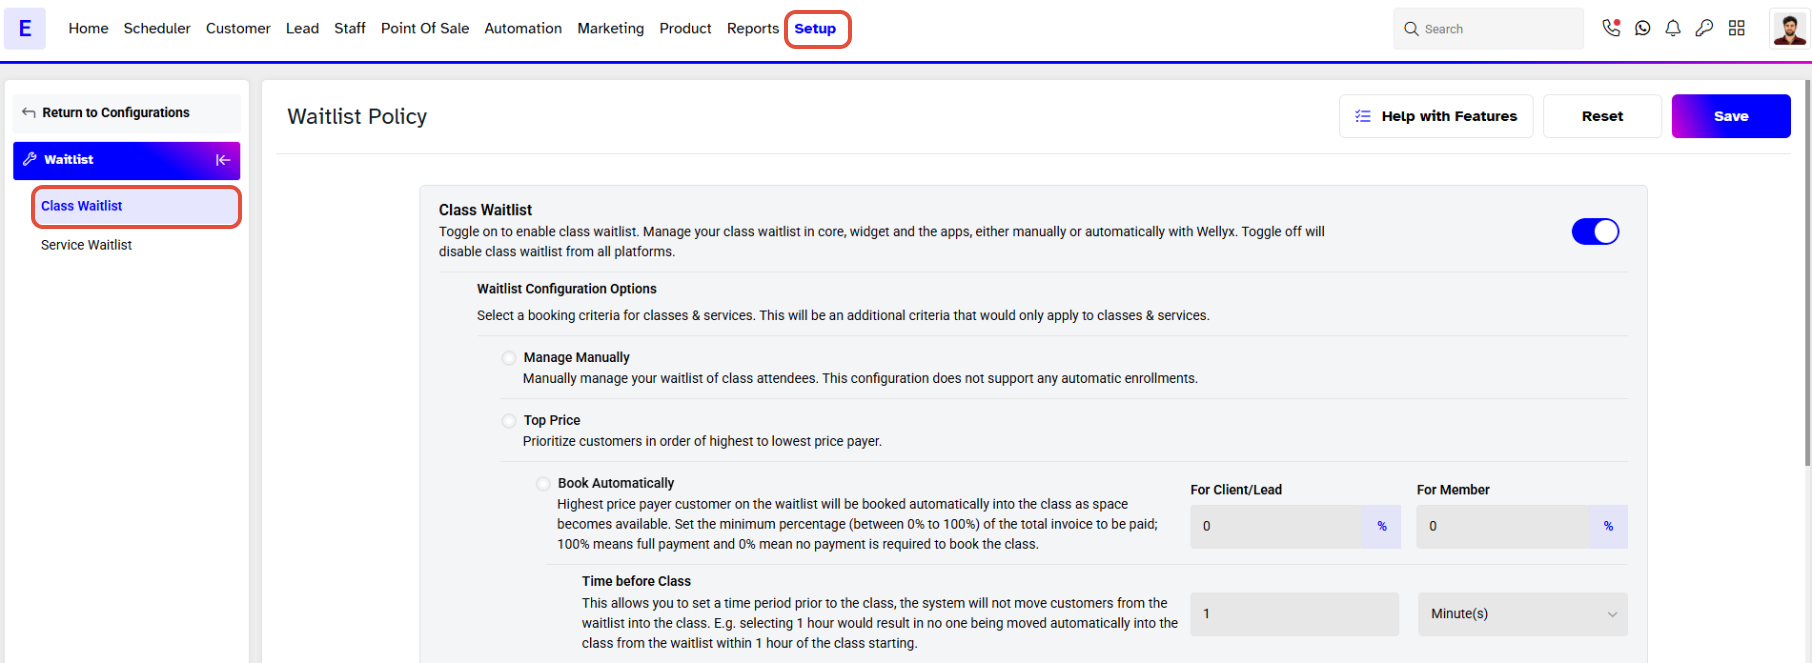
Merchants have the option of either manually handling their class waitlists or automatically.
Step 3: Configure Waitlist Options
Under Waitlist Configuration Options, select one of the following:
Manage Manually
Manually manage your waitlist of class attendees. This configuration does not support any automatic enrollments.
Top Price
- Rank Customers in order of highest to lowest price payer.
Book Automatically
- The highest price paying Customer on the waitlist will be booked automatically into the class as space becomes available. Establish the minimum percentage (between 0% to 100%) of the total invoice to be paid.
Time Before Class
- Set a time period prior to the Class. The system will not move customers from the waitlist into the class within this time. For example, selecting 1 hour would result in no one being moved automatically into the Class from the Waitlist within 1 hour of the class start.
Alert Only
- The highest price paying Customers are sorted and sent alerts sequentially. The next Customer on the waitlist is sent an alert when the time to respond elapses for the previous customer.
When setting Booking percentages a 100% would indicate a full payment and 0% would mean no payment is required to book the class.
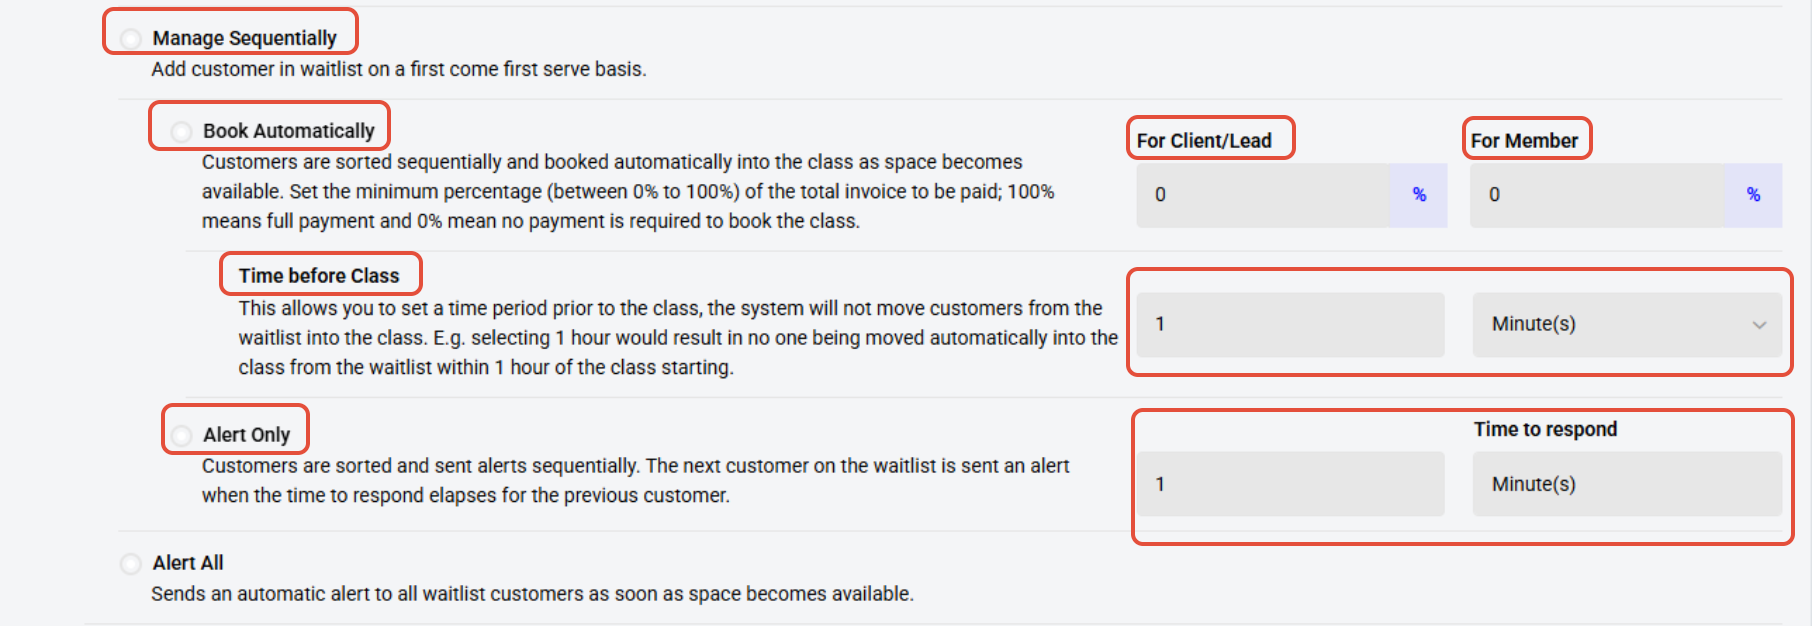
Manage Sequentially
Add a Customer to a Waitlist on a first come first serve basis.
- Book Automatically: Customers are sorted sequentially and booked automatically into the Class as space becomes available. The same rules apply here as from Manage Manually.
- Time Before Class: Set a time period prior to the Class. The system will not move customers from the waitlist into the class within this time. For example, selecting 1 hour would result in no one being moved automatically into the Class from the Waitlist within 1 hour of the class start.
- Alert Only: Customers are sorted and sent alerts sequentially. The next customer on the waitlist is sent an alert when the time to respond elapses for the previous customer.
- Alert All: Sends an automatic alert to all Waitlist Customers as soon as space becomes available.
Step 4: Enable Waitlists Online
- Toggle ON Enable Waitlists Online to allow Customers to add themselves to the Class Waitlists on the Widget & Customer App.
- Require Payment Method Online: Toggle ON to require card details from Customers to enroll in the Waitlist. Toggling OFF would result in the system still requesting payment information from the Customer, but it would not be mandatory.
- Payment Display Text (Up to 200 Characters): Customize the text that will be displayed at checkout to provide Customers with more information regarding why a payment method is being requested for Waitlist bookings.
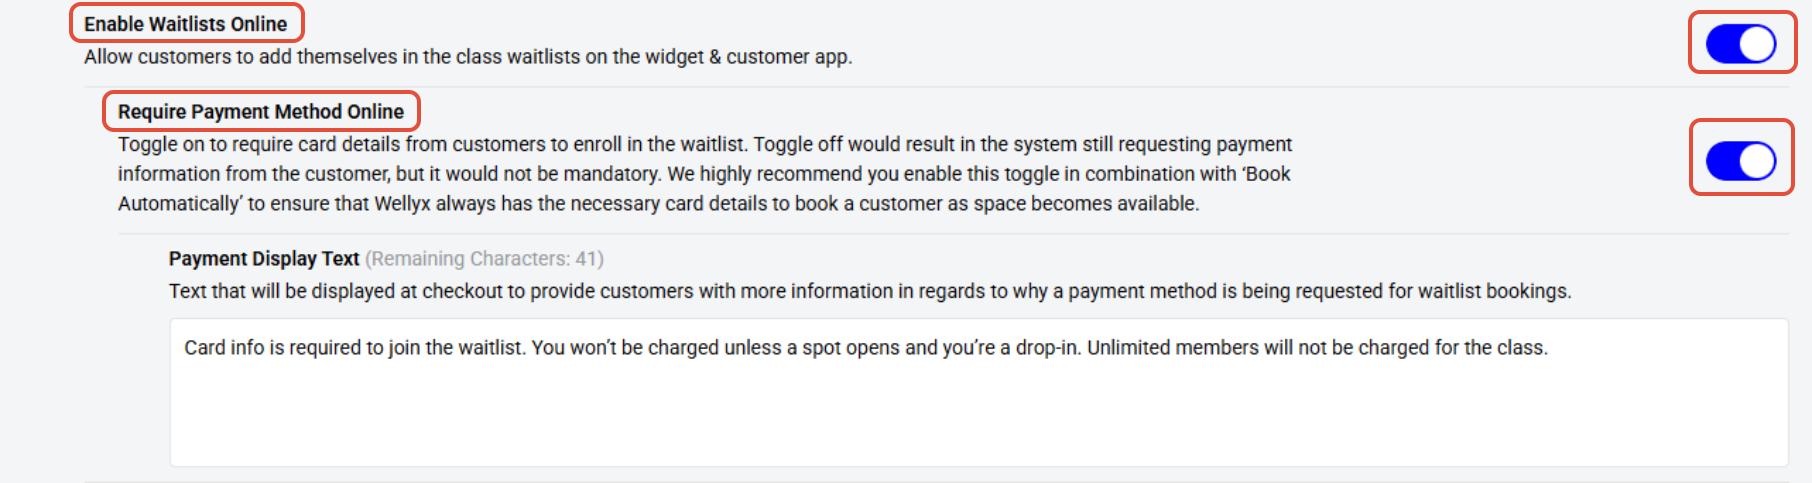
It is highly recommended Merchants enable Require Payment Online in combination with ‘Book Automatically’ to ensure that Wellyx always has the necessary card details to book a Customer as space becomes available.
Step 5: Set Notifications
From the dropdown menu, select how to notify Waitlist Customers when space becomes available in a Class.
Merchants can choose from the following options:
- All
- SMS
- Notification

Step 6: Save Configurations
- A 'Waitlist Configurations Saved Successfully' message will appear, confirming all the changes.
For a list of terms used in the Wellyx application & across the support website, please consult our Glossary.